Modular Wardrobe
15 weeks
Fall 2023
Skills:
Drawing
Rapid prototyping
Mold design
Soft fabrication
3D Printing
Lighting fabrication
Woodworking
Softwares:
SOLIDWORKS
Adobe Illustrator
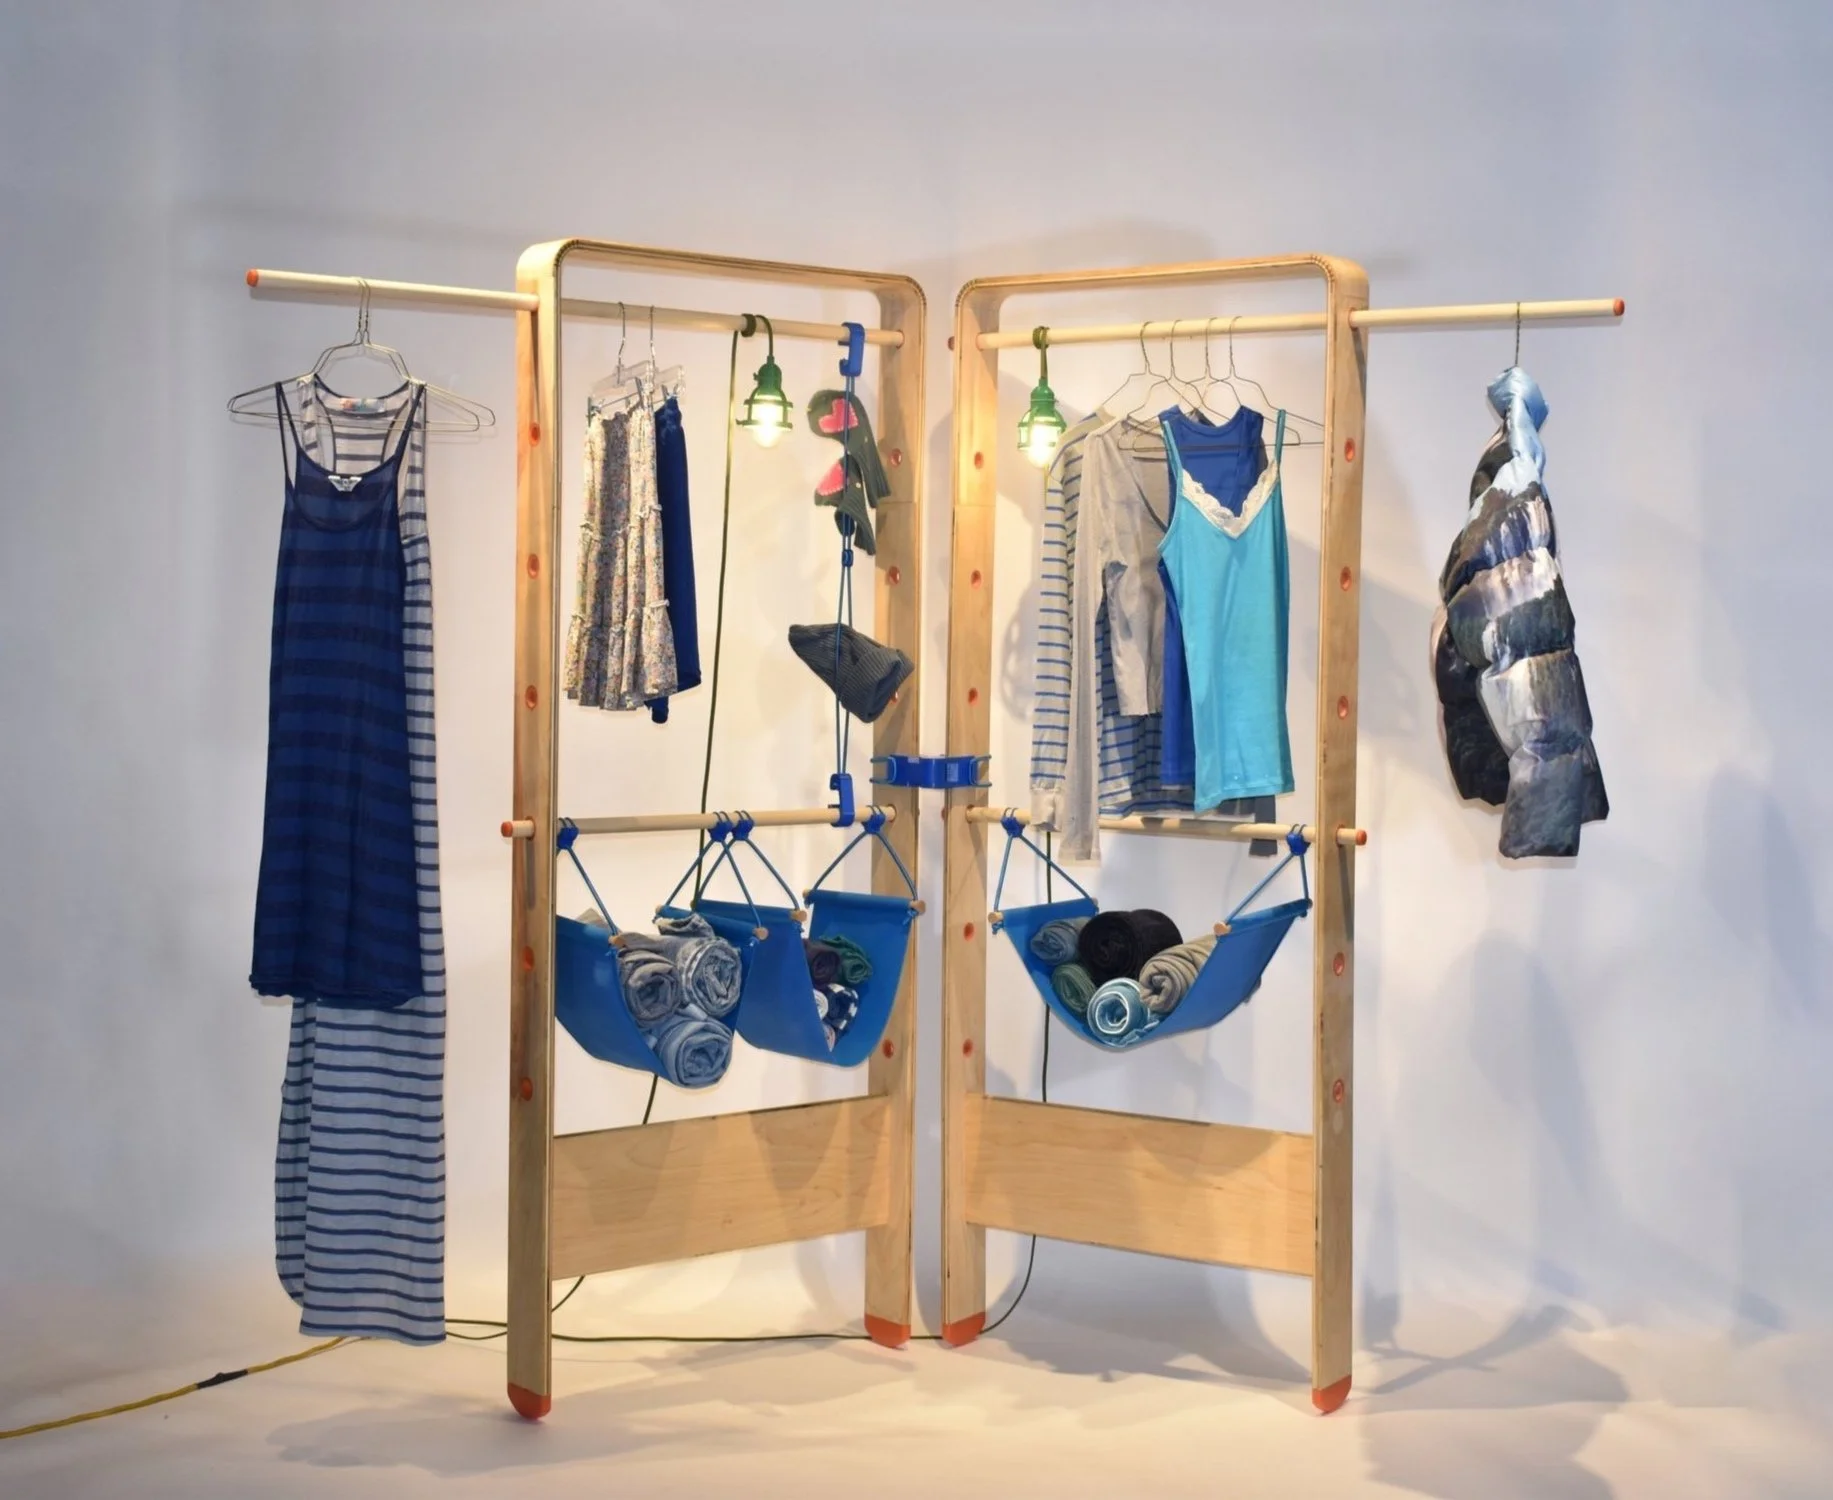
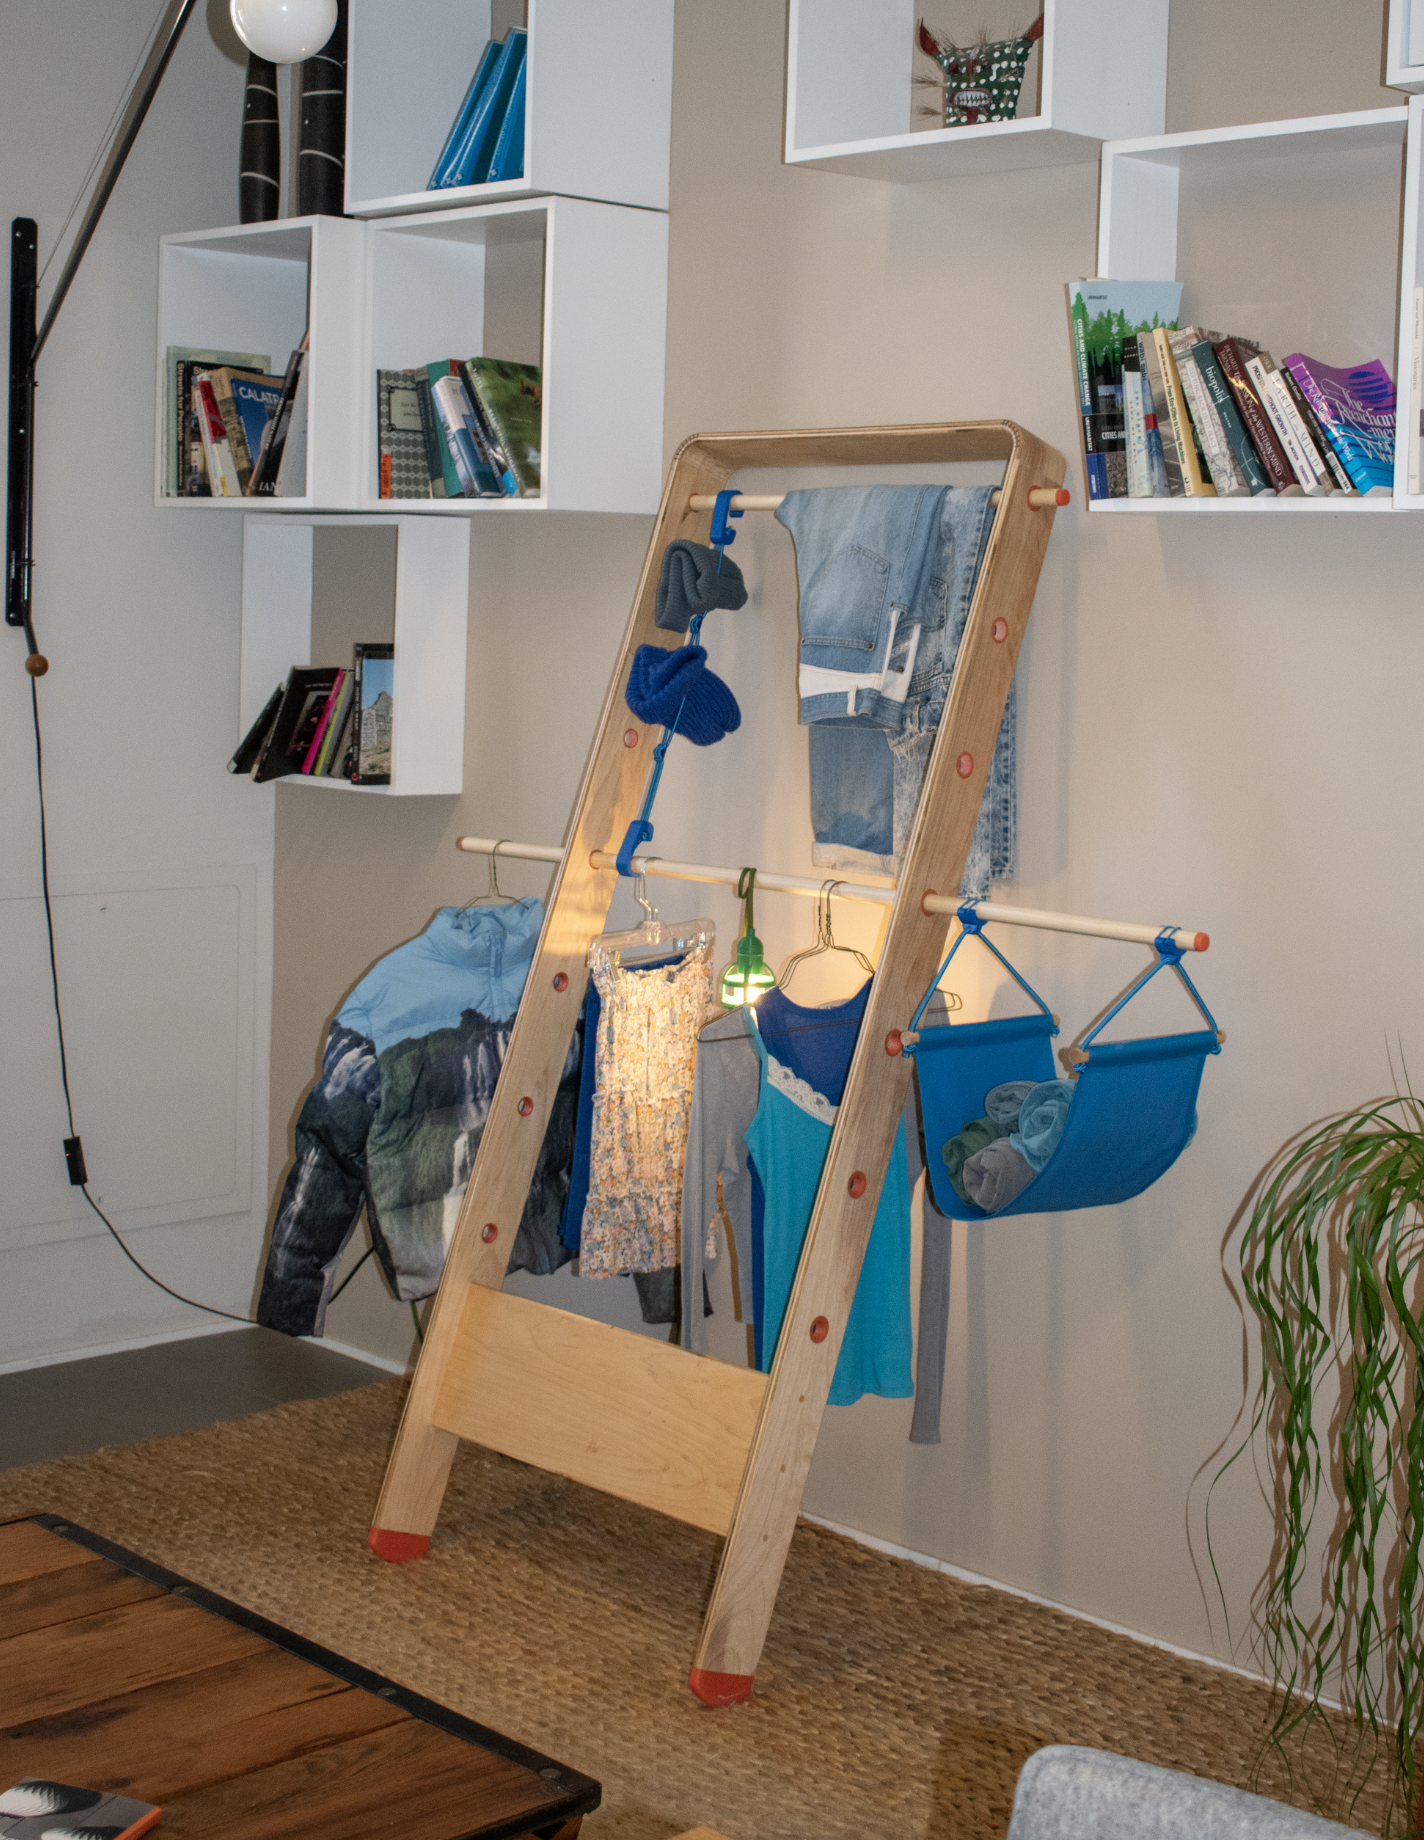
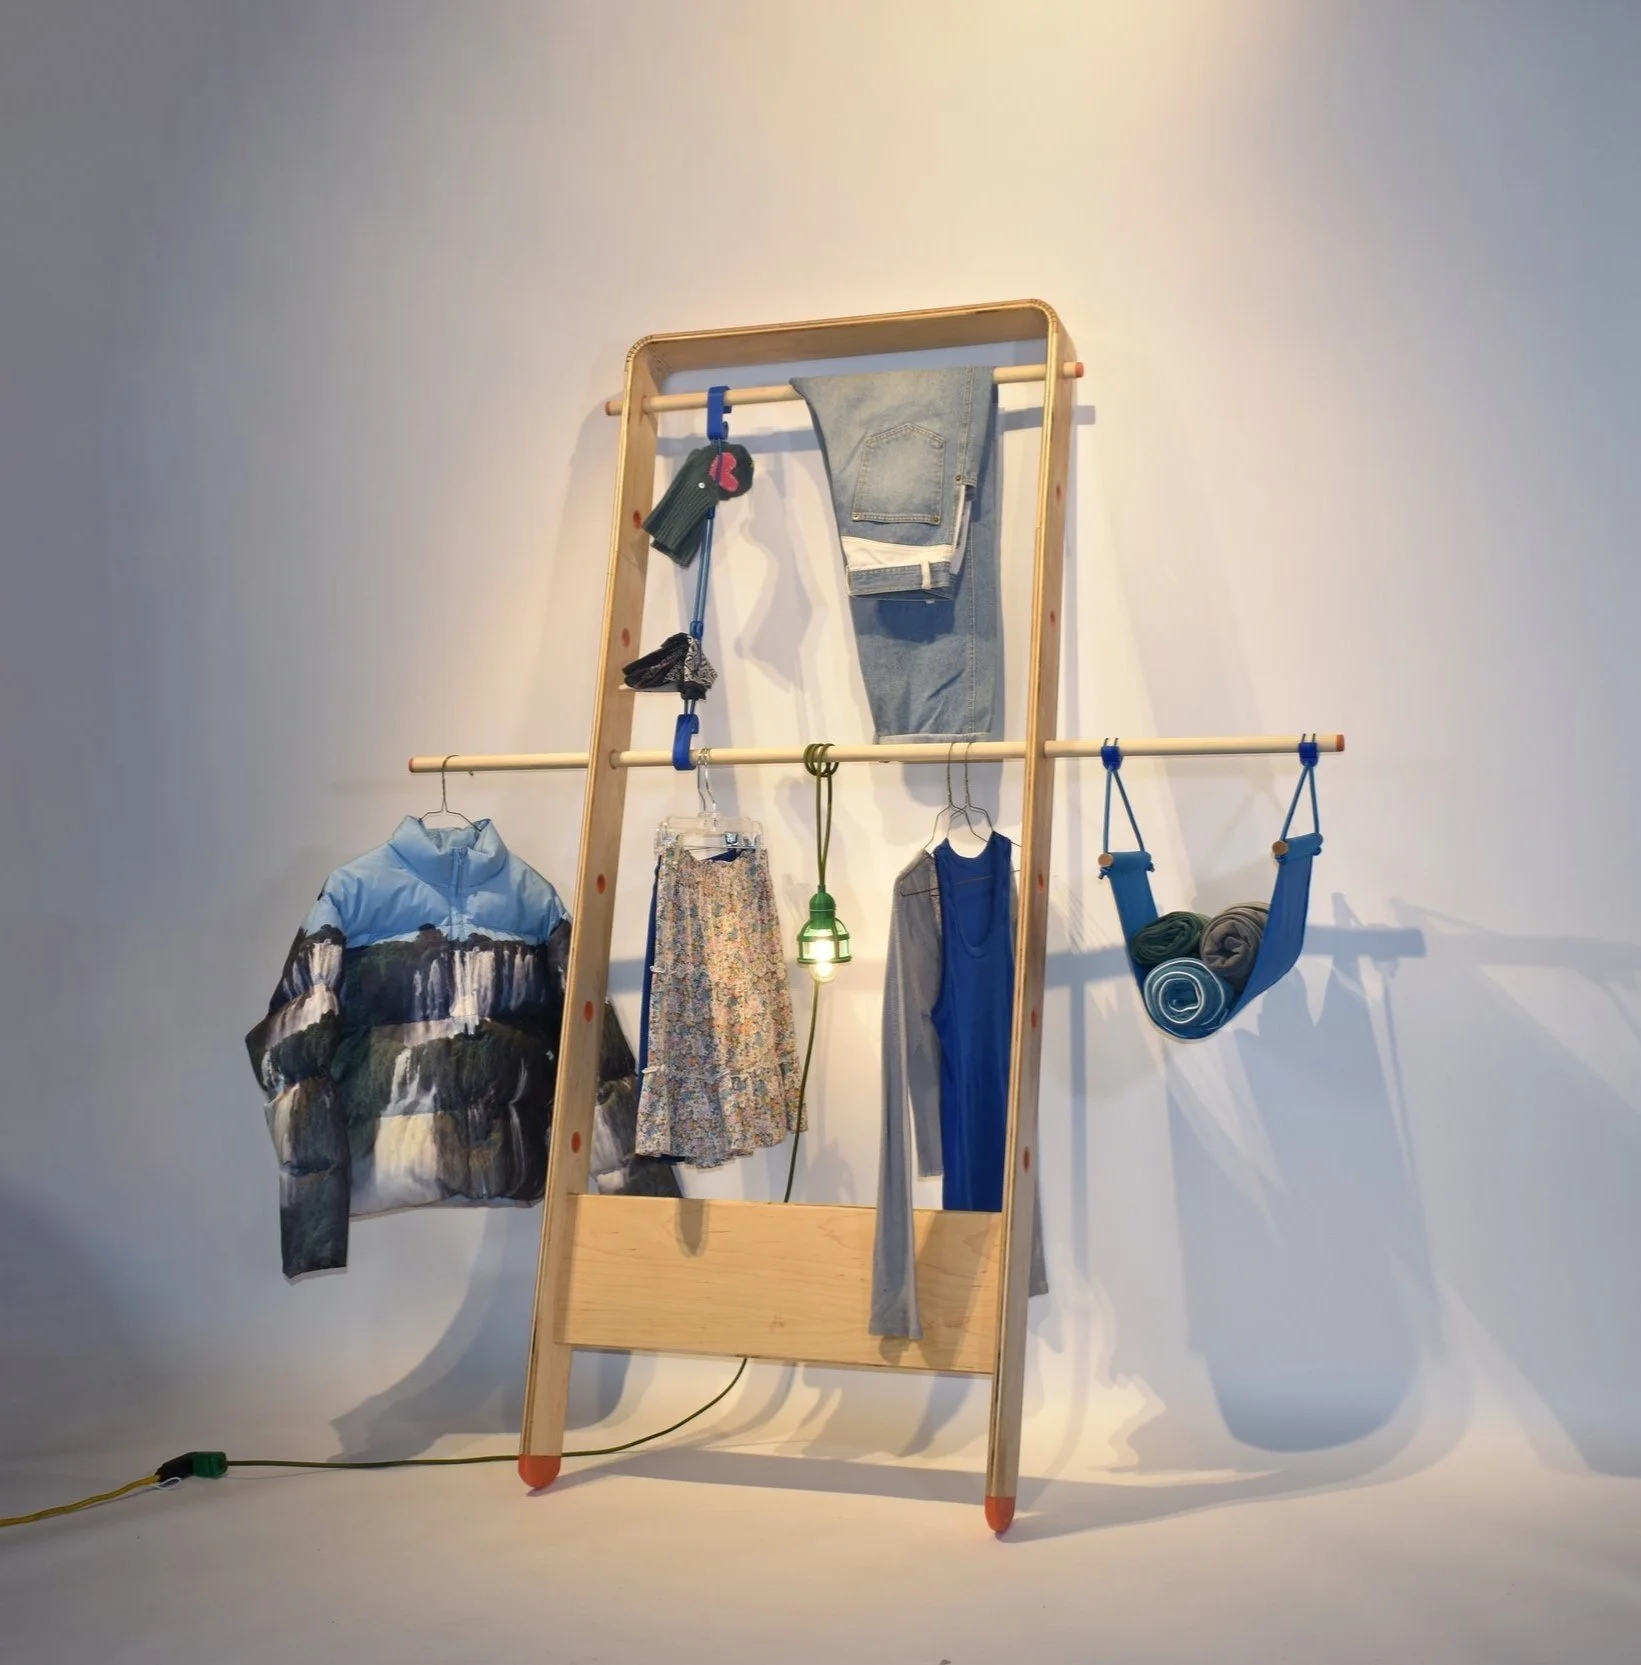
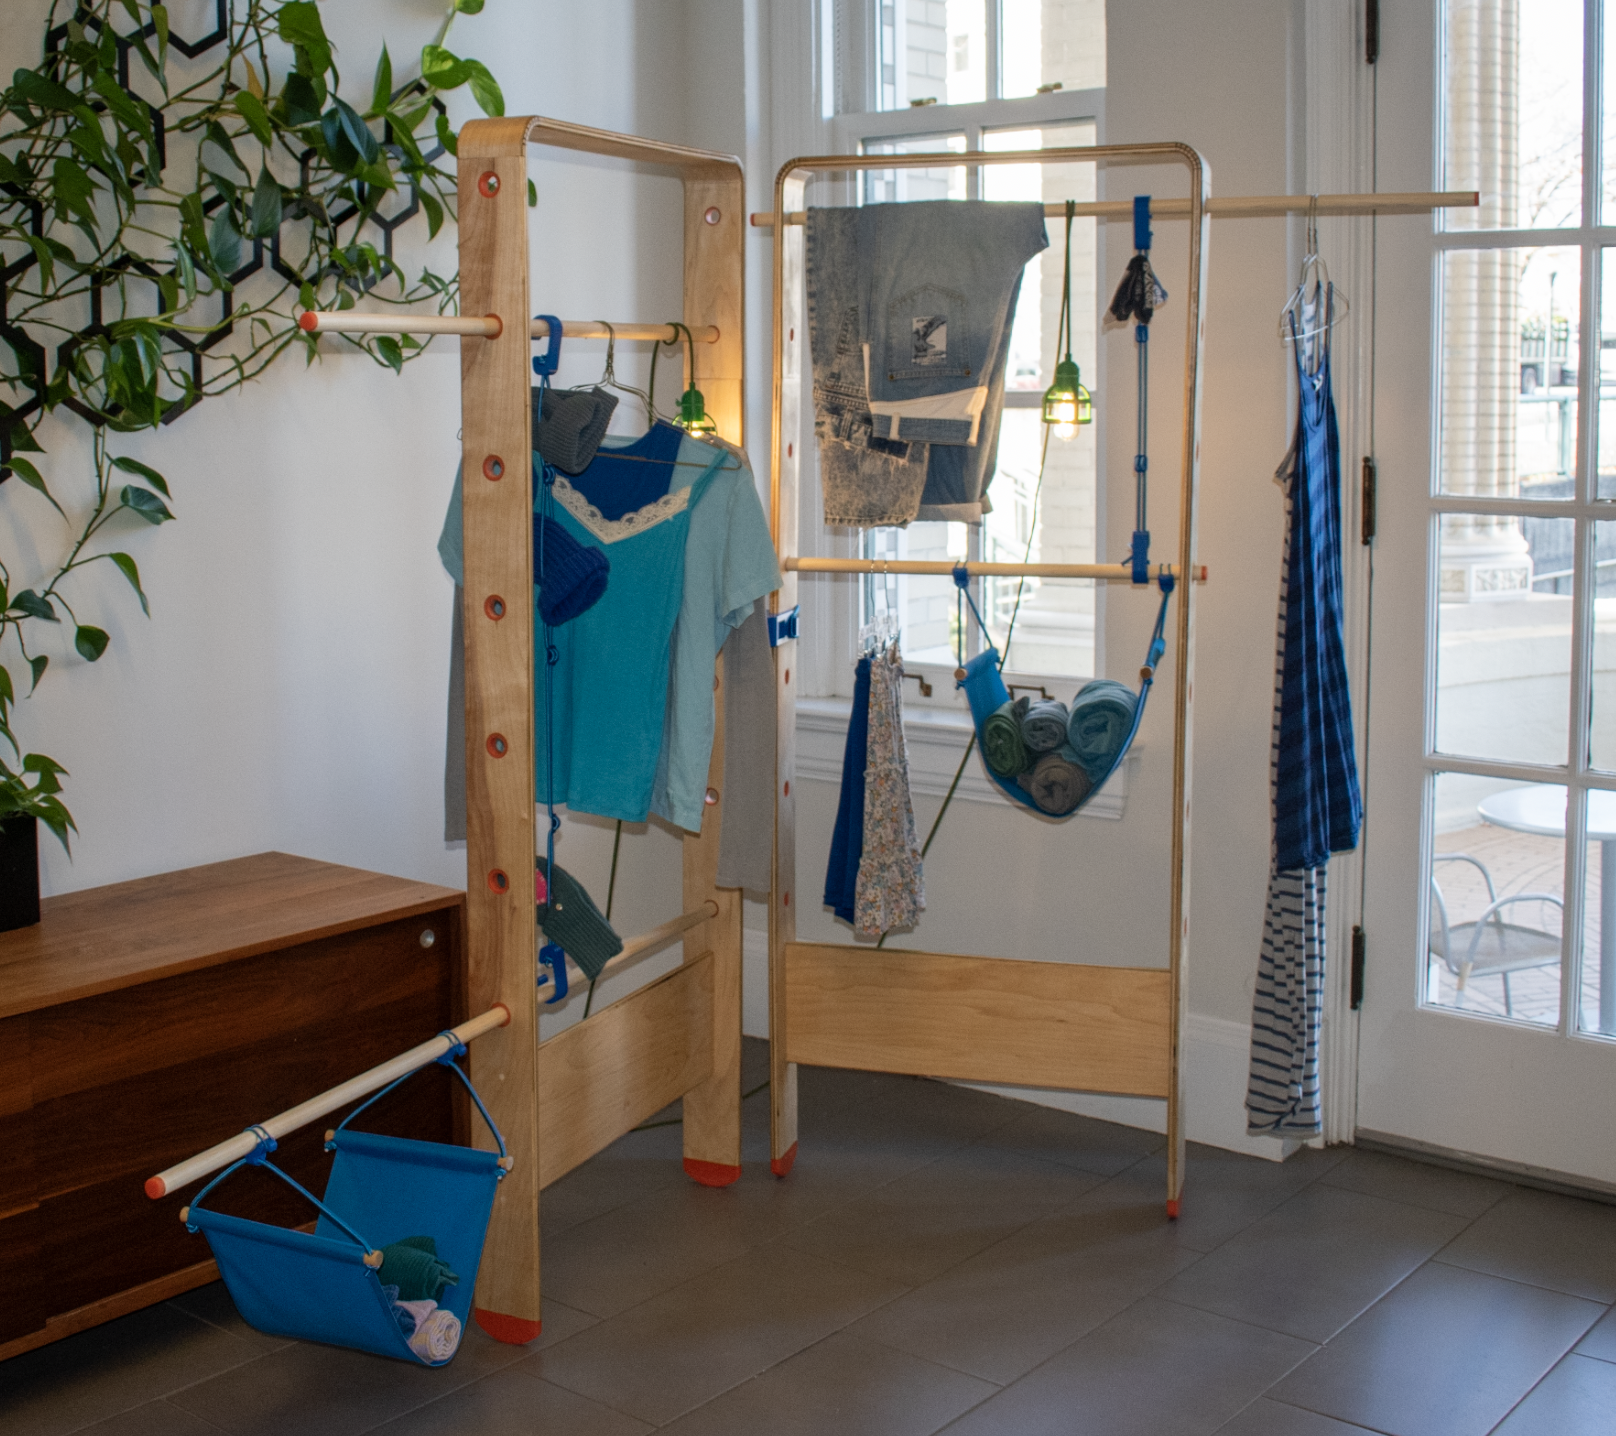
A customizable piece of furniture that displays clothes and facilitates curation.
This freestanding wardrobe was born out of a need for more flexible and beautiful garment storage solutions. Having a scattered organizational system can make it hard to keep track of what we own. Clothes should be displayed in a central location with pride. By visualizing our clothes as a collection, we can better understand our personal style and clothing needs, thus nurturing a more fulfilling relationship with what we wear.
The modules:
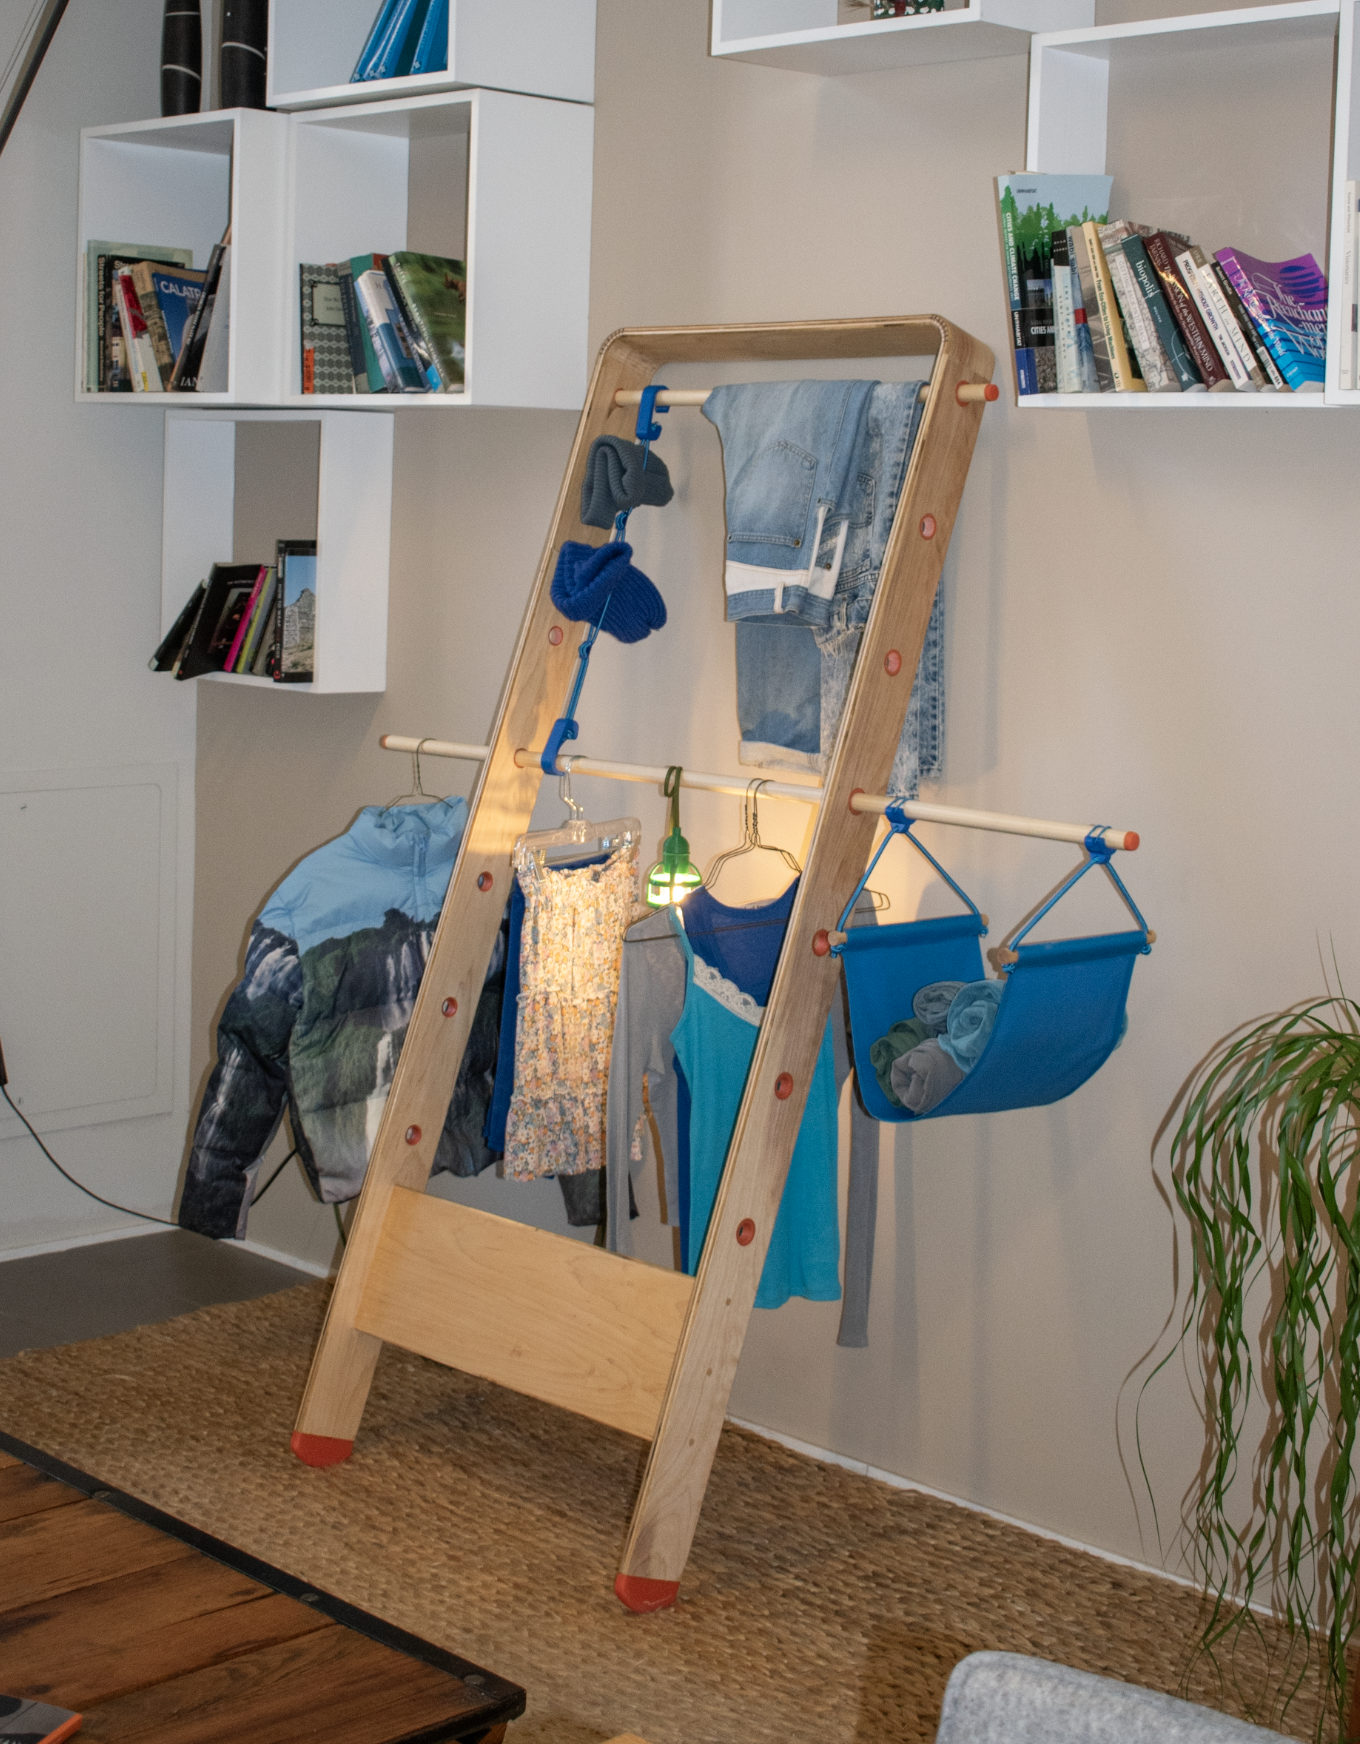
The system is made up of an assortment of different modules, allowing the user to build the ideal setup for accommodating their collection.
1
4
1

2

3
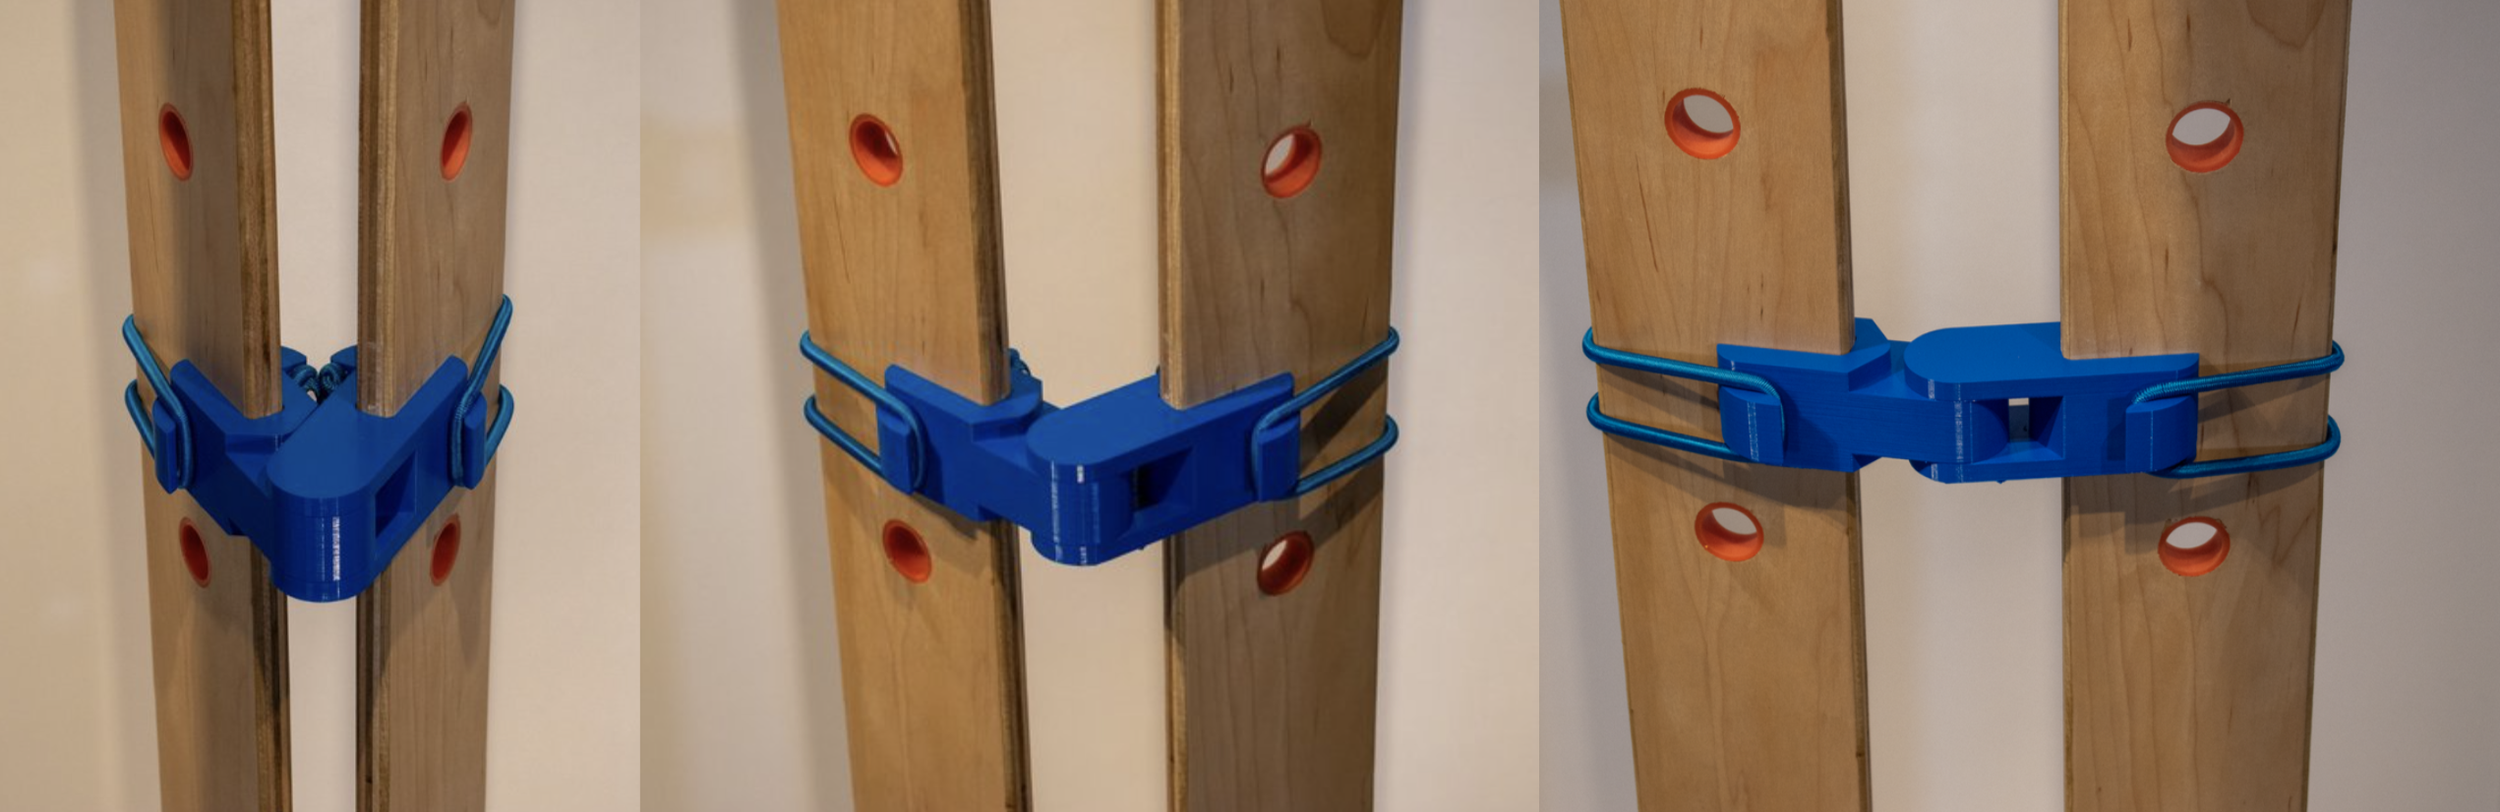
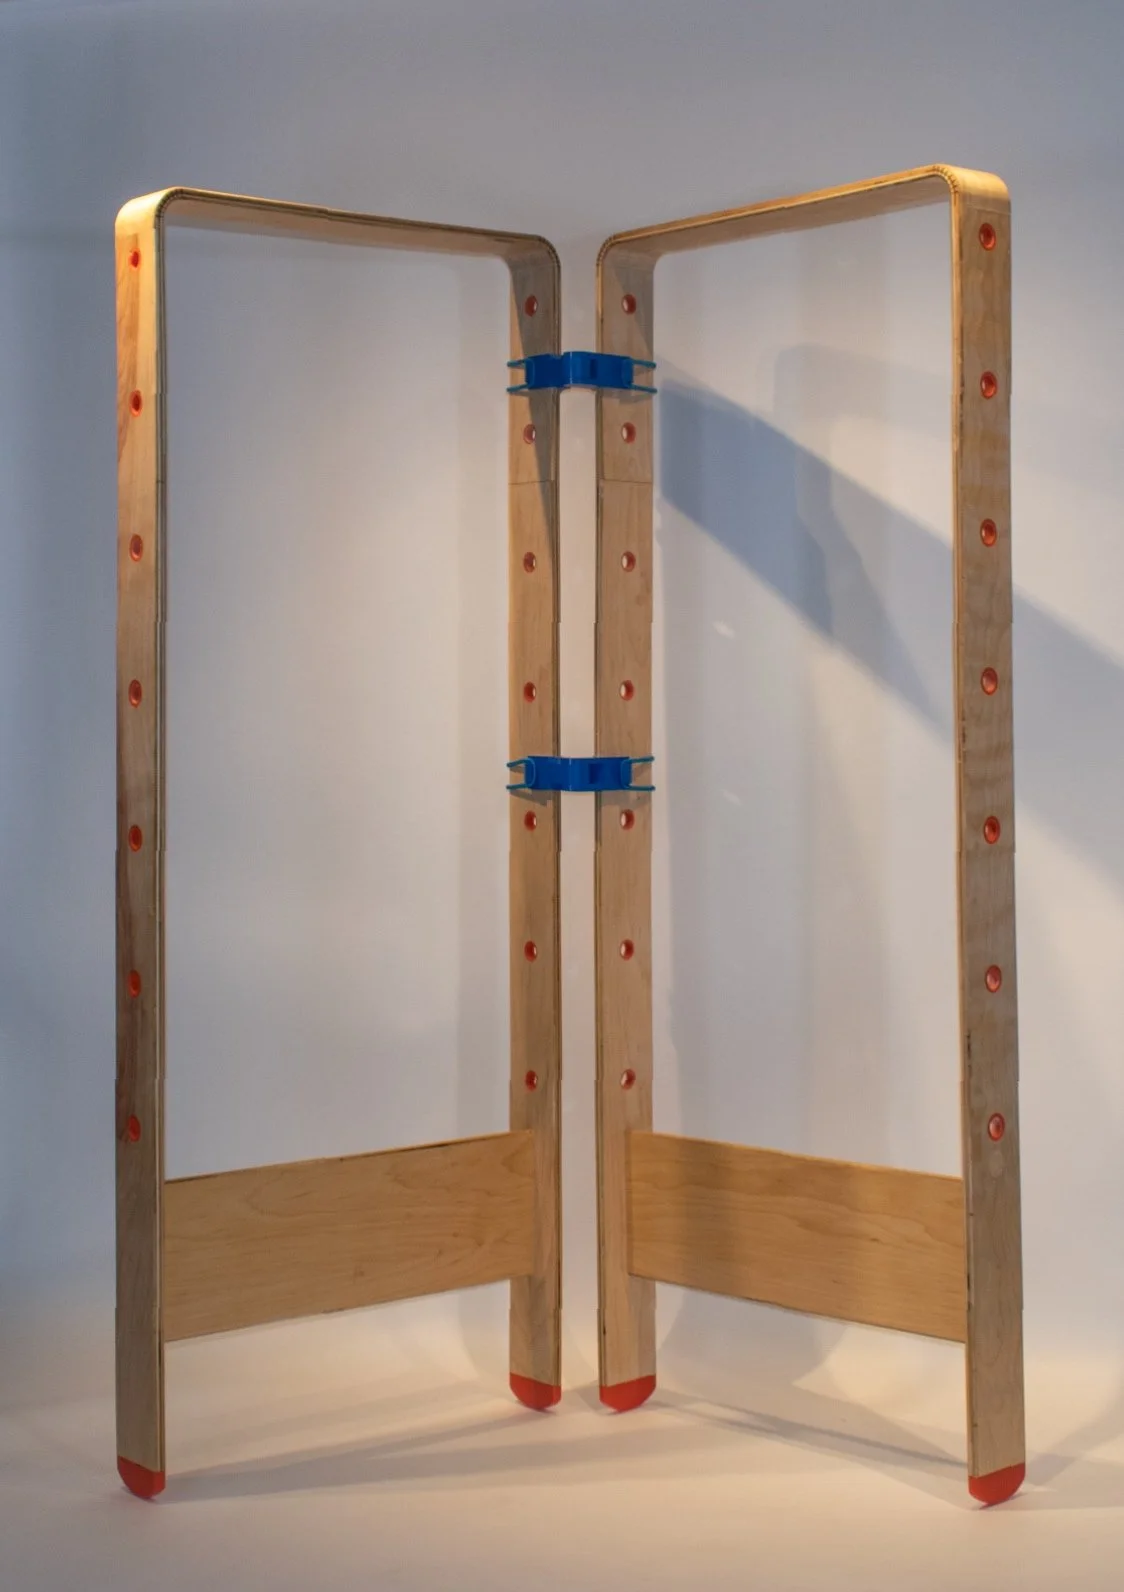
Hinges connect multiple frames together, enabling the structure to stand freely. Hinges can be set at any angle.
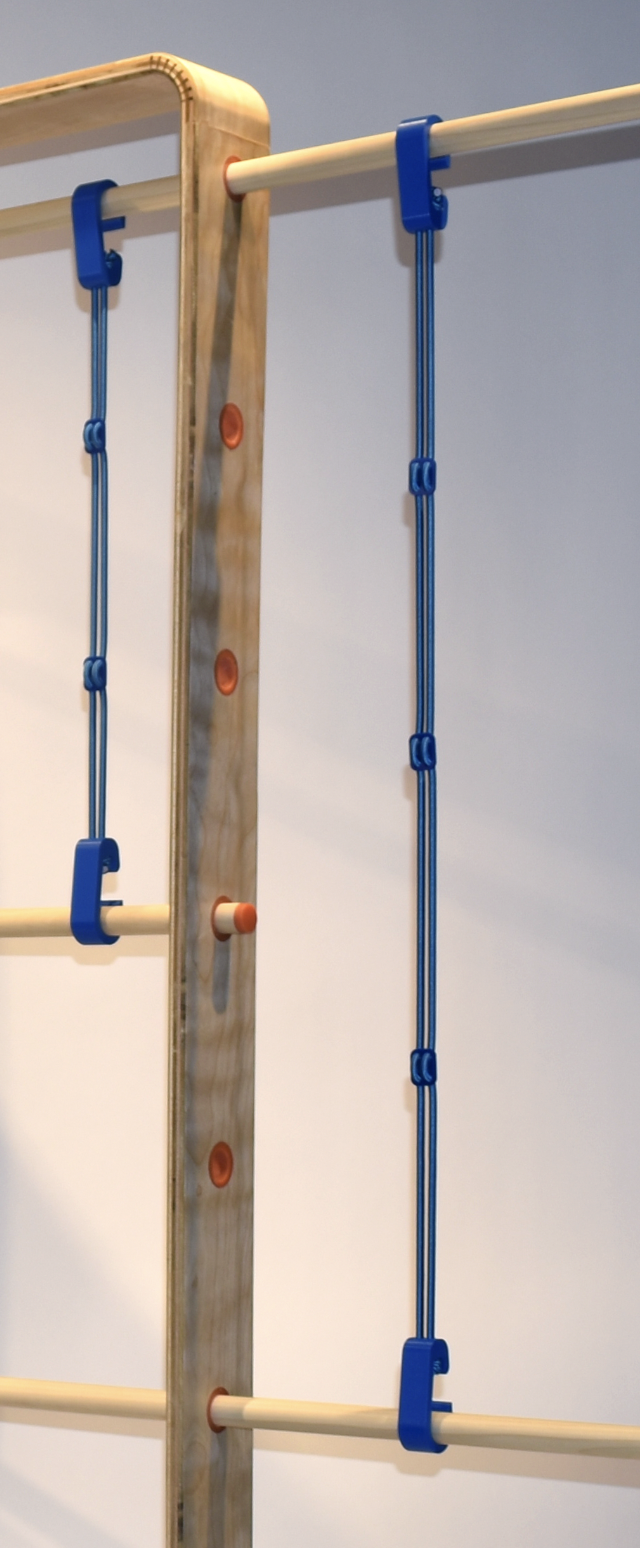
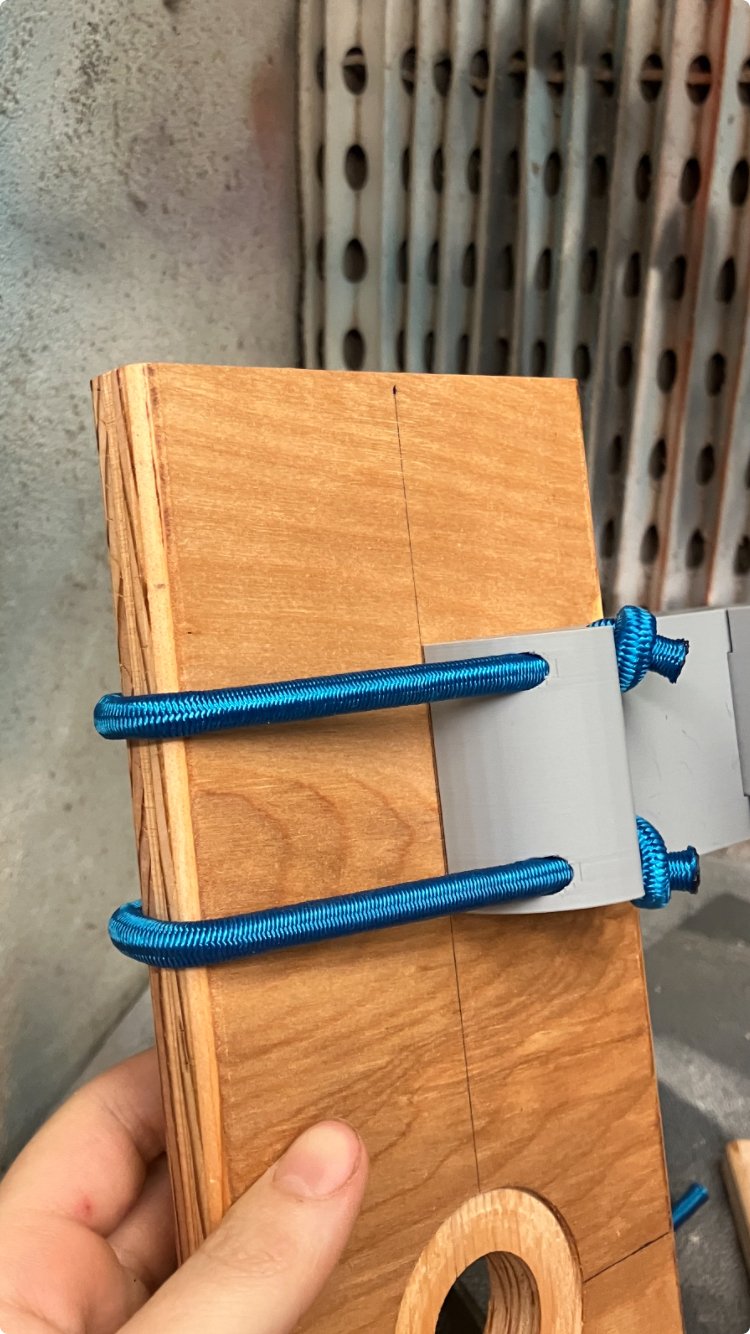
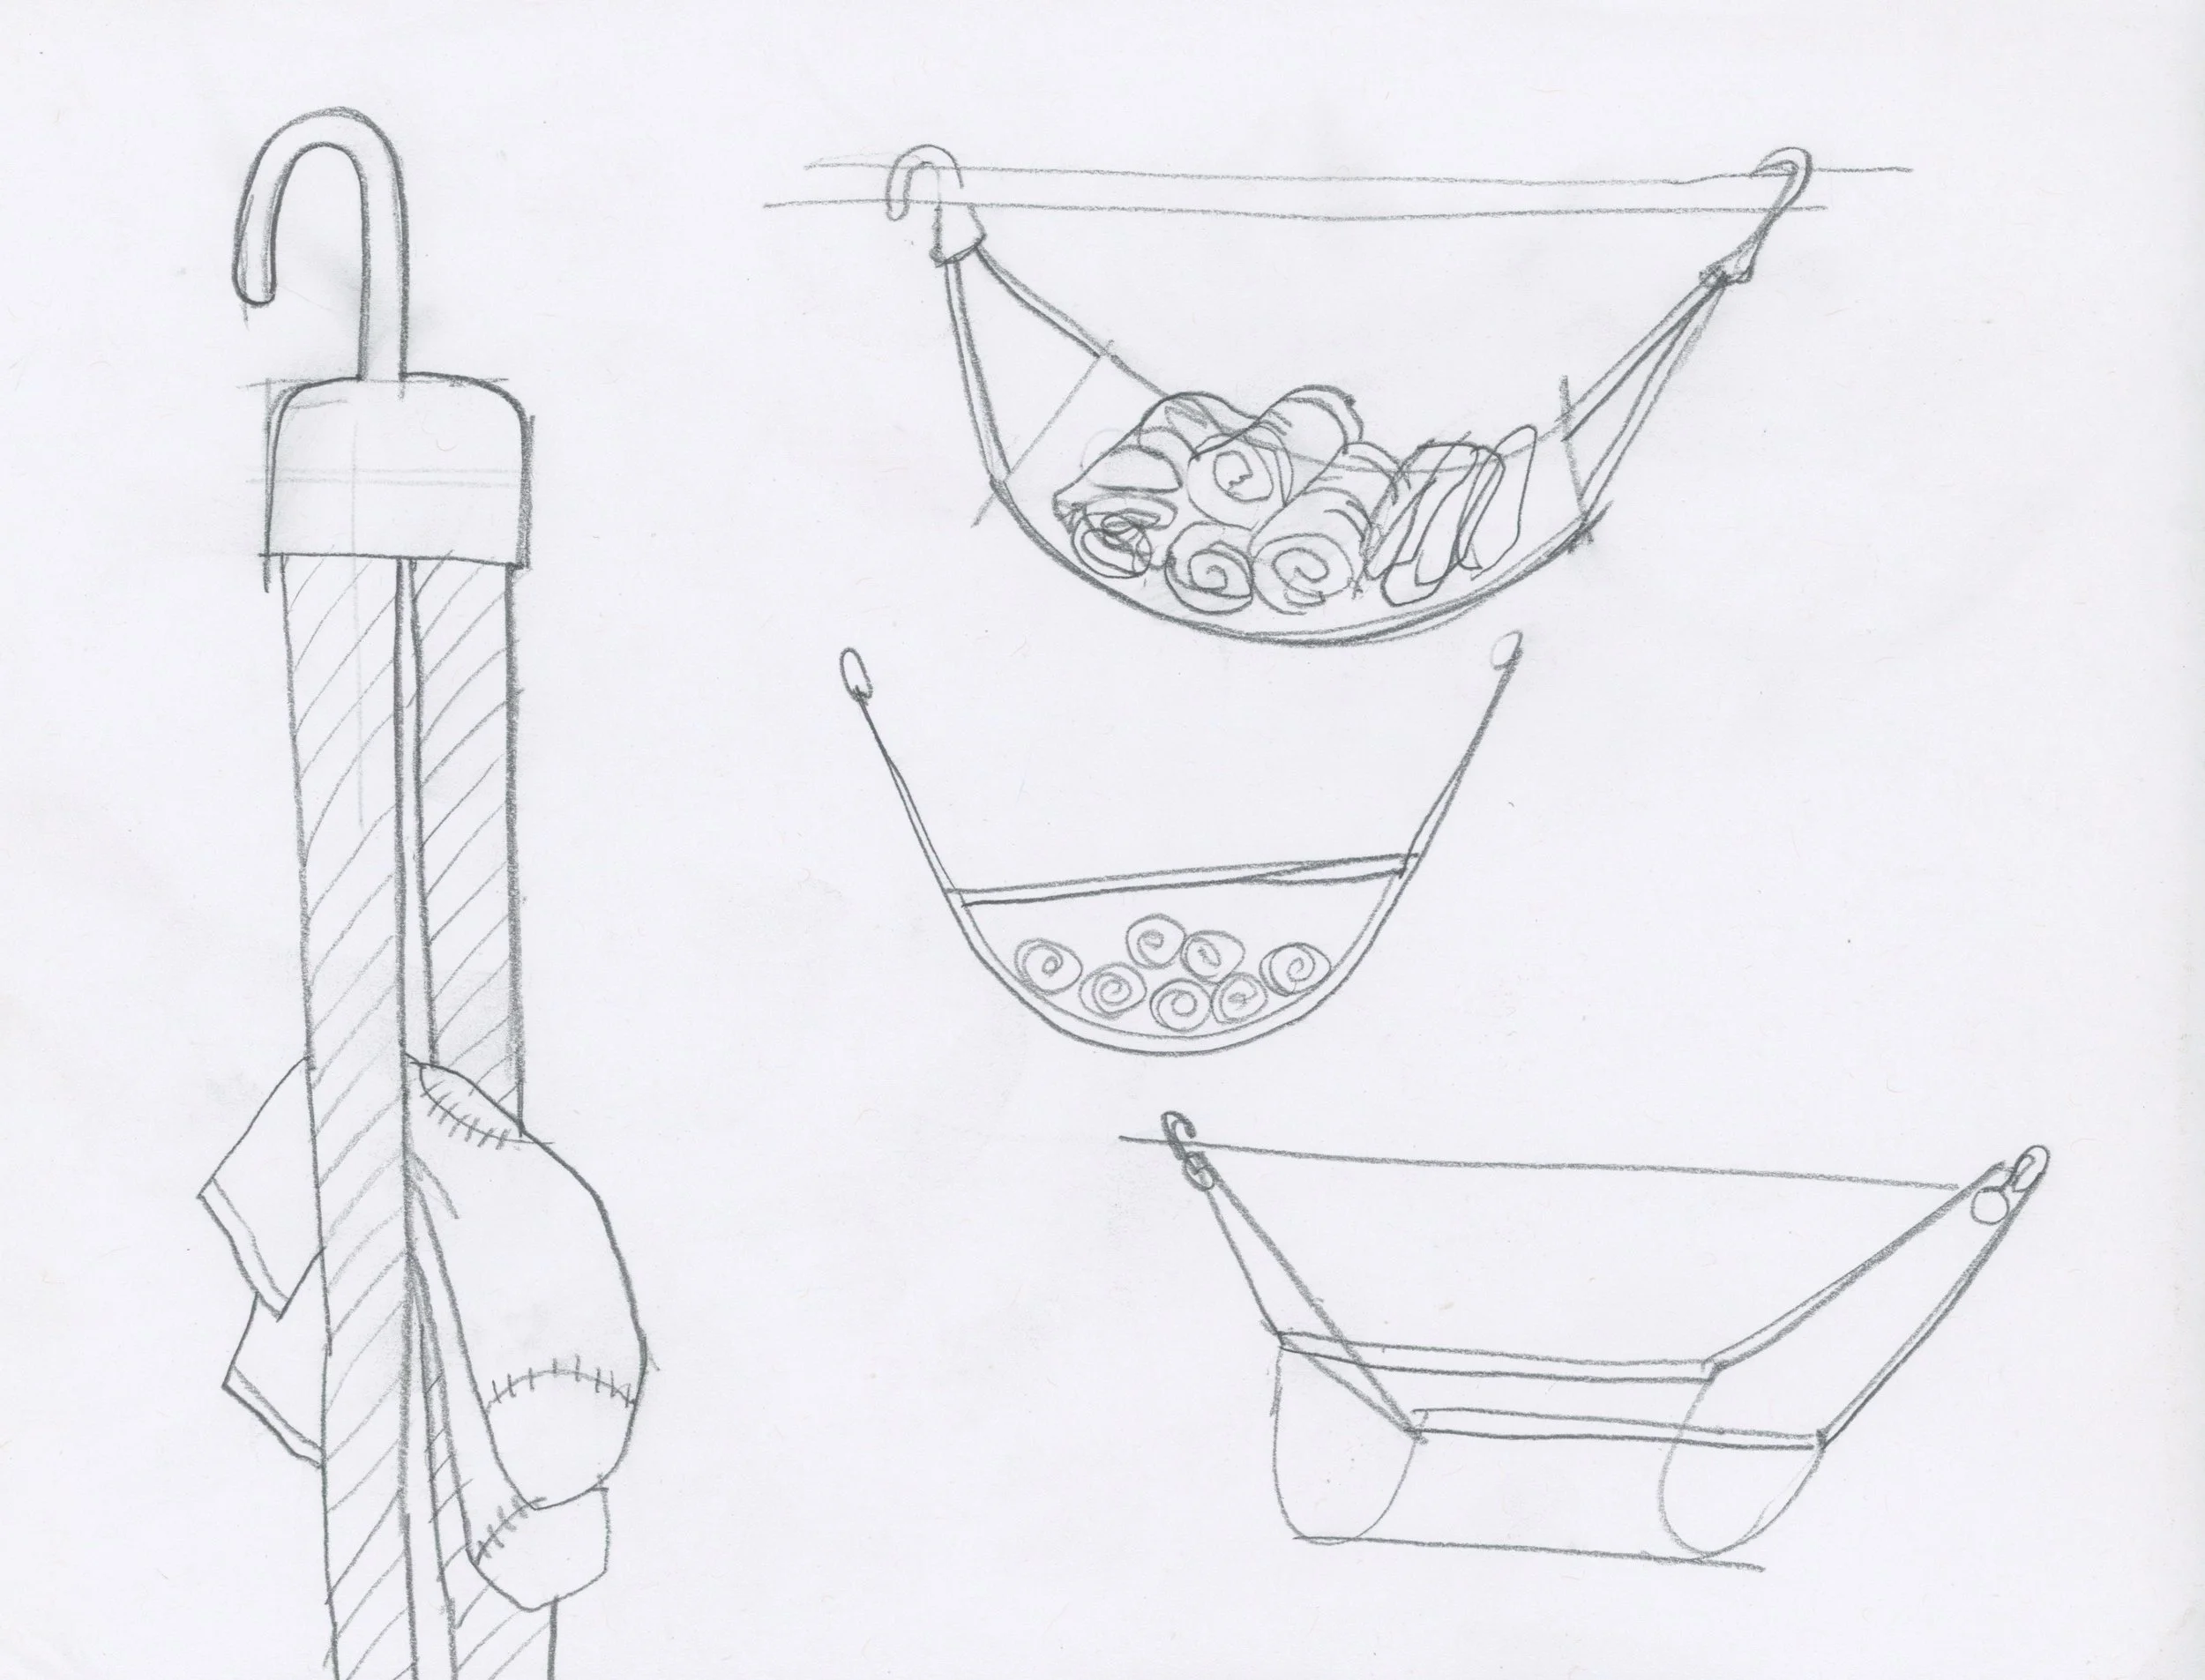
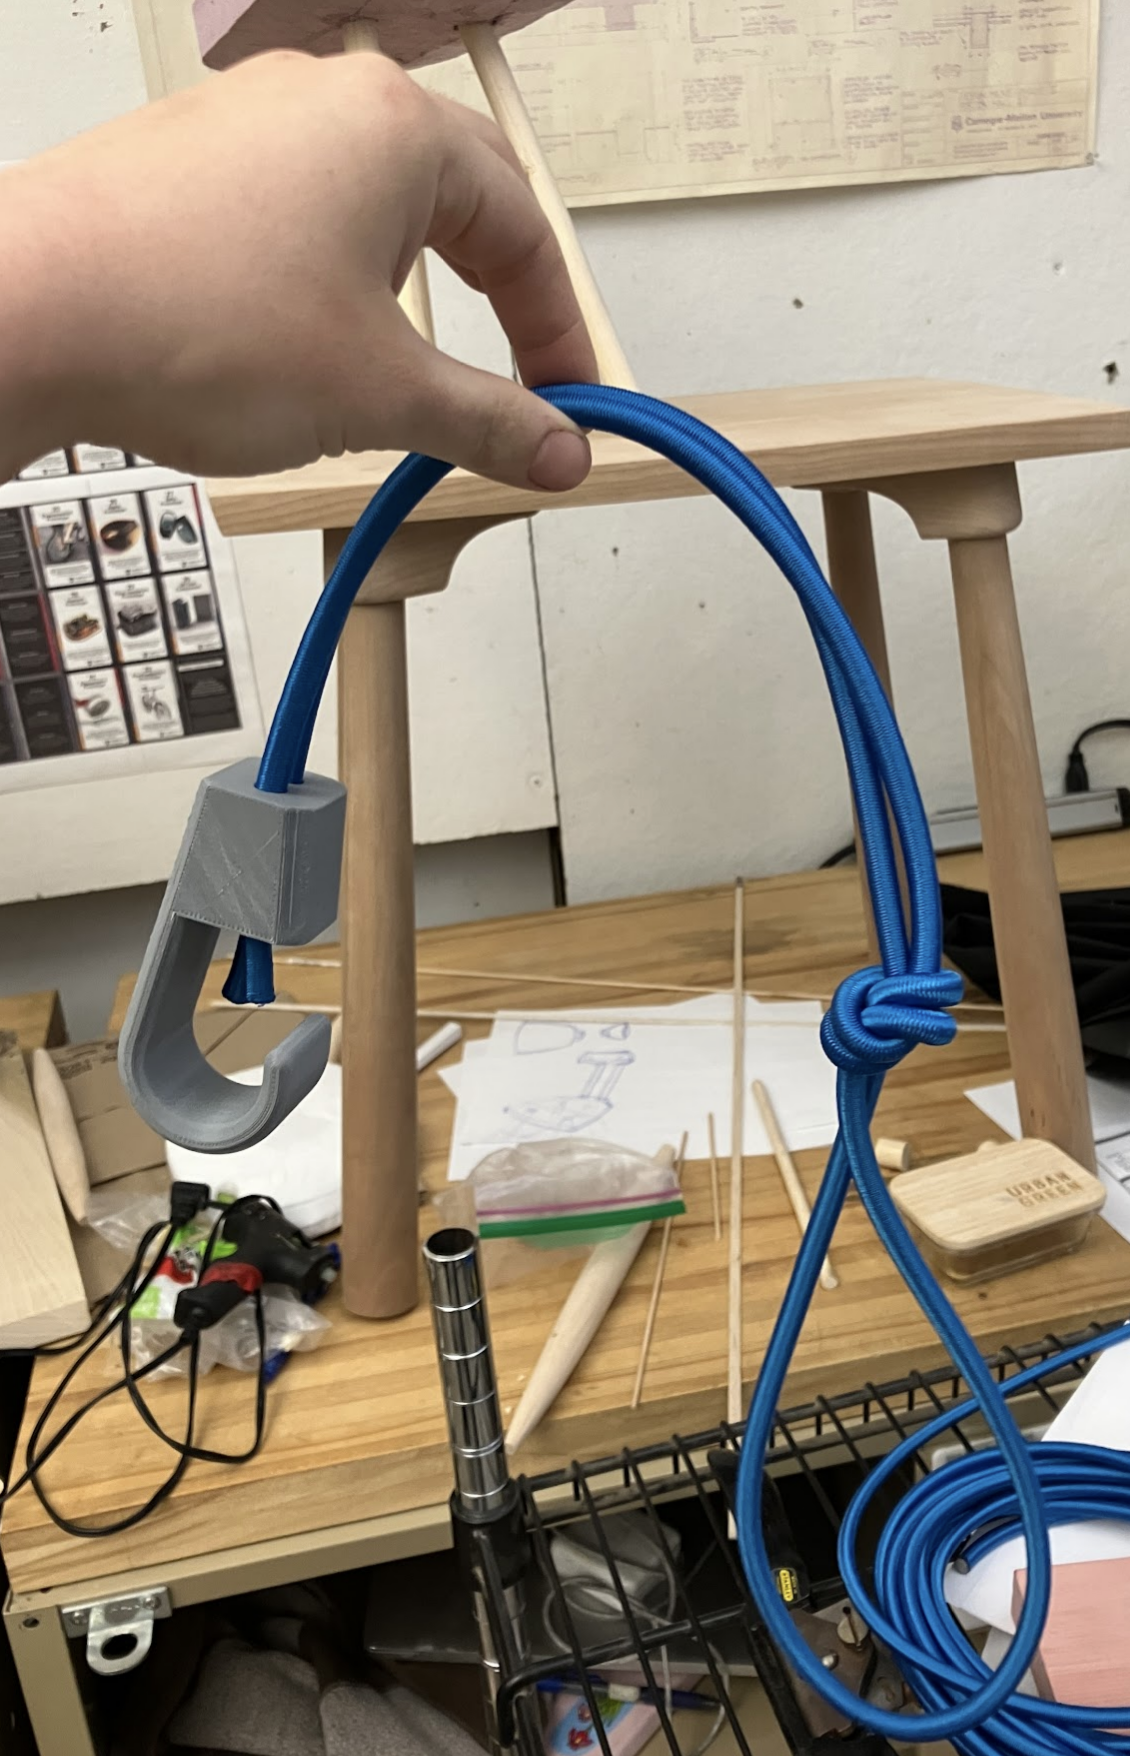
Bungees are double bungee cords that hold items via tension. Accessories and hard-to-place small items can be easily stored using this module.

Hammock bungee fastener

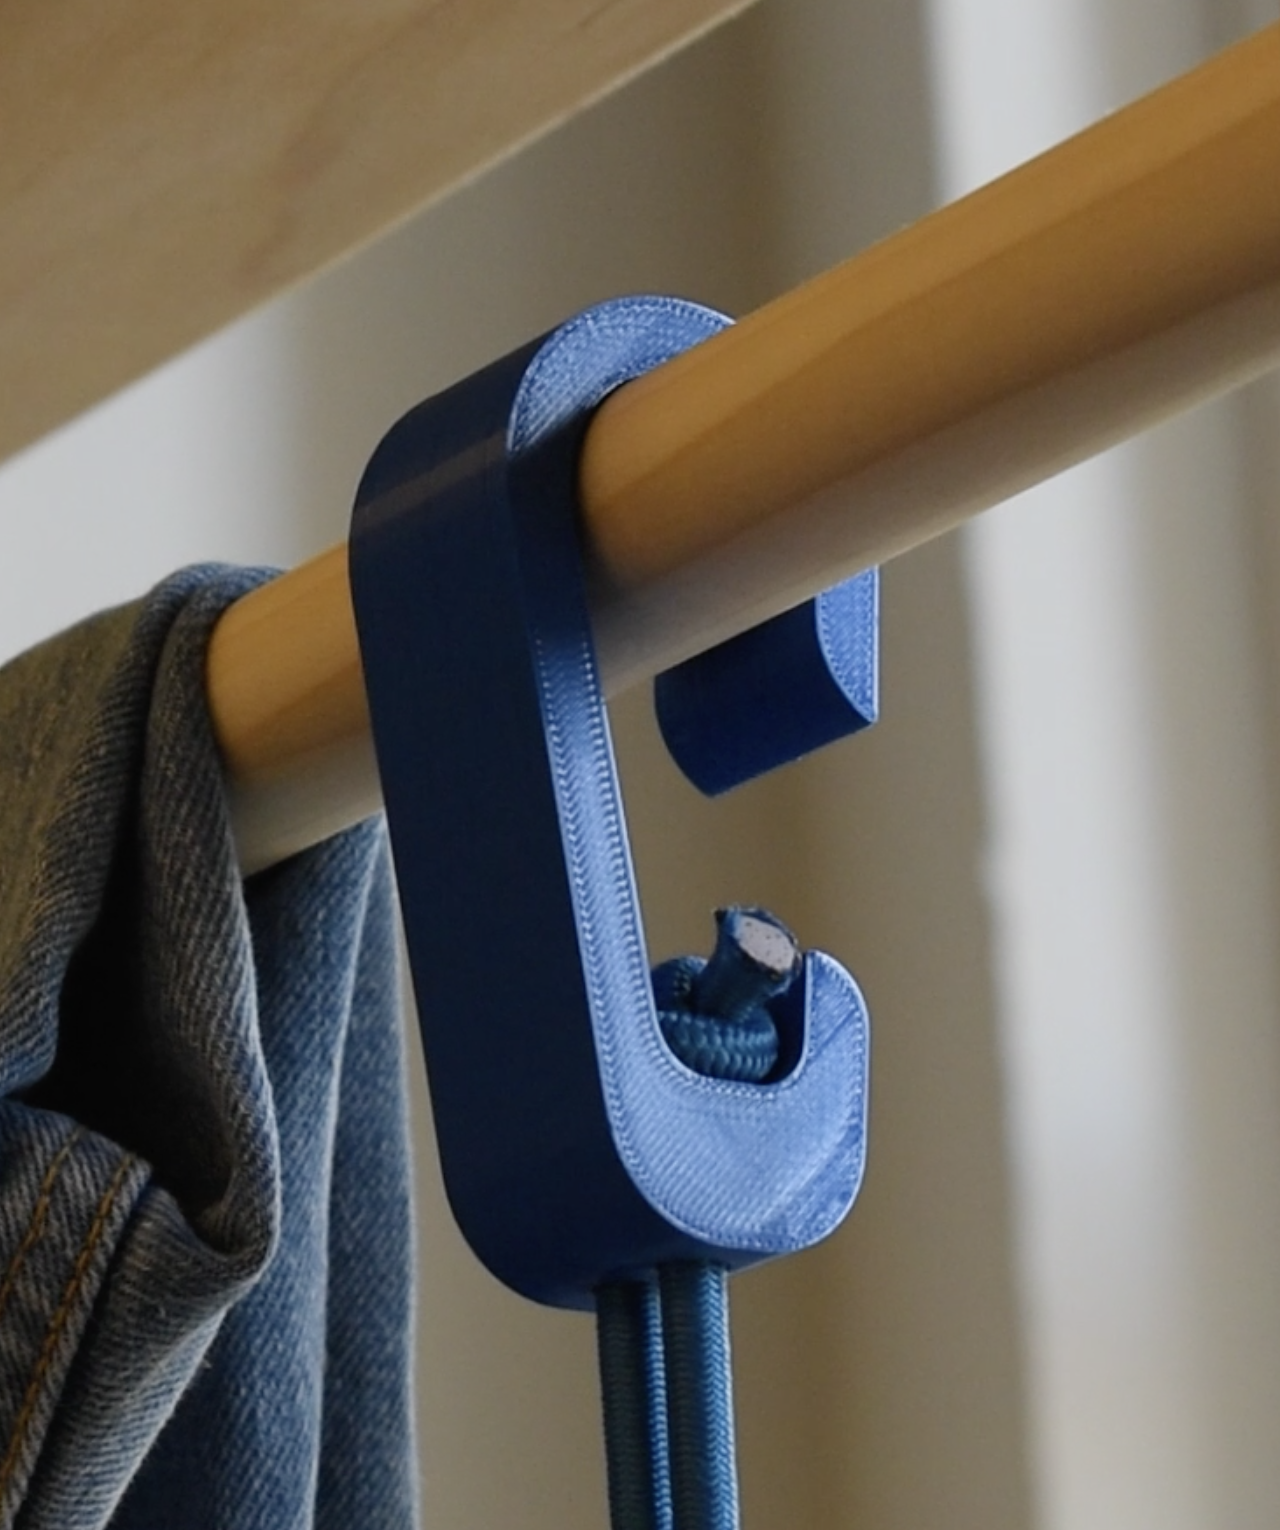
Bungee hook

3
6

4

5

6
Dowels are inserted into the frame and come in various lengths. They support the hanging of clothes and/or the placement of other modules.

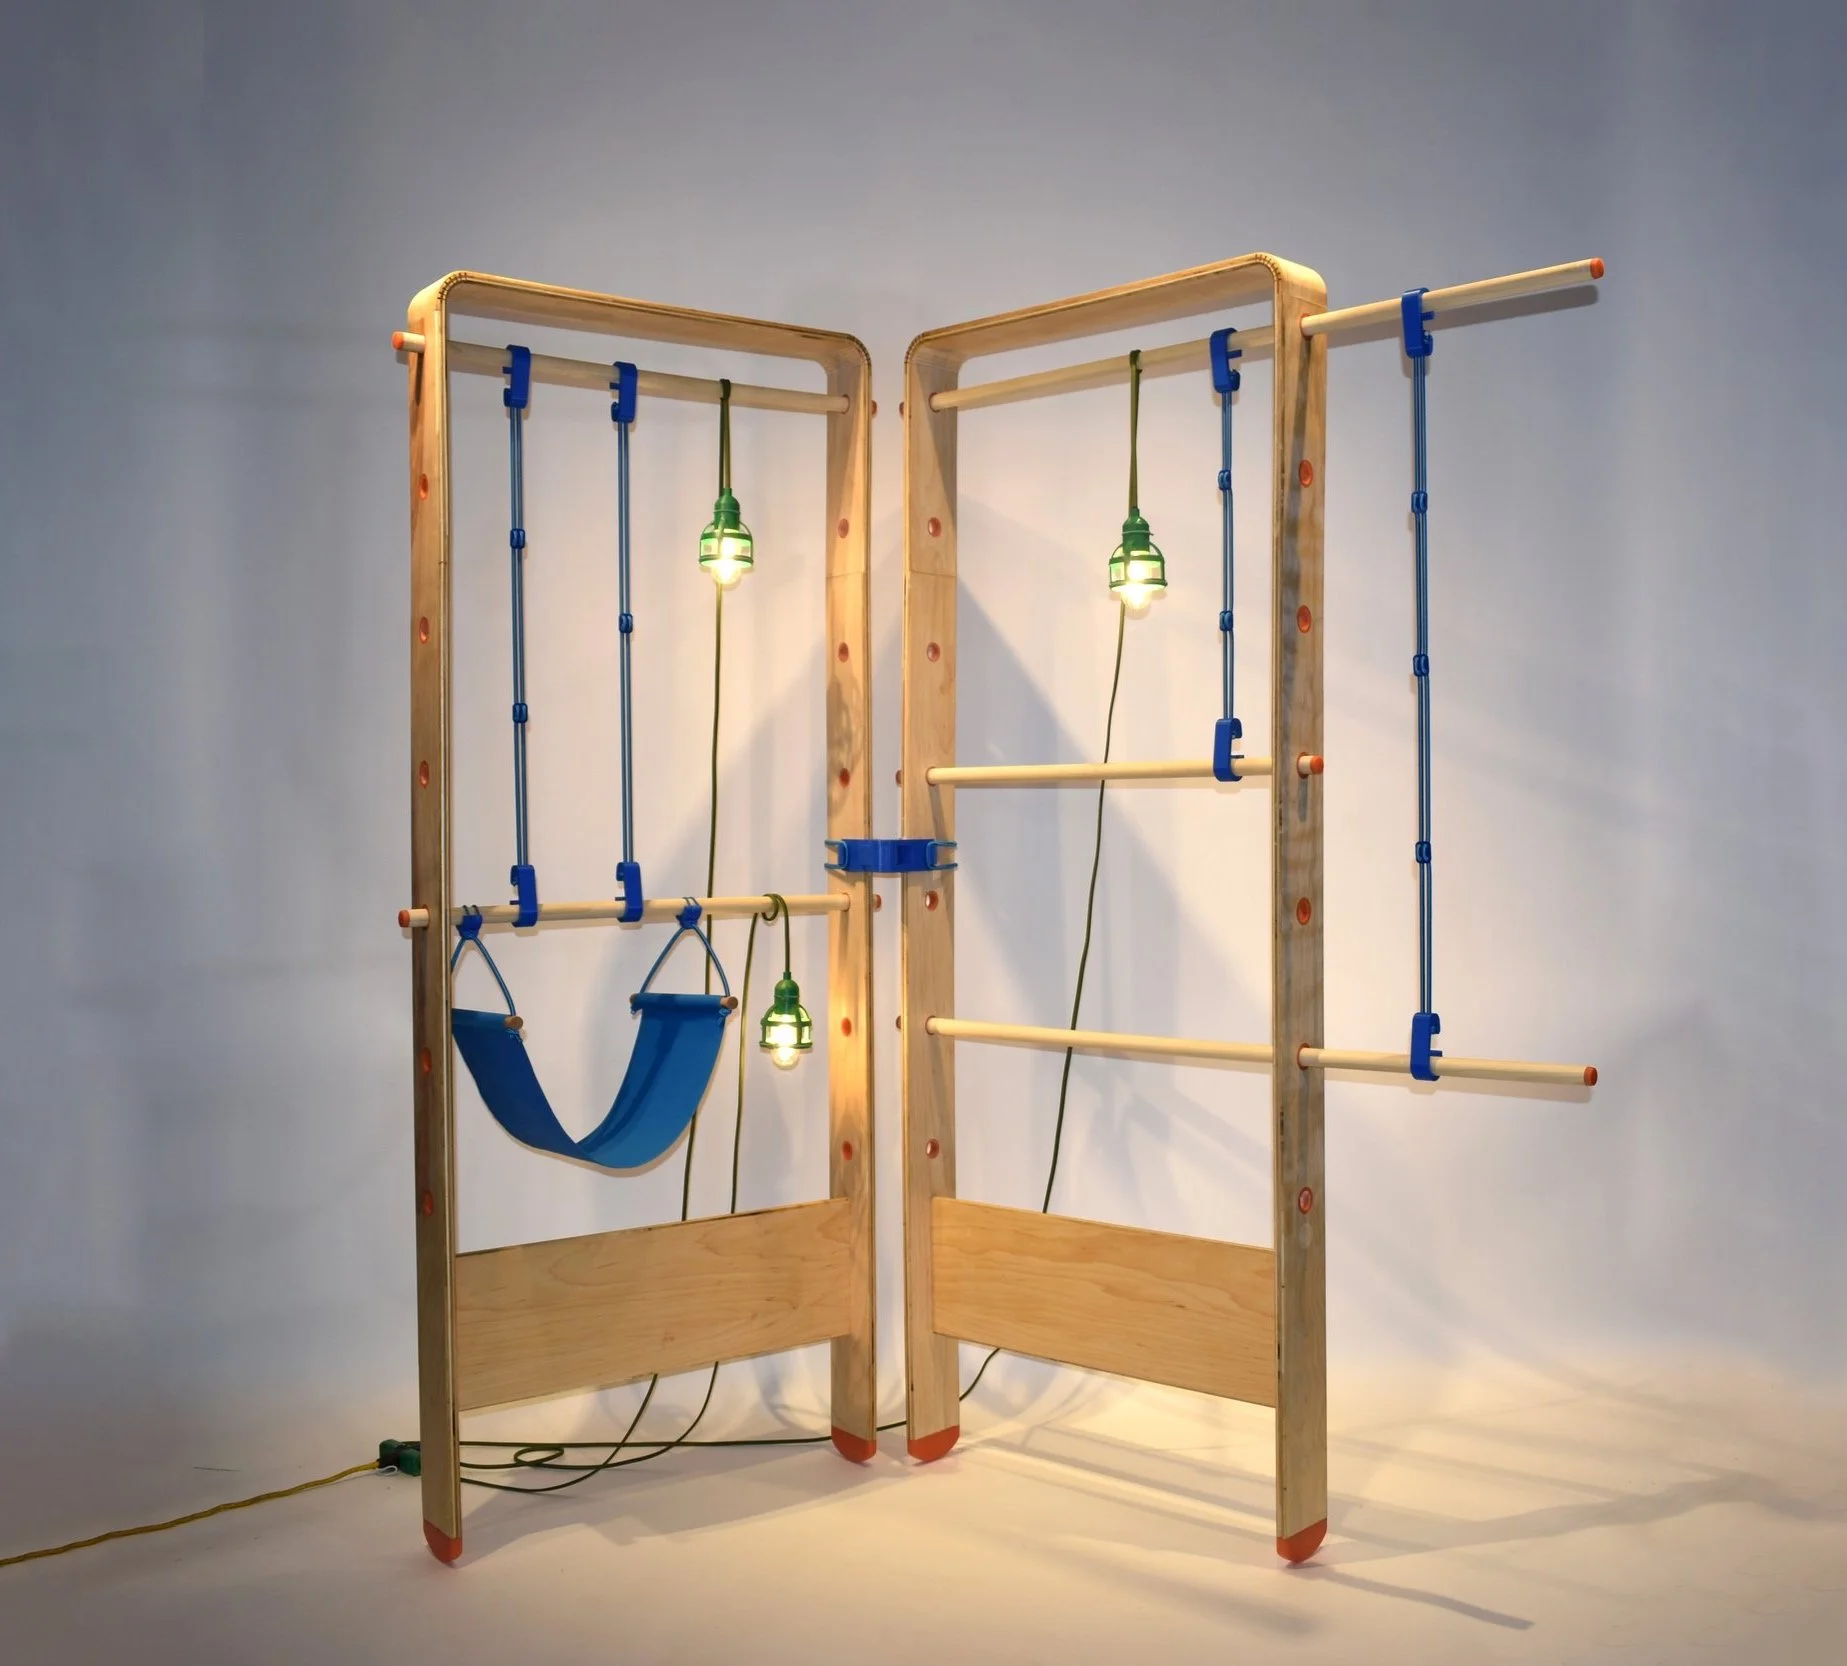
Lights illuminate your clothes and add ambience to your room.


Hinge bungee fastener

Light hanging by cord


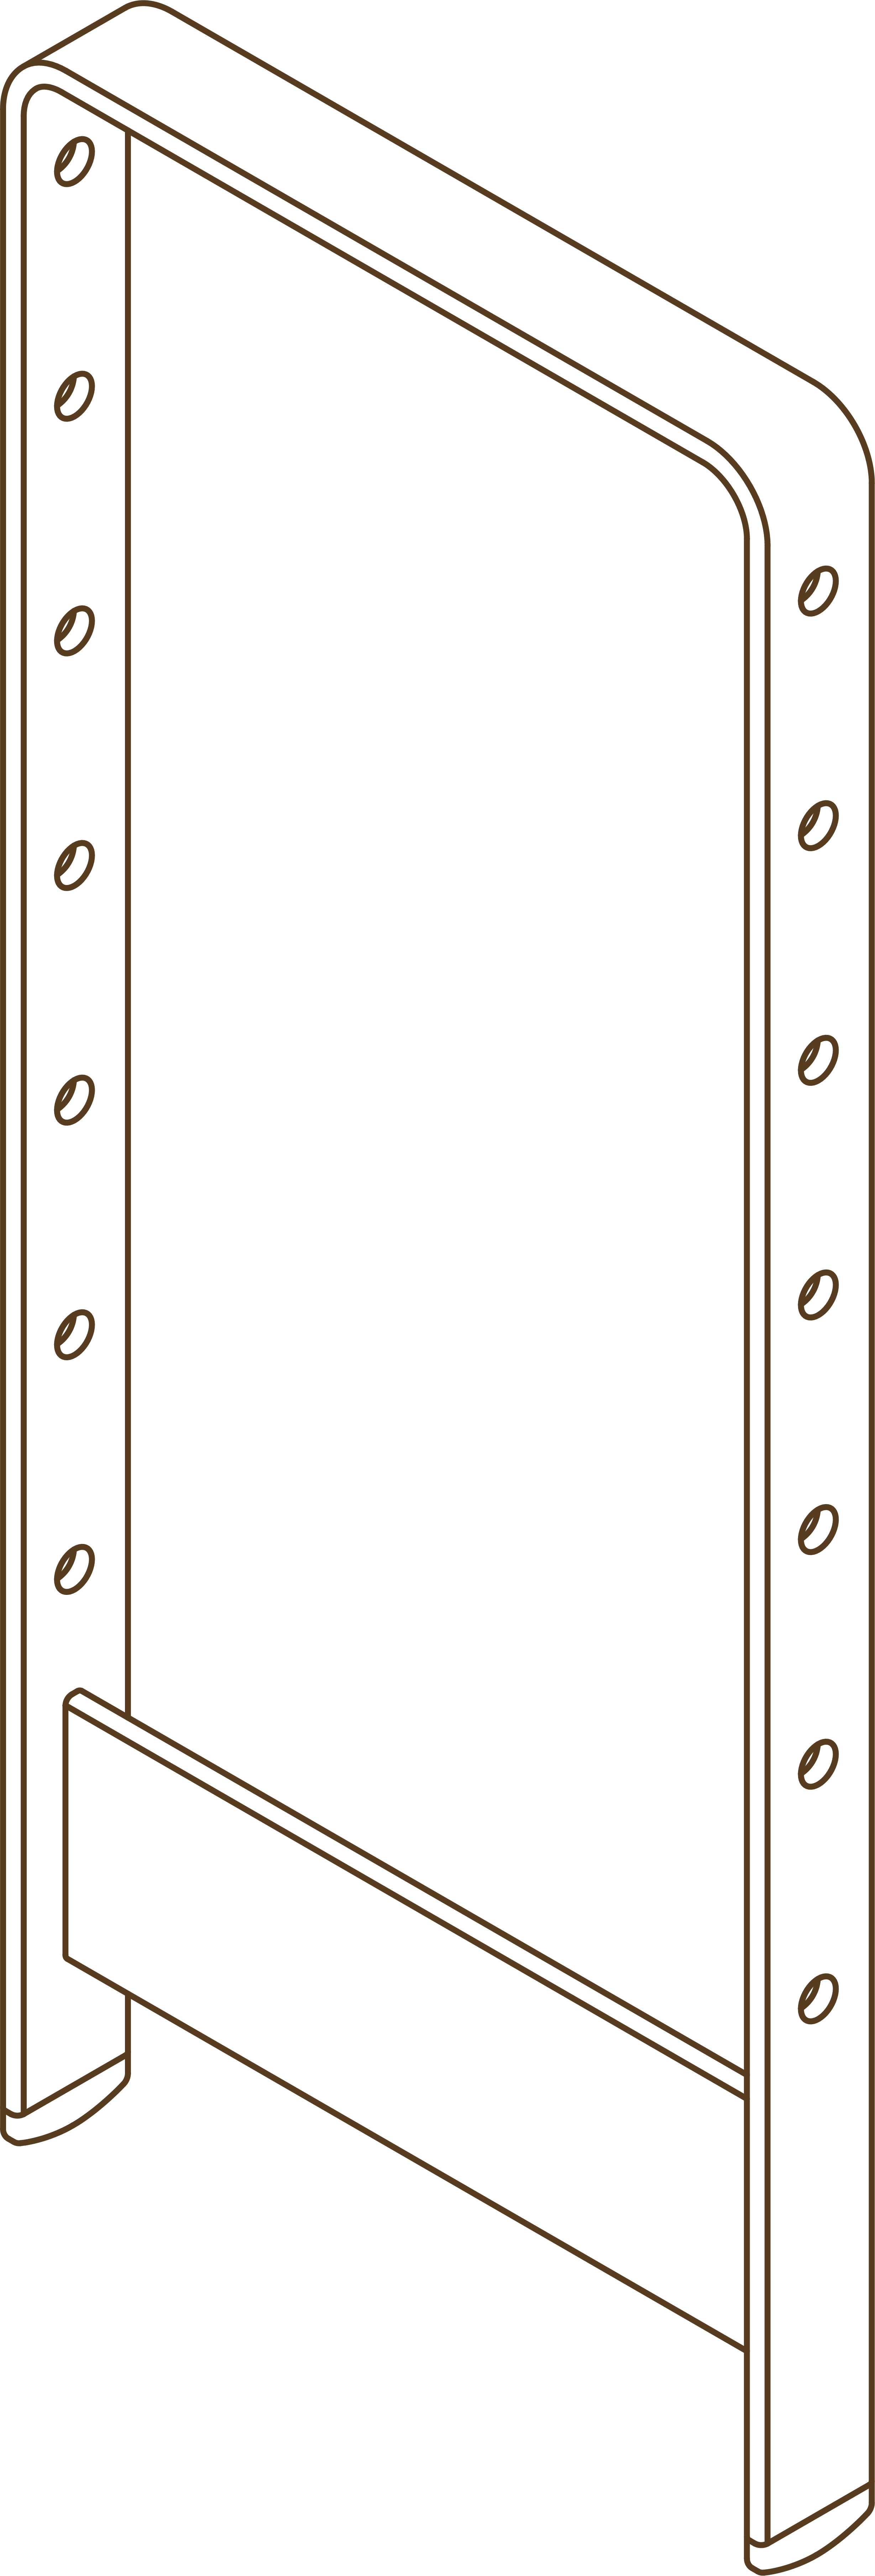
Frames are the largest module and support all else. They are perforated to support the placement of dowels.
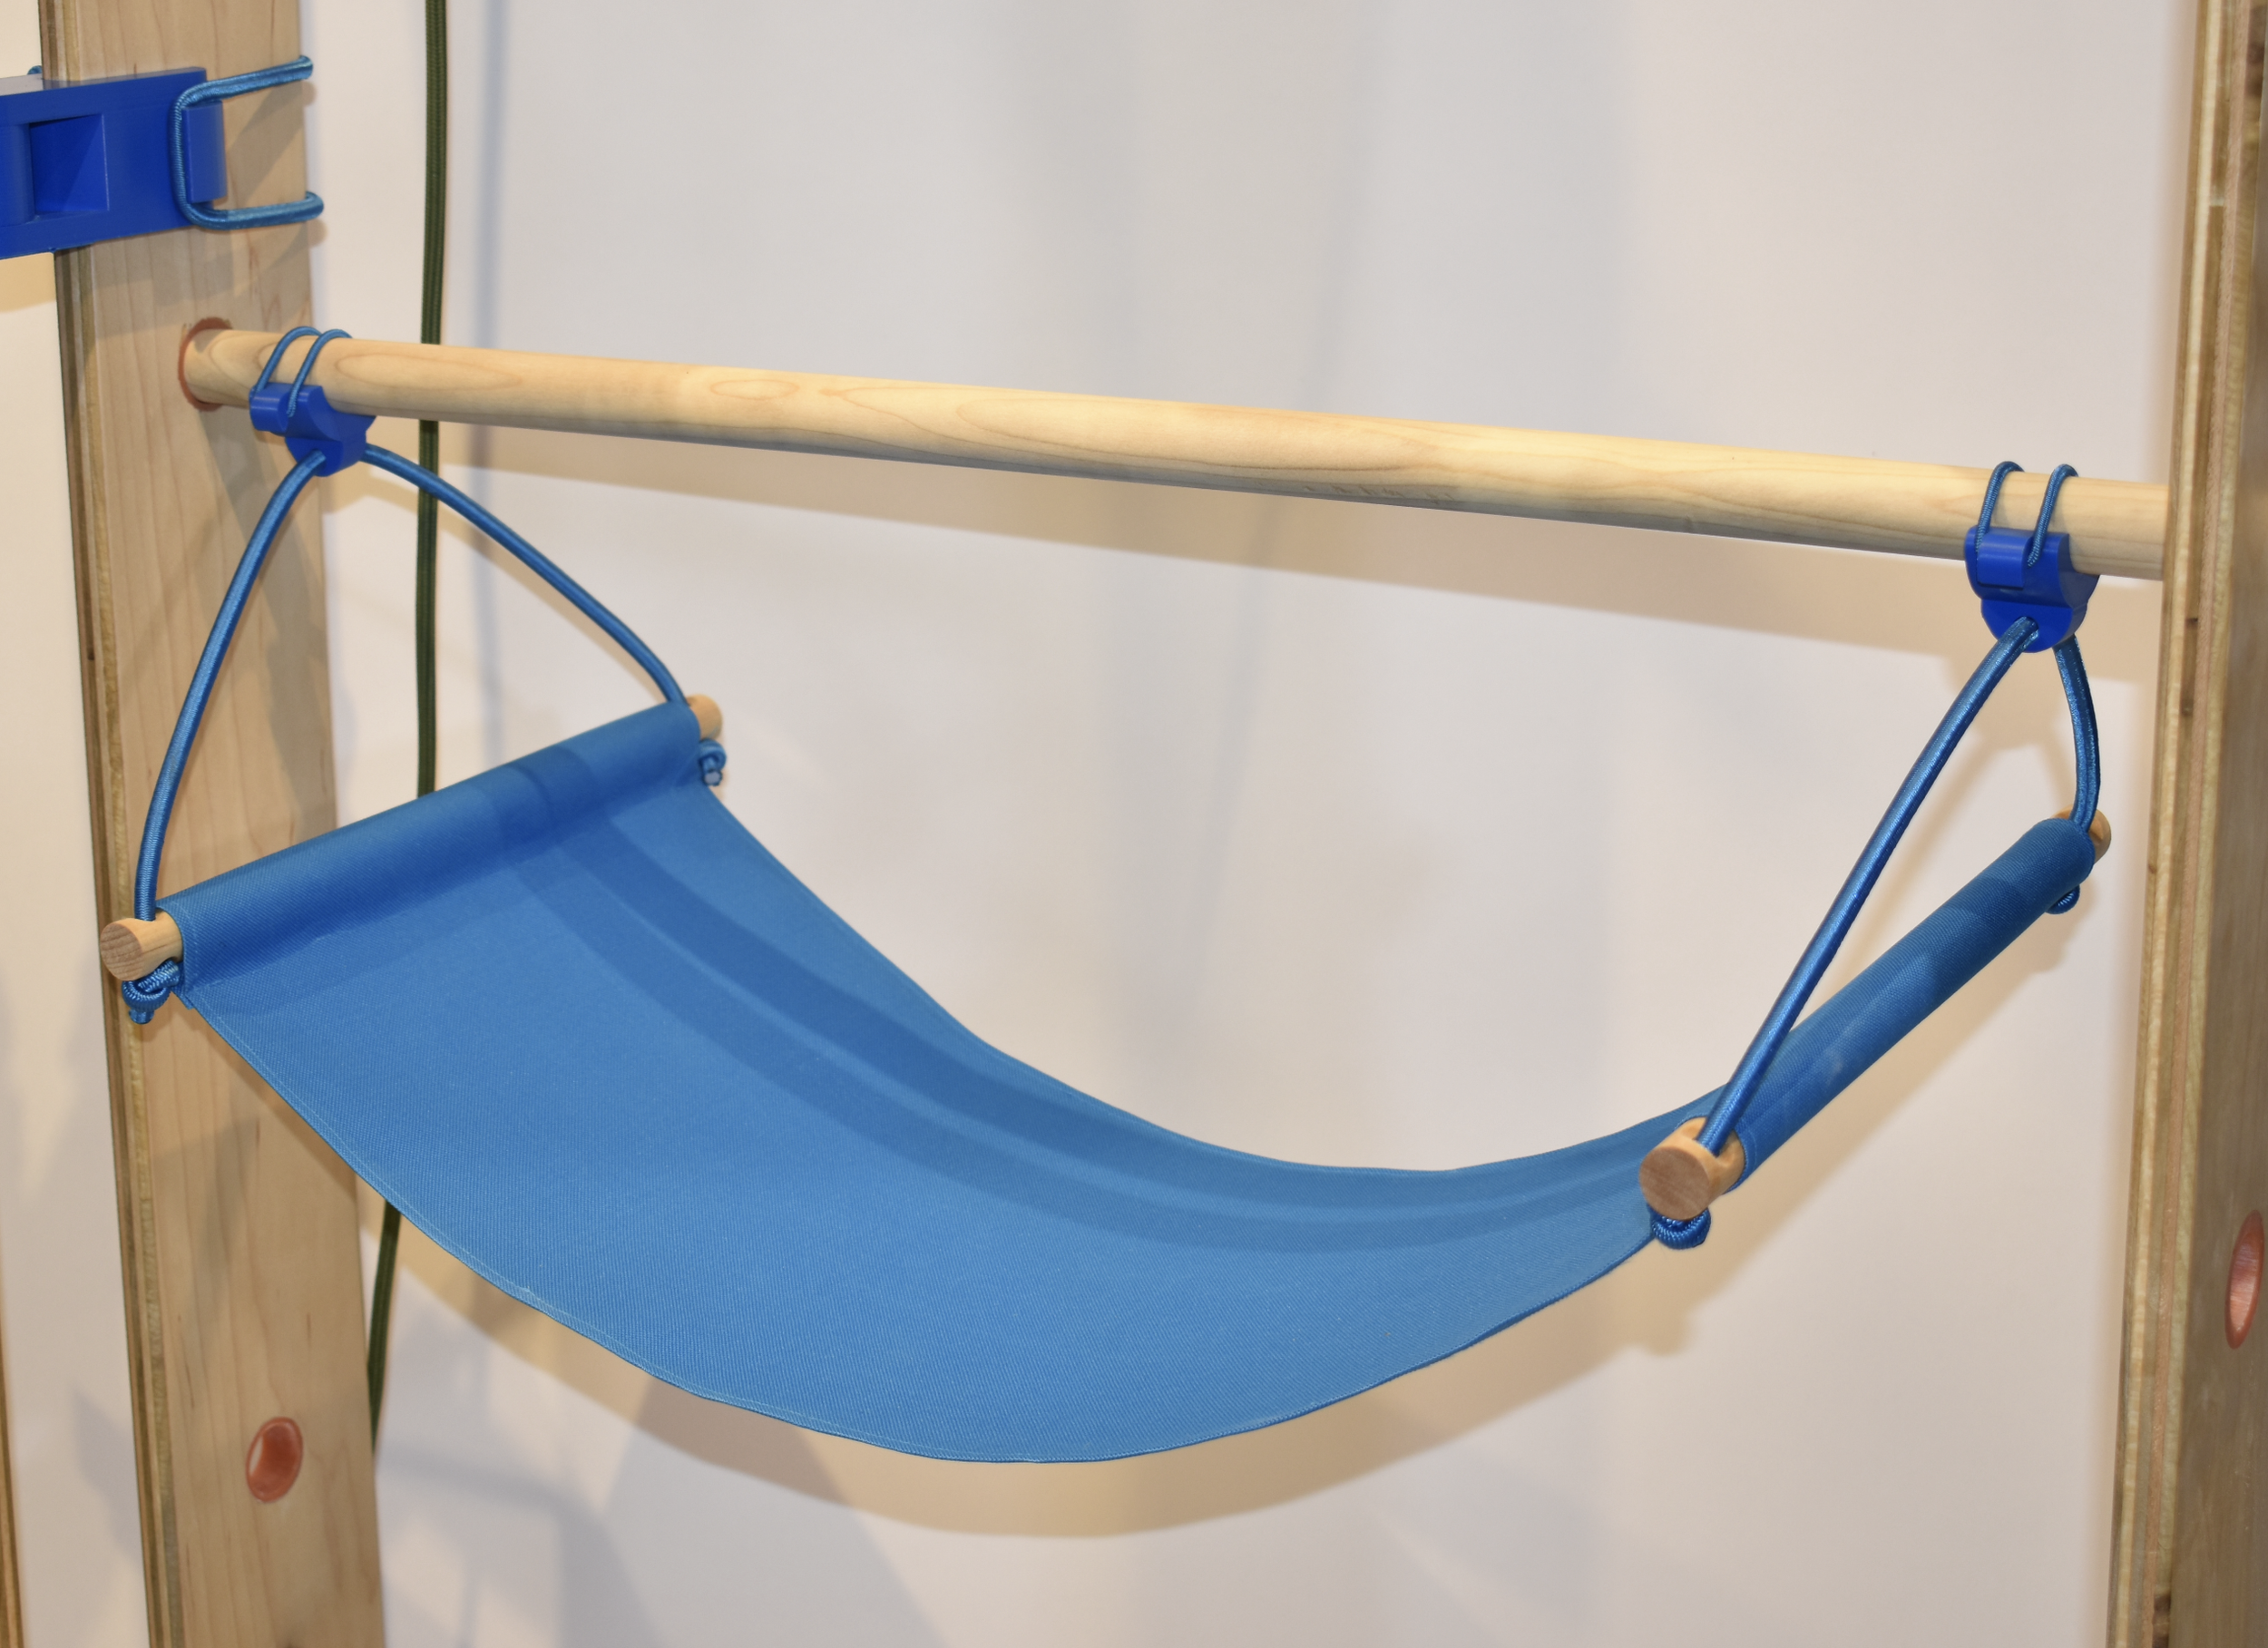
Hammocks are flexible modules that attach to dowels and hold small or rolled items. Perfect for socks, intimates, or knitwear.
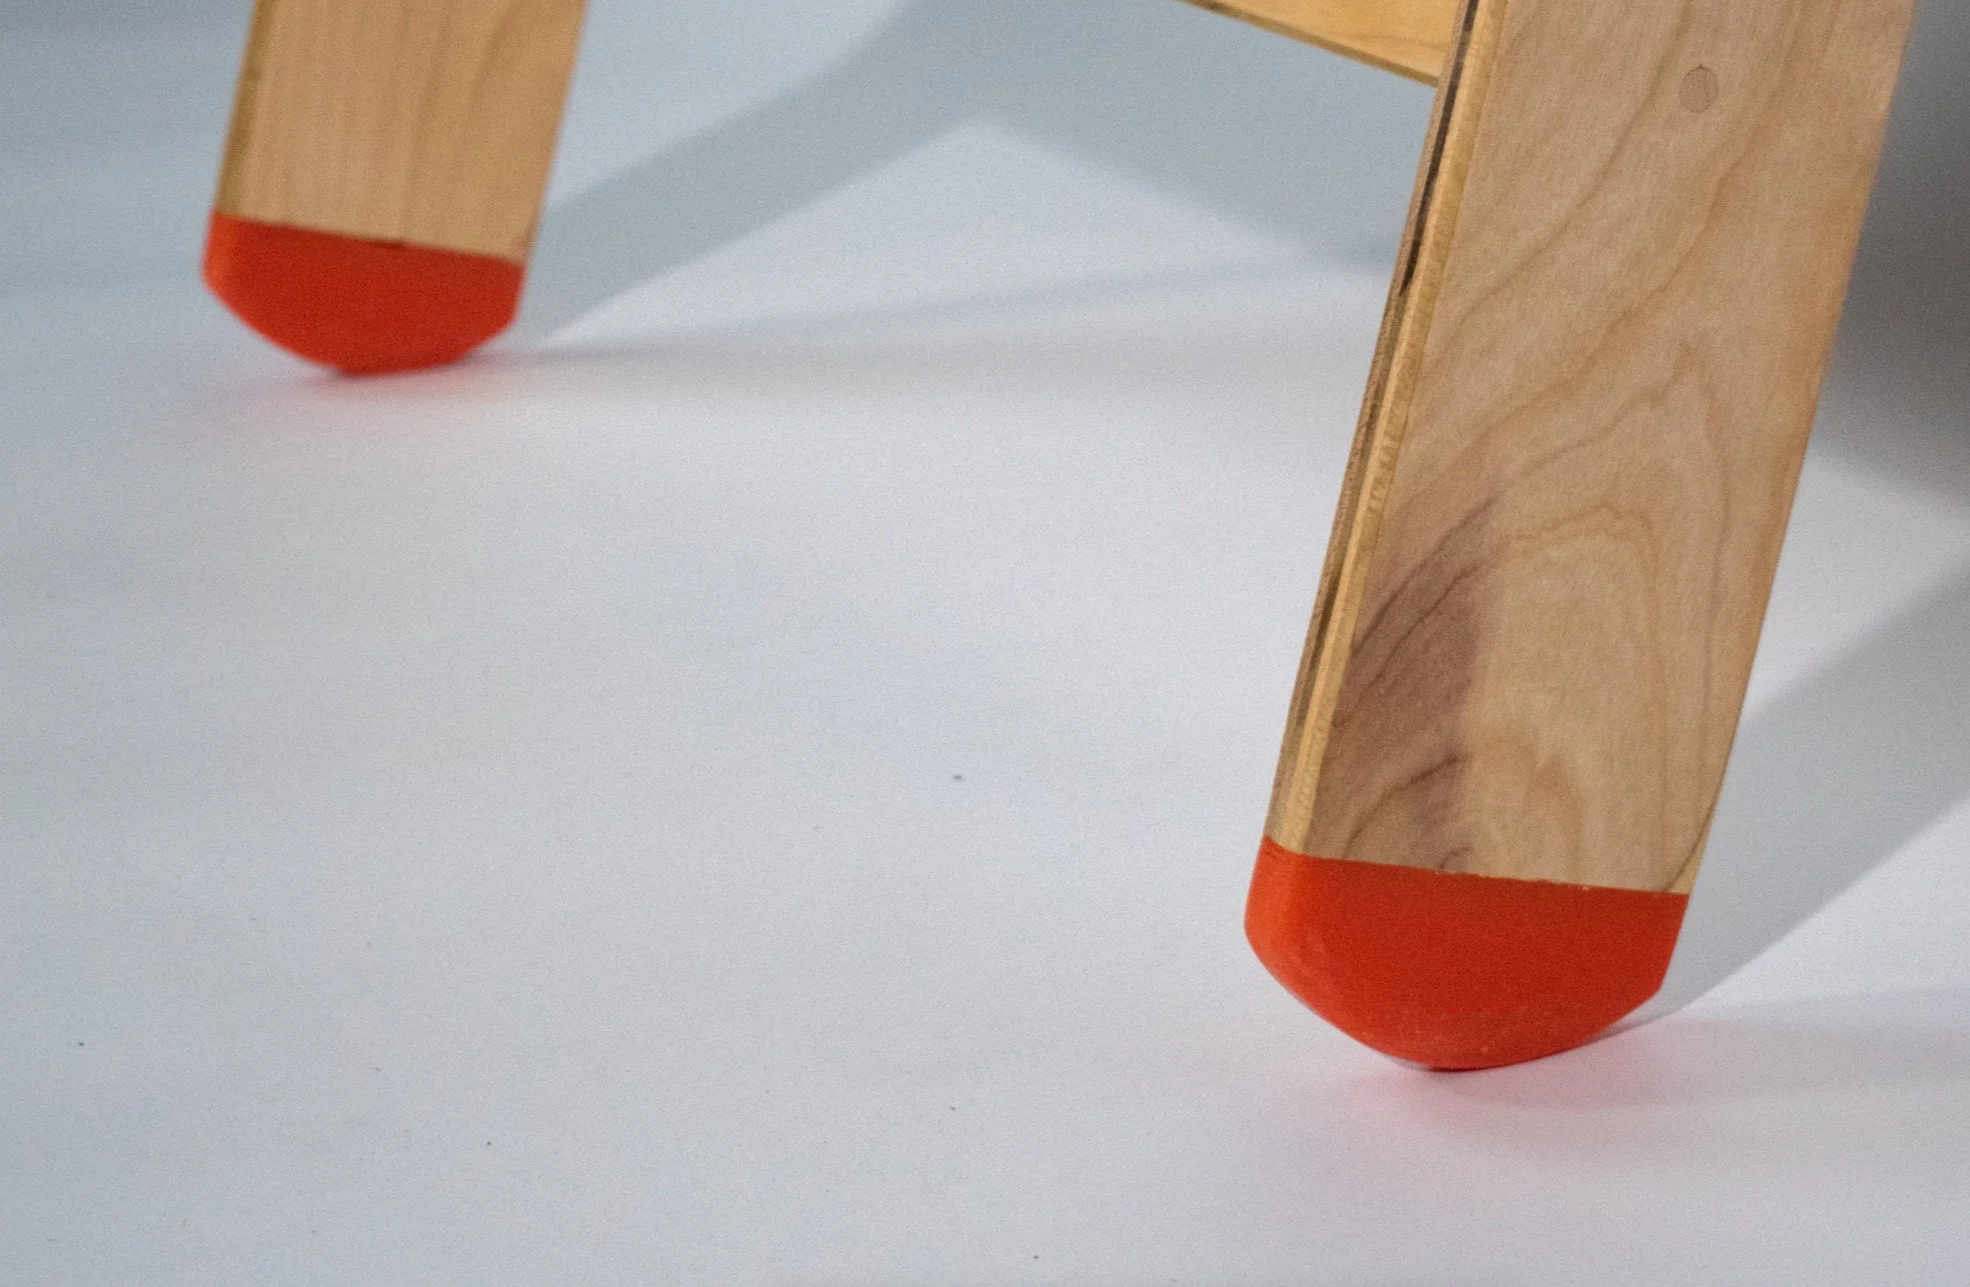
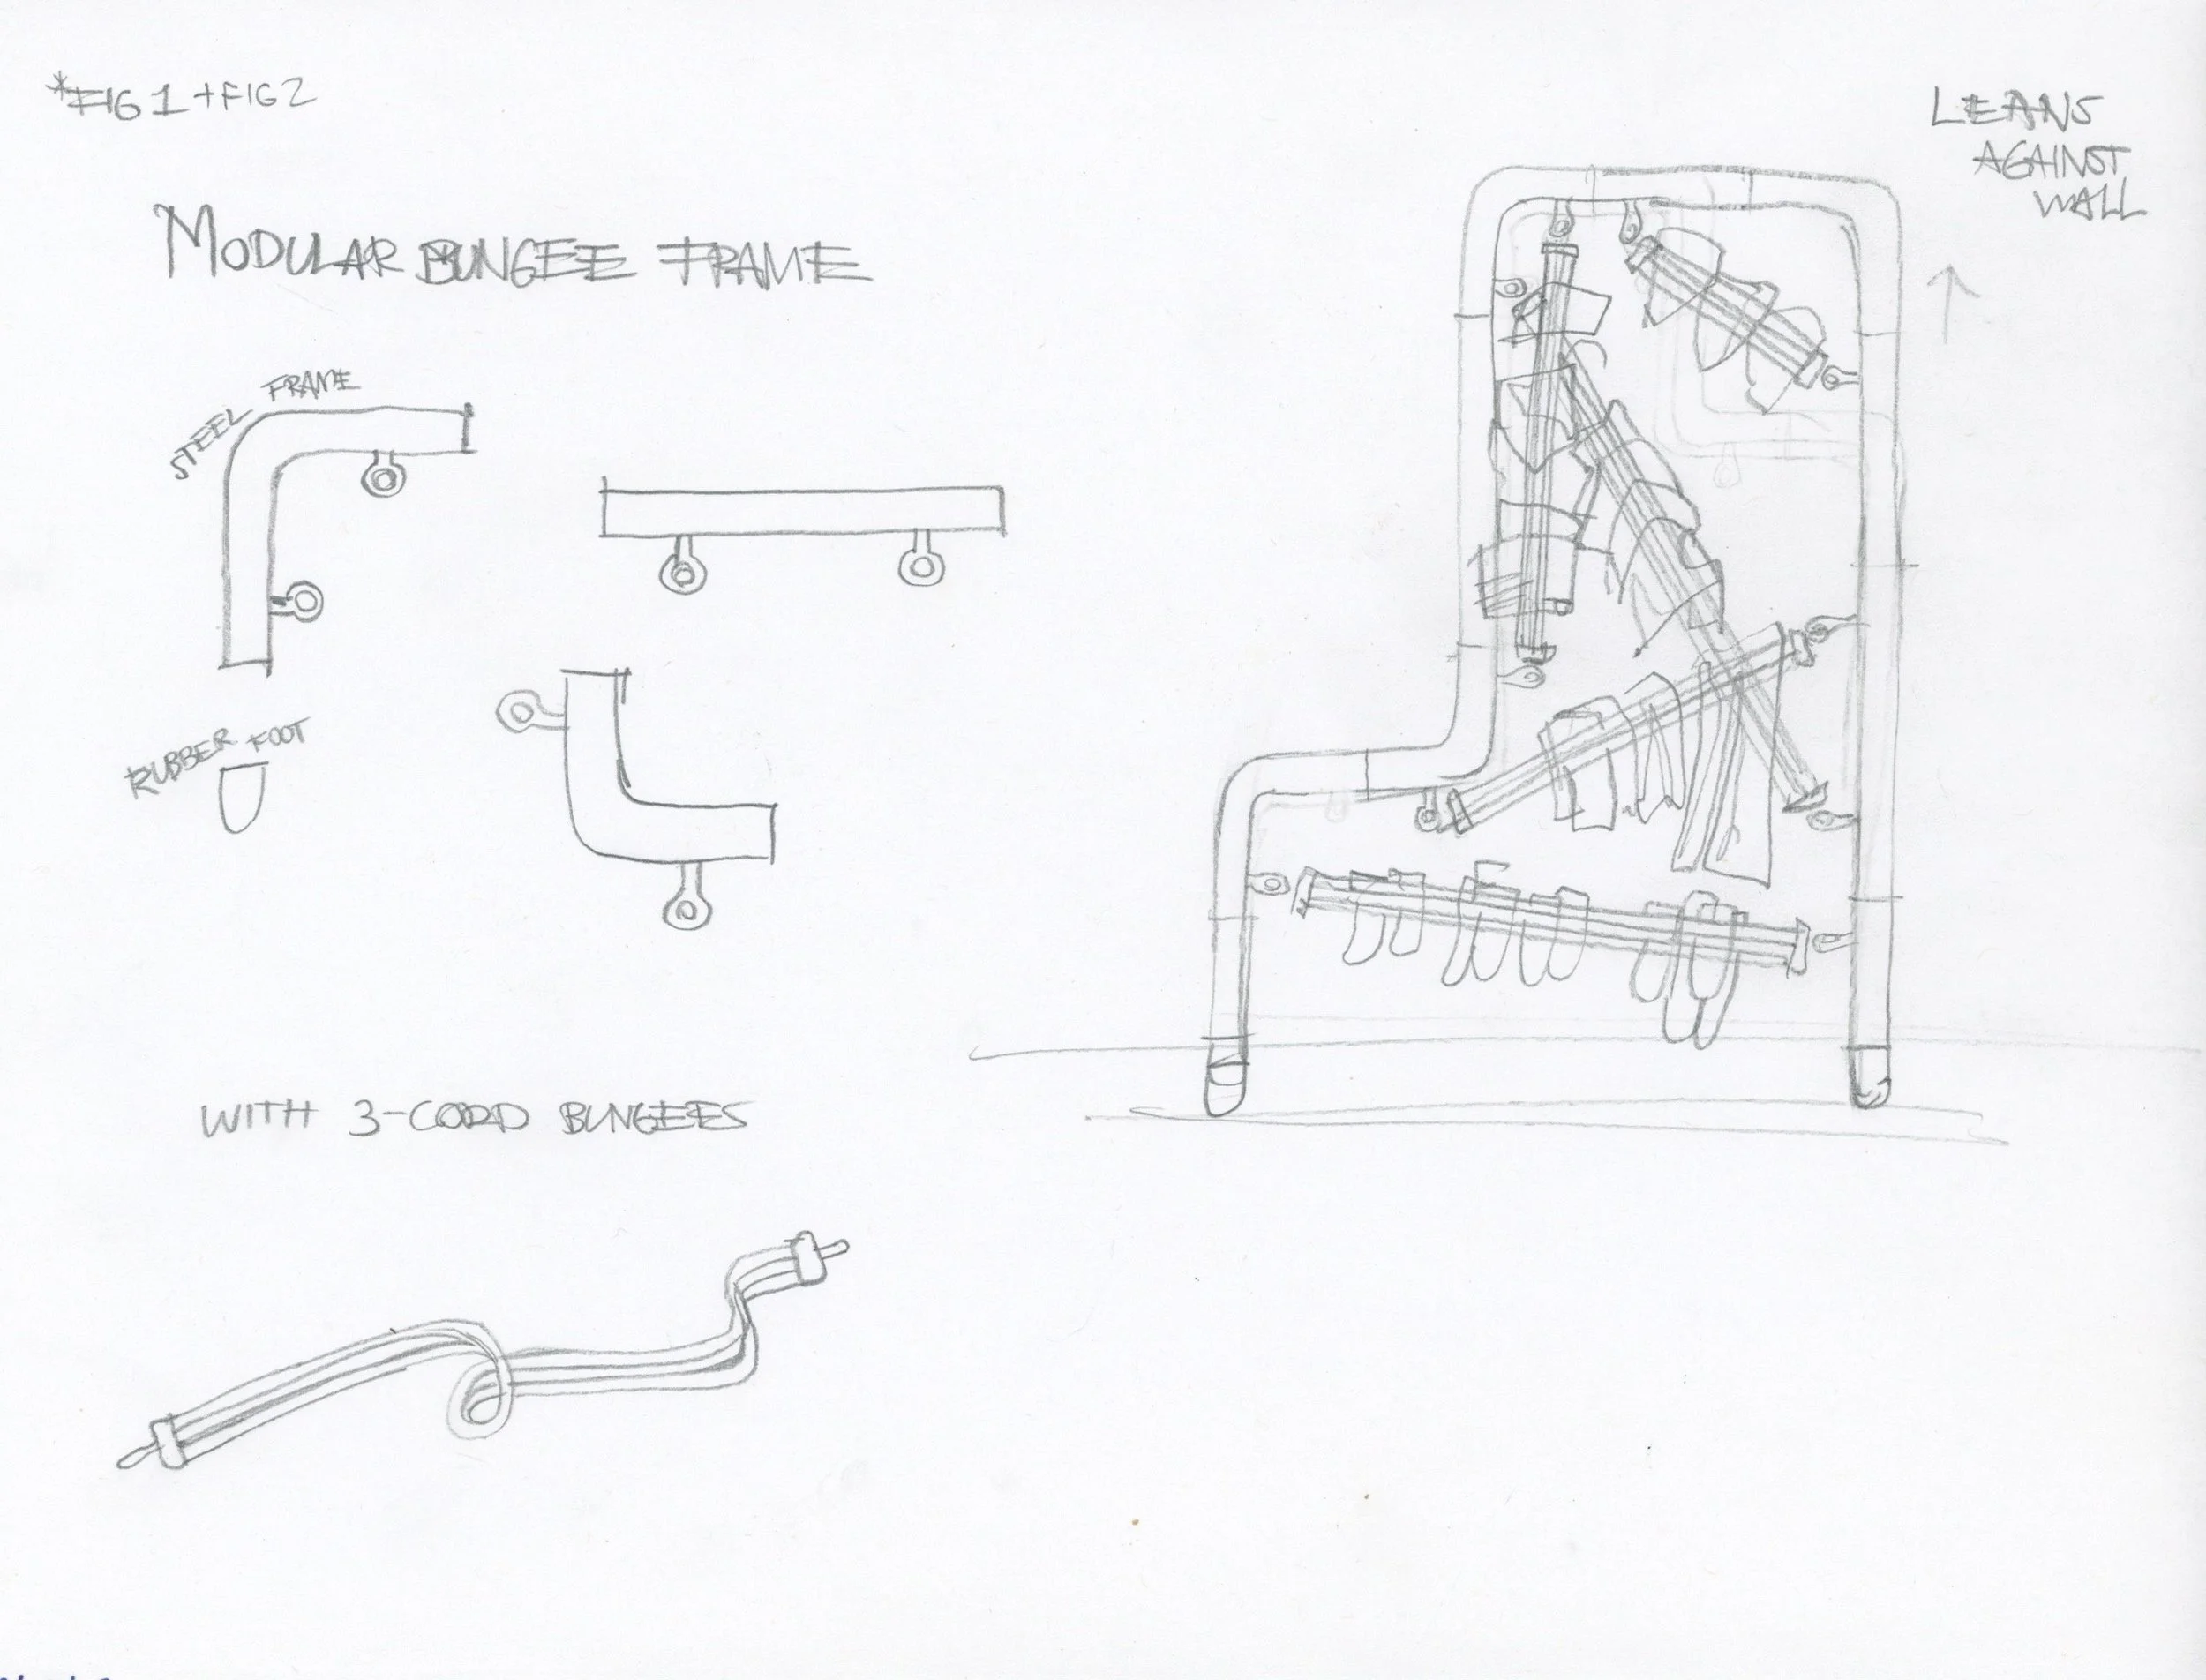
Users can create their system as large or small as they want. As many frames as the user desires can be attached together. A single frame can be used alone by leaning it against a wall, thanks to the rounded design of the feet.

2
5
Scalability:
Unique joinery:
Everything in the system can be assembled without tools. Dowels simply slide into the frame while other modules use custom bungee/hook fasteners. Lights have extended cables so they may be coiled and hung anywhere on the structure.
Gallery:
Process:
Agenda
This class, Product Design IV, was structured in such a way that we students could essentially make whatever we wanted. The only requirement was this: that we chose something we passionately cared about, a topic we would happily live and breathe for the next 16 weeks. I decided I wanted to make something about clothes. Specifically, I wanted to make something that slowed clothing waste.
I have had a long-standing fascination with clothes, specifically with something I like to call wardrobe theory, the study of what makes a collection of garments cohesive and stable.
A stable wardrobe is one that slow turnover because it has reached a state of homeostasis. Garments in a stable wardrobe work together as a healthy ecosystem. They have a cohesive color palette, compatible materials, and are thematically consistent. A stable wardrobe has enough, but not too many items; each item serves a unique purpose.
Over the years, through observation and refinement of my own collecting and curating practices, I came to the conclusion that unstable wardrobes are more prone to overconsumption than stable ones.
I wanted to create a physical product that helps people build stable wardrobes.
Ideation
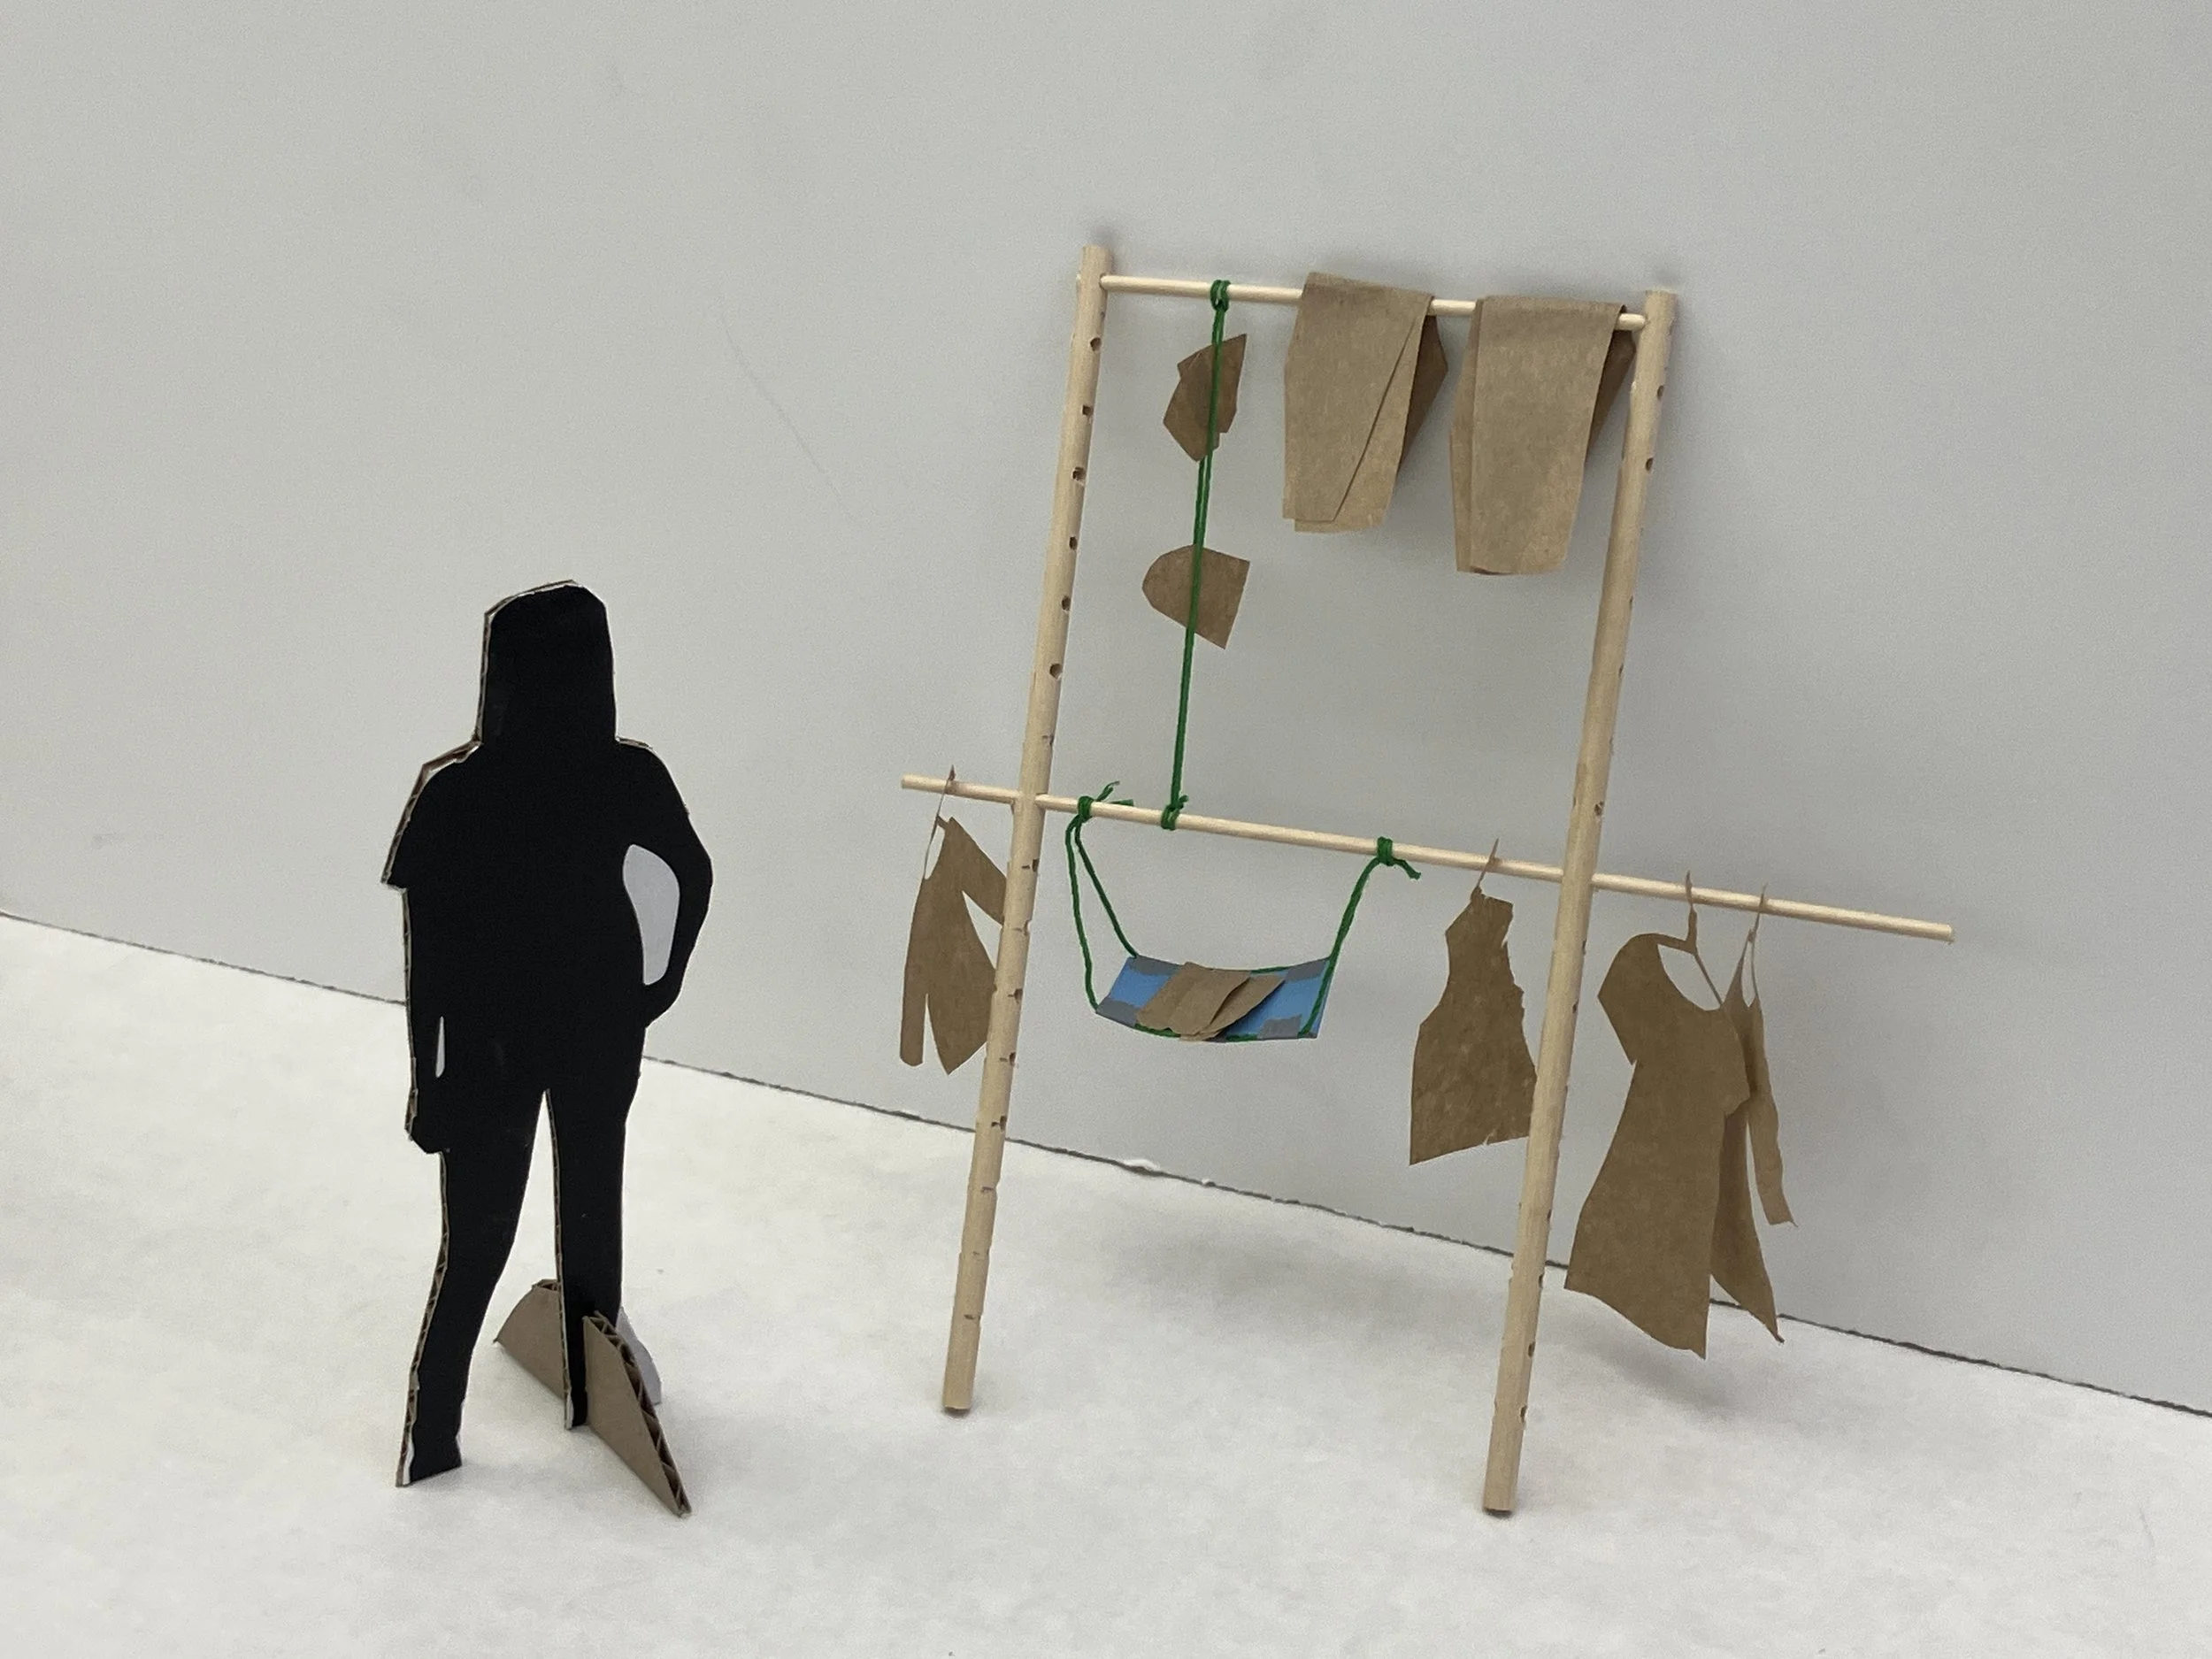
I started brainstorming unique, physical ways to visualize garments as a system. I wanted something that was freeform, allowing the user to arrange the clothes intuitively, letting patterns in color and texture naturally surface. I hypothesized that noticing patterns within a collection is the key to effective curation.
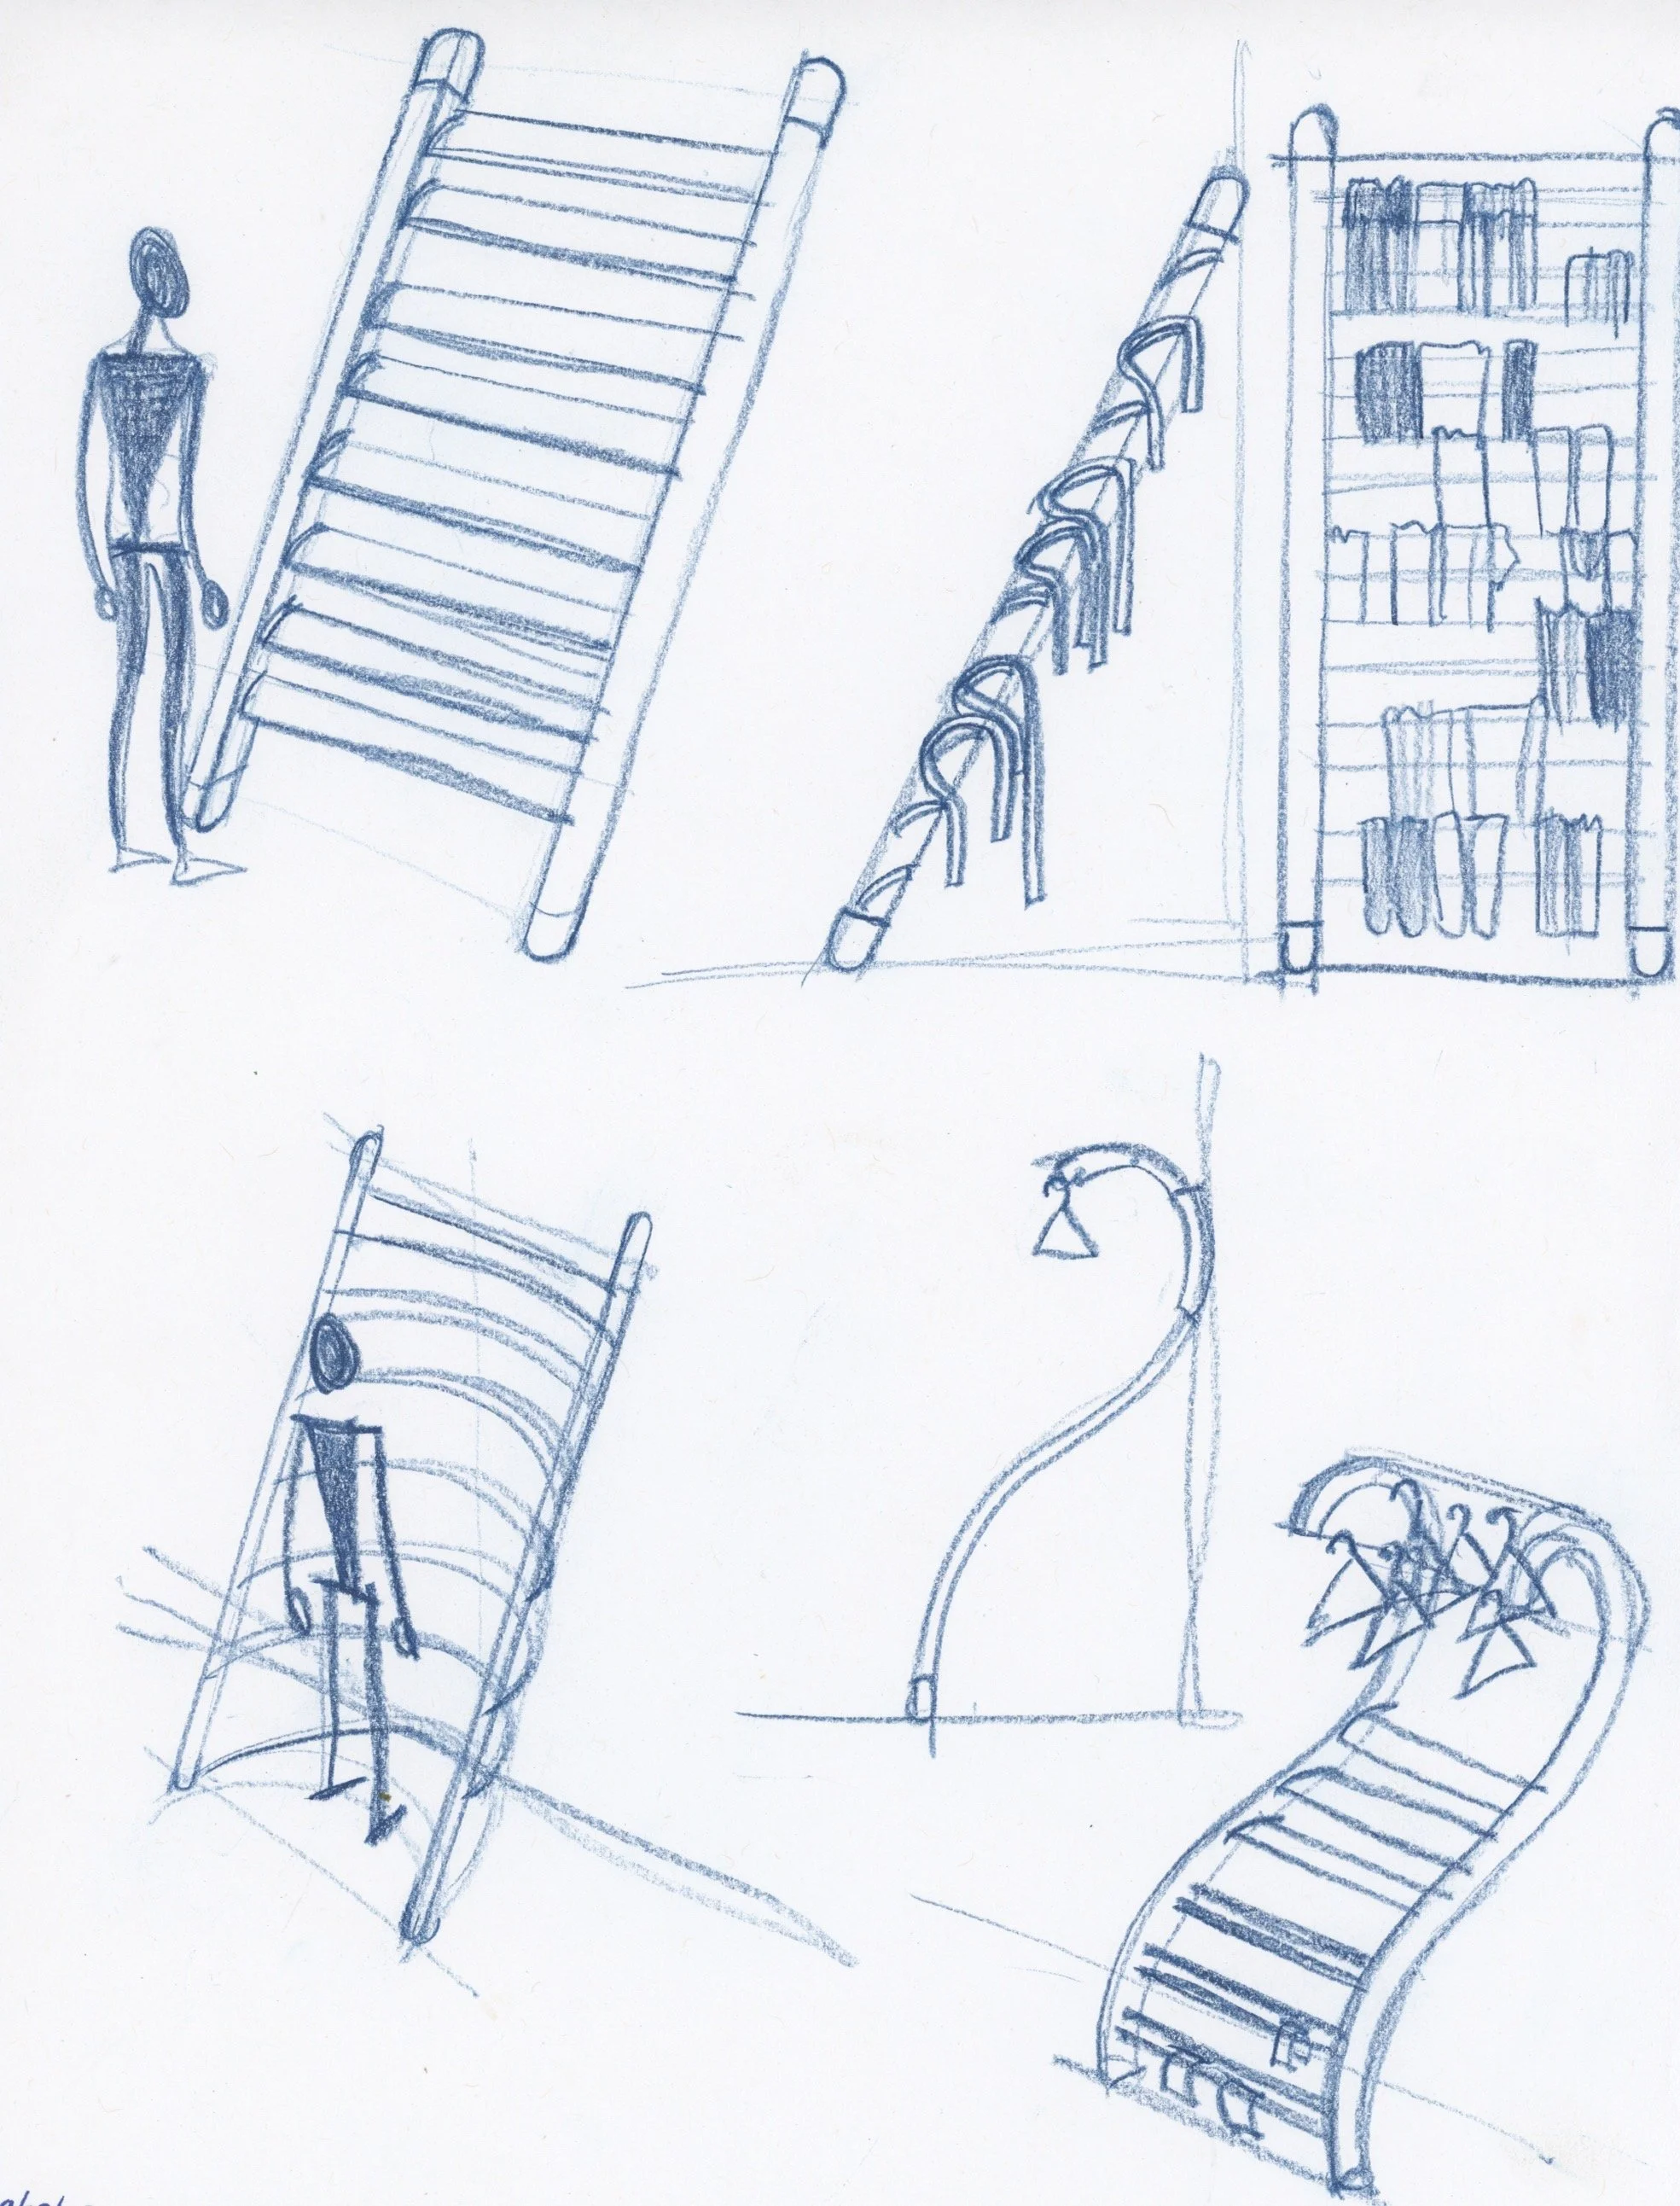
An extremely simple “ladder” form could act as a blank slate for the placement of clothes.

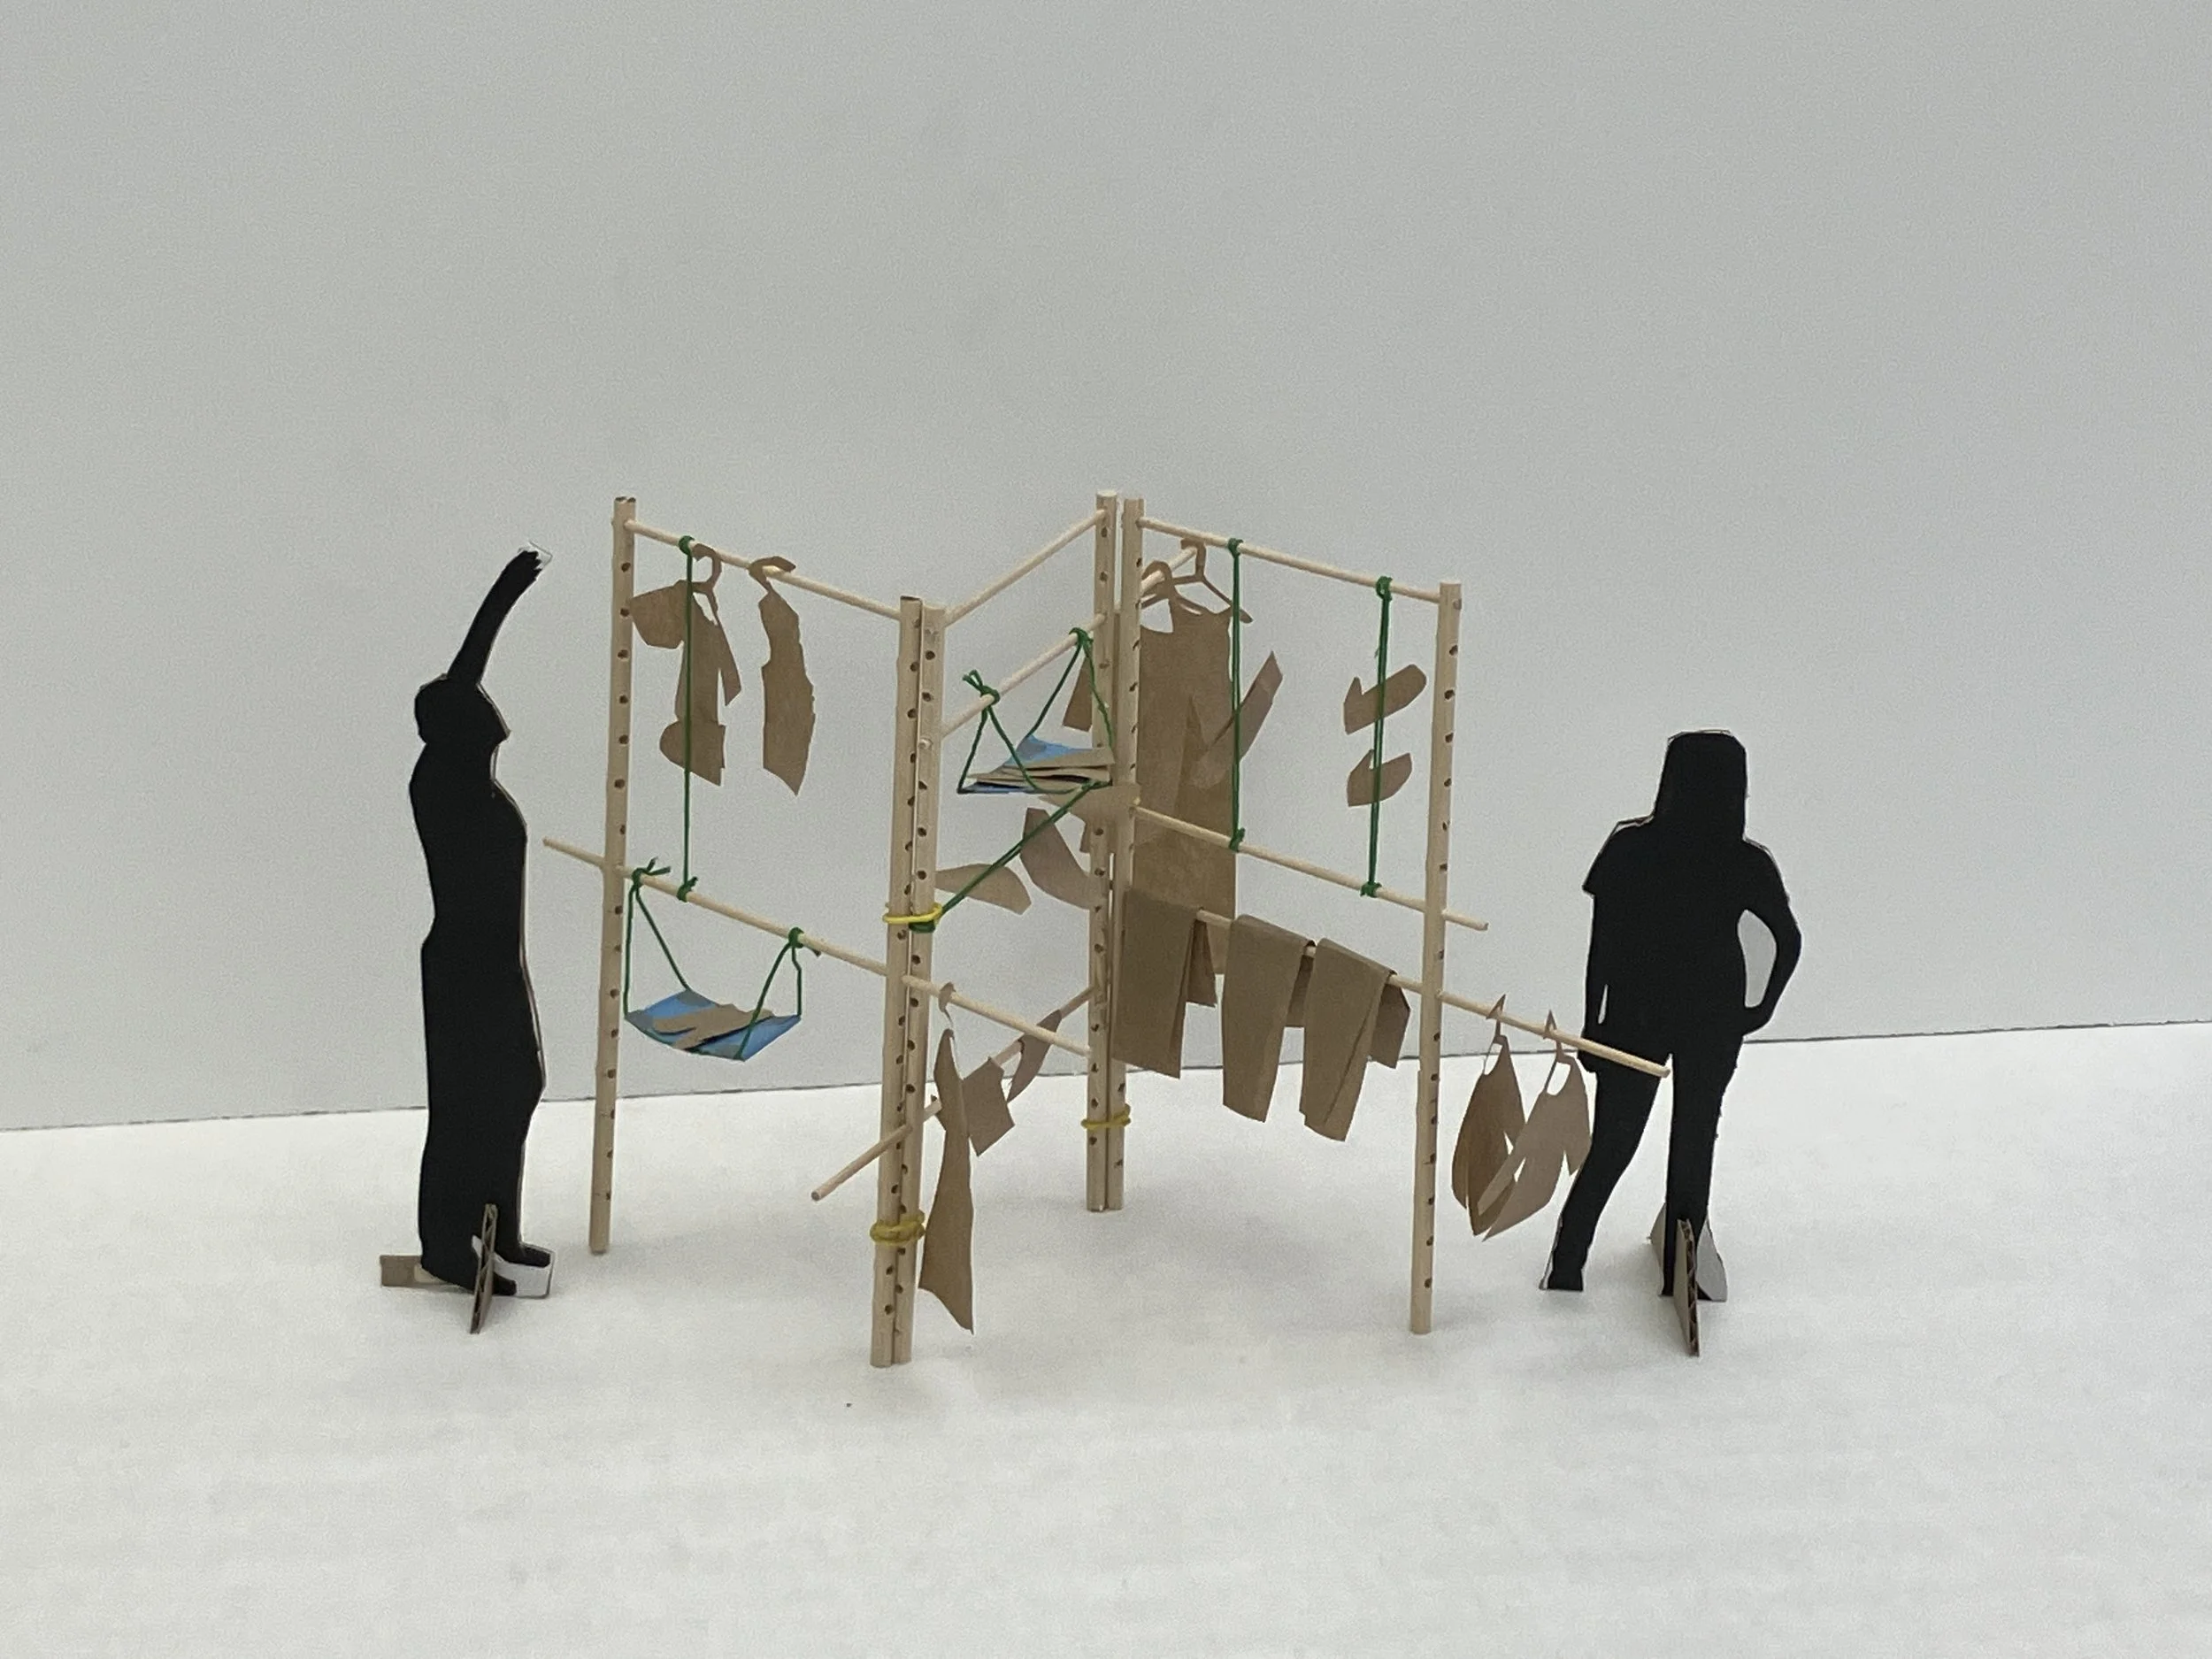
I became interested in an “ecosystem” structure with overlapping tiers, multiple elements meshing into one beautiful tapestry of garments.


Production

The first thing I did was finalize frame dimensions and order a 4’ by 8’ sheet of 3/4” plywood.

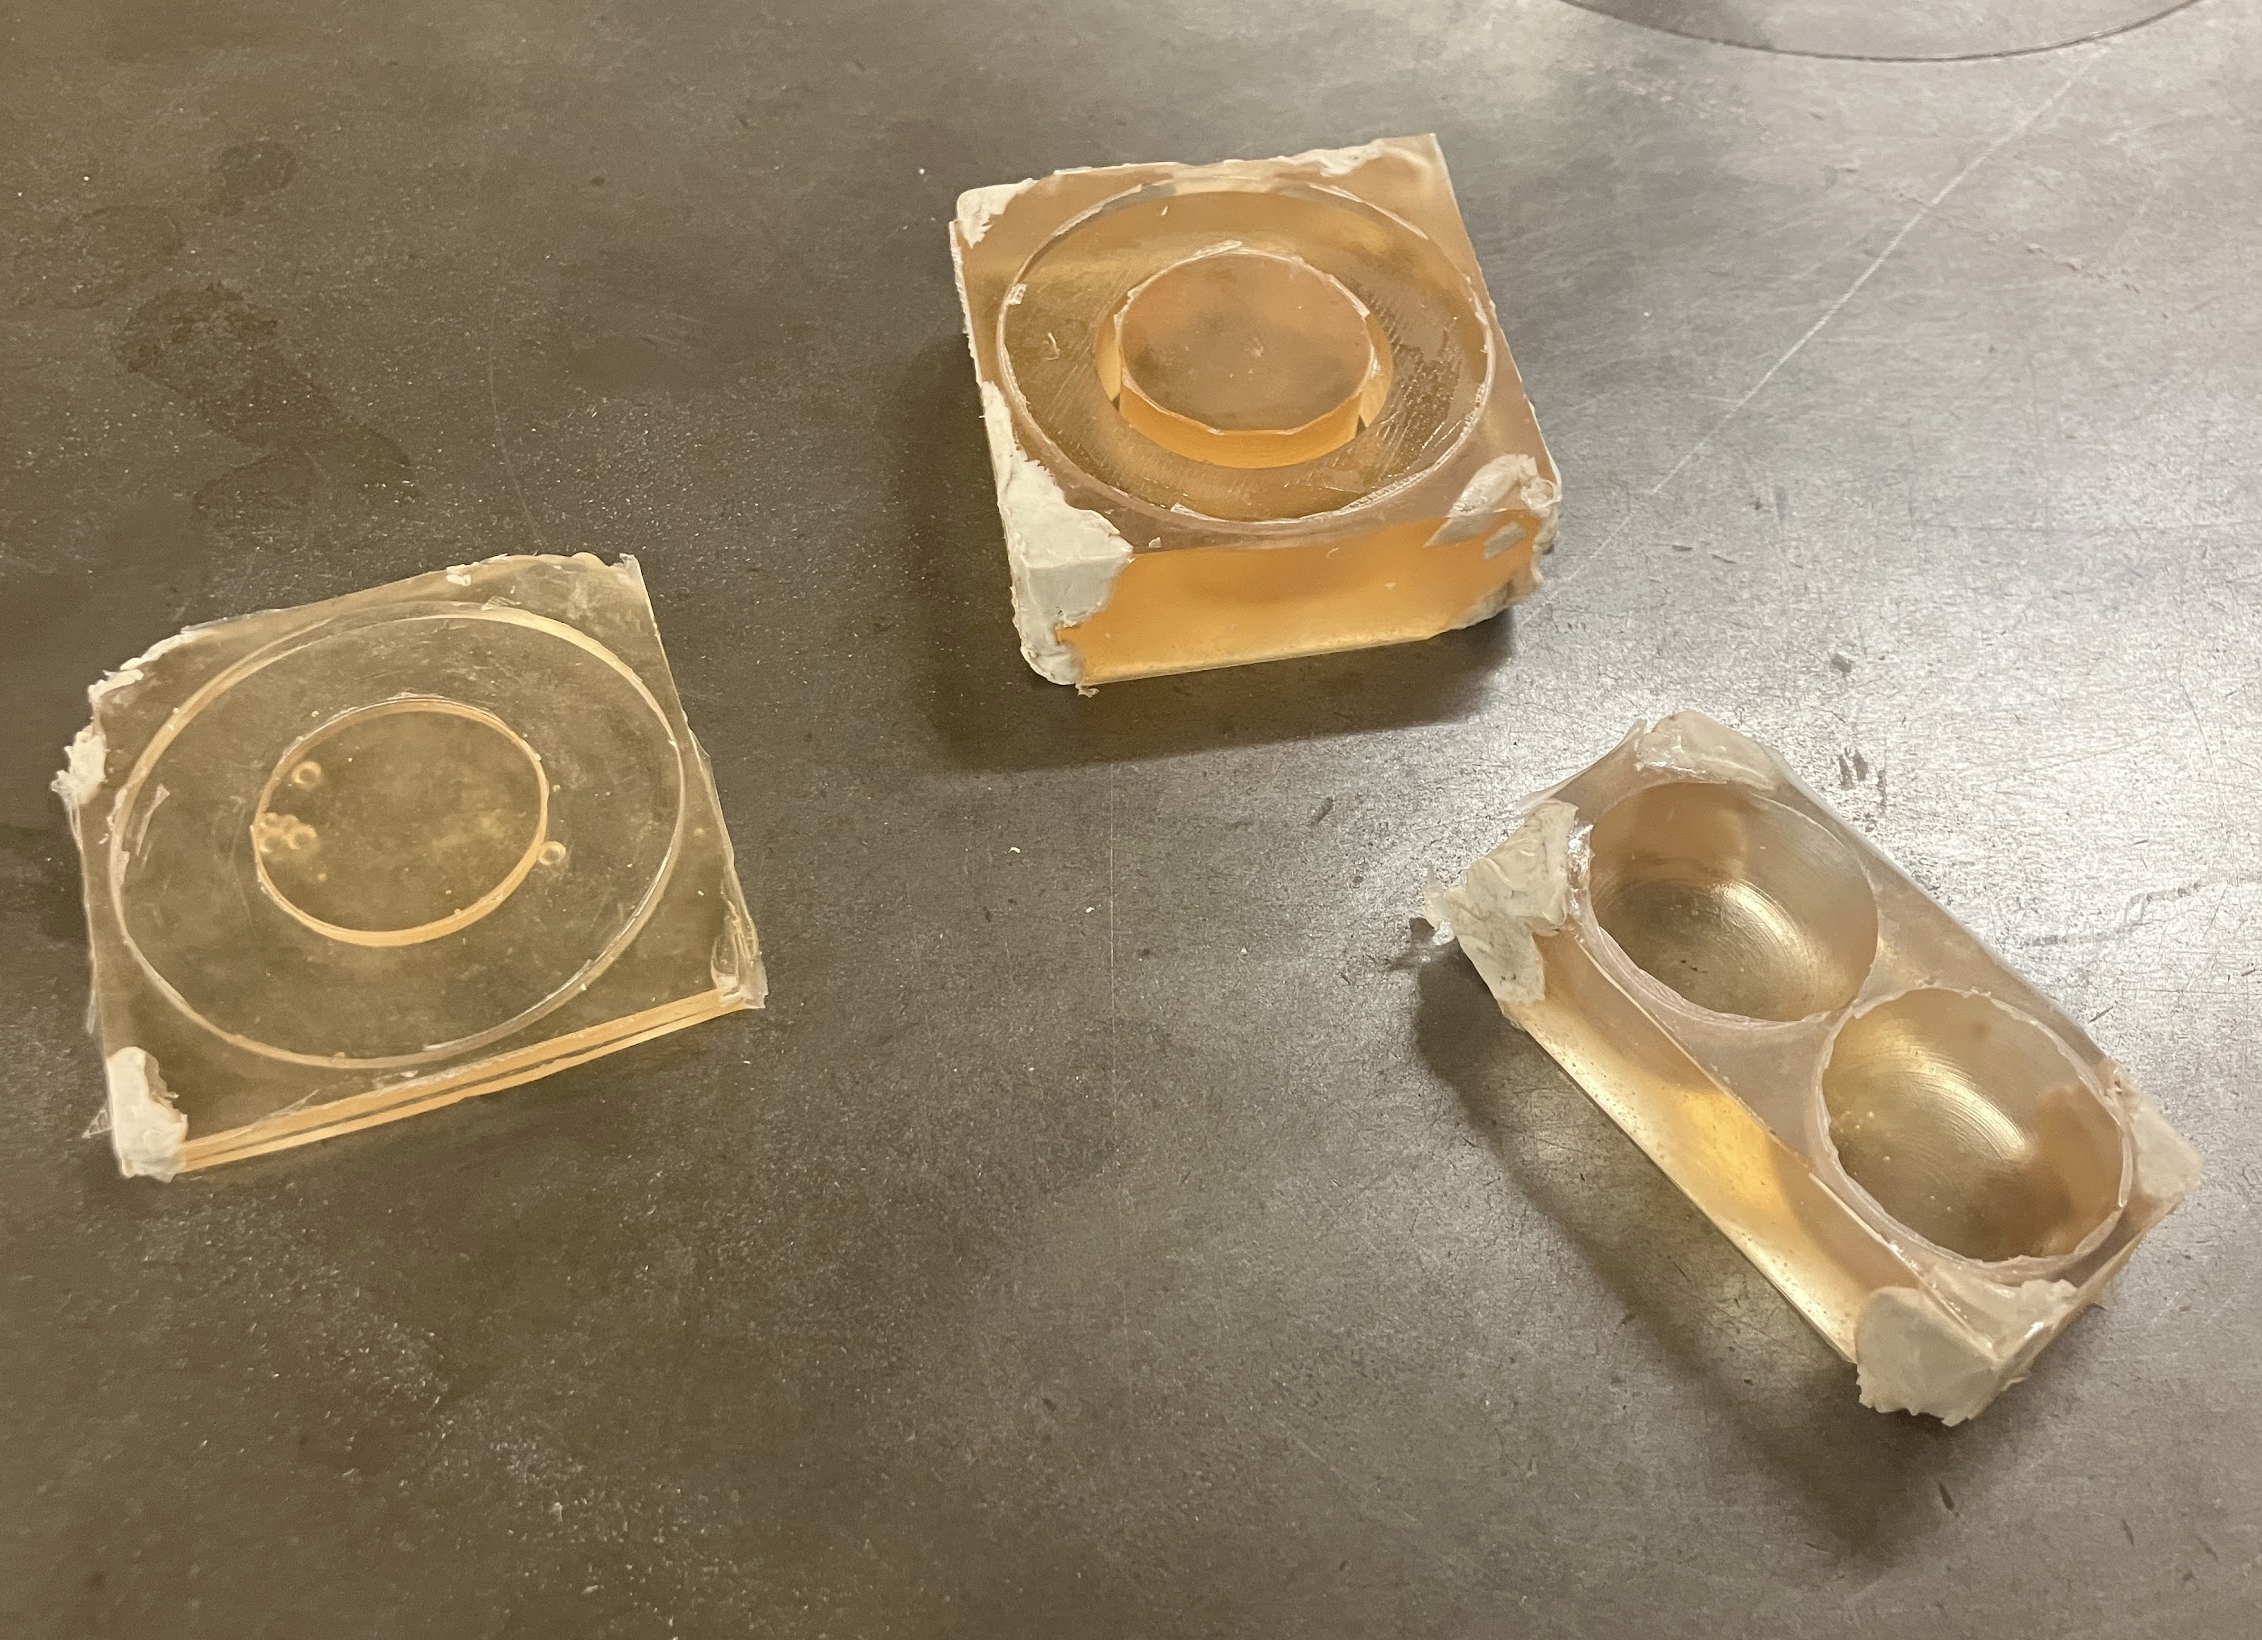
I wanted the frame and dowel accents to be casted out of plastic because I really wanted a translucent “jelly” look. I also felt that they would visually mesh with the wood more seamlessly than if they were 3D printed. These were my first attempts at one-part molds. The originals were designed in SOLIDWORKS and 3D printed, and the molds were cast out of Smooth-On Vytaflex 30.

An early exploration of wardrobe stability: close up scans of 16 of my most-worn items, illustrating relationships of color and texture within my collection.

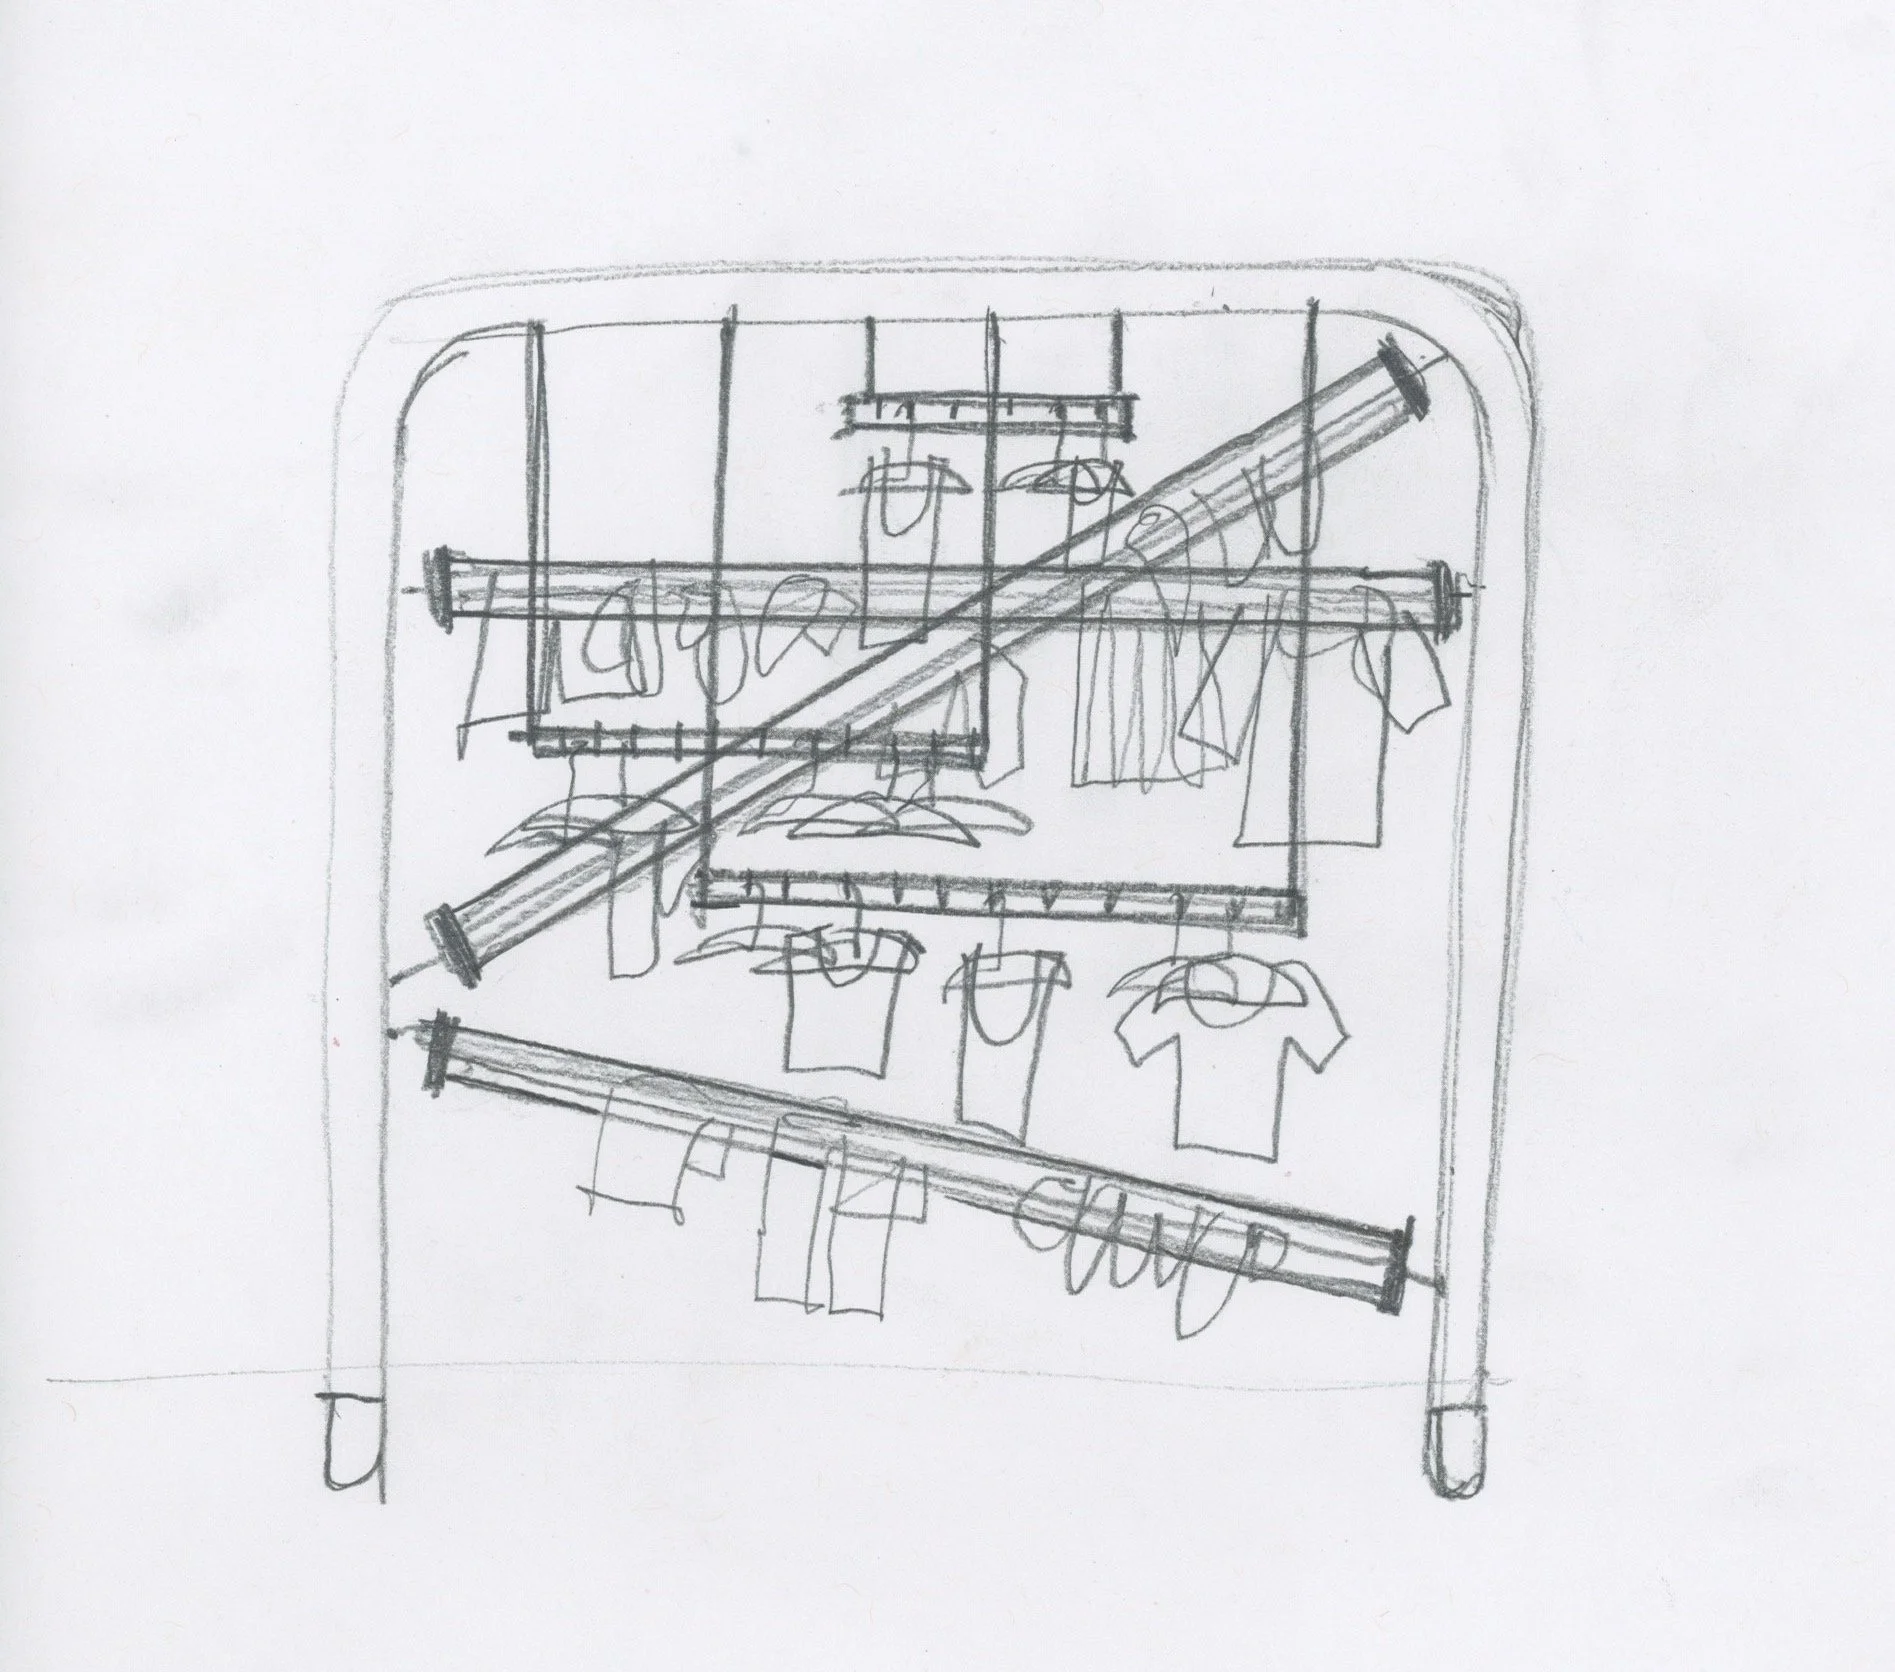
Early explorations of kinetic systems. Movement along a “track” could add another layer to the visualization of the system as well as provide more real estate for clothing storage if the track travels up the wall to otherwise inaccessible areas.


The light bulb covers, bungee hooks, hammock clips, and frame hinges were all modeled in Solidworks and 3D printed. I tried to strike a formal consistency between the smaller components using a blocky style and select geometric motifs.

I finished the frame with wipe-on polyurethane.
Considering a modular “track” system
At this point I departed from a track-based kinetic system, feeling that it was too rigid for the interaction I was hoping to achieve. Instead, I began generating concepts that were more flexible and scalable.
To view my proposal slide deck, click here.

I experimented with different adhesives. I found that a process of first wood glue and then epoxy gave the best strength and finish.

After learning from my first attempt, I decided to make two-part molds for my final parts. To do this, I built a clay mound for each mold that would later serve as the second part of the mold.
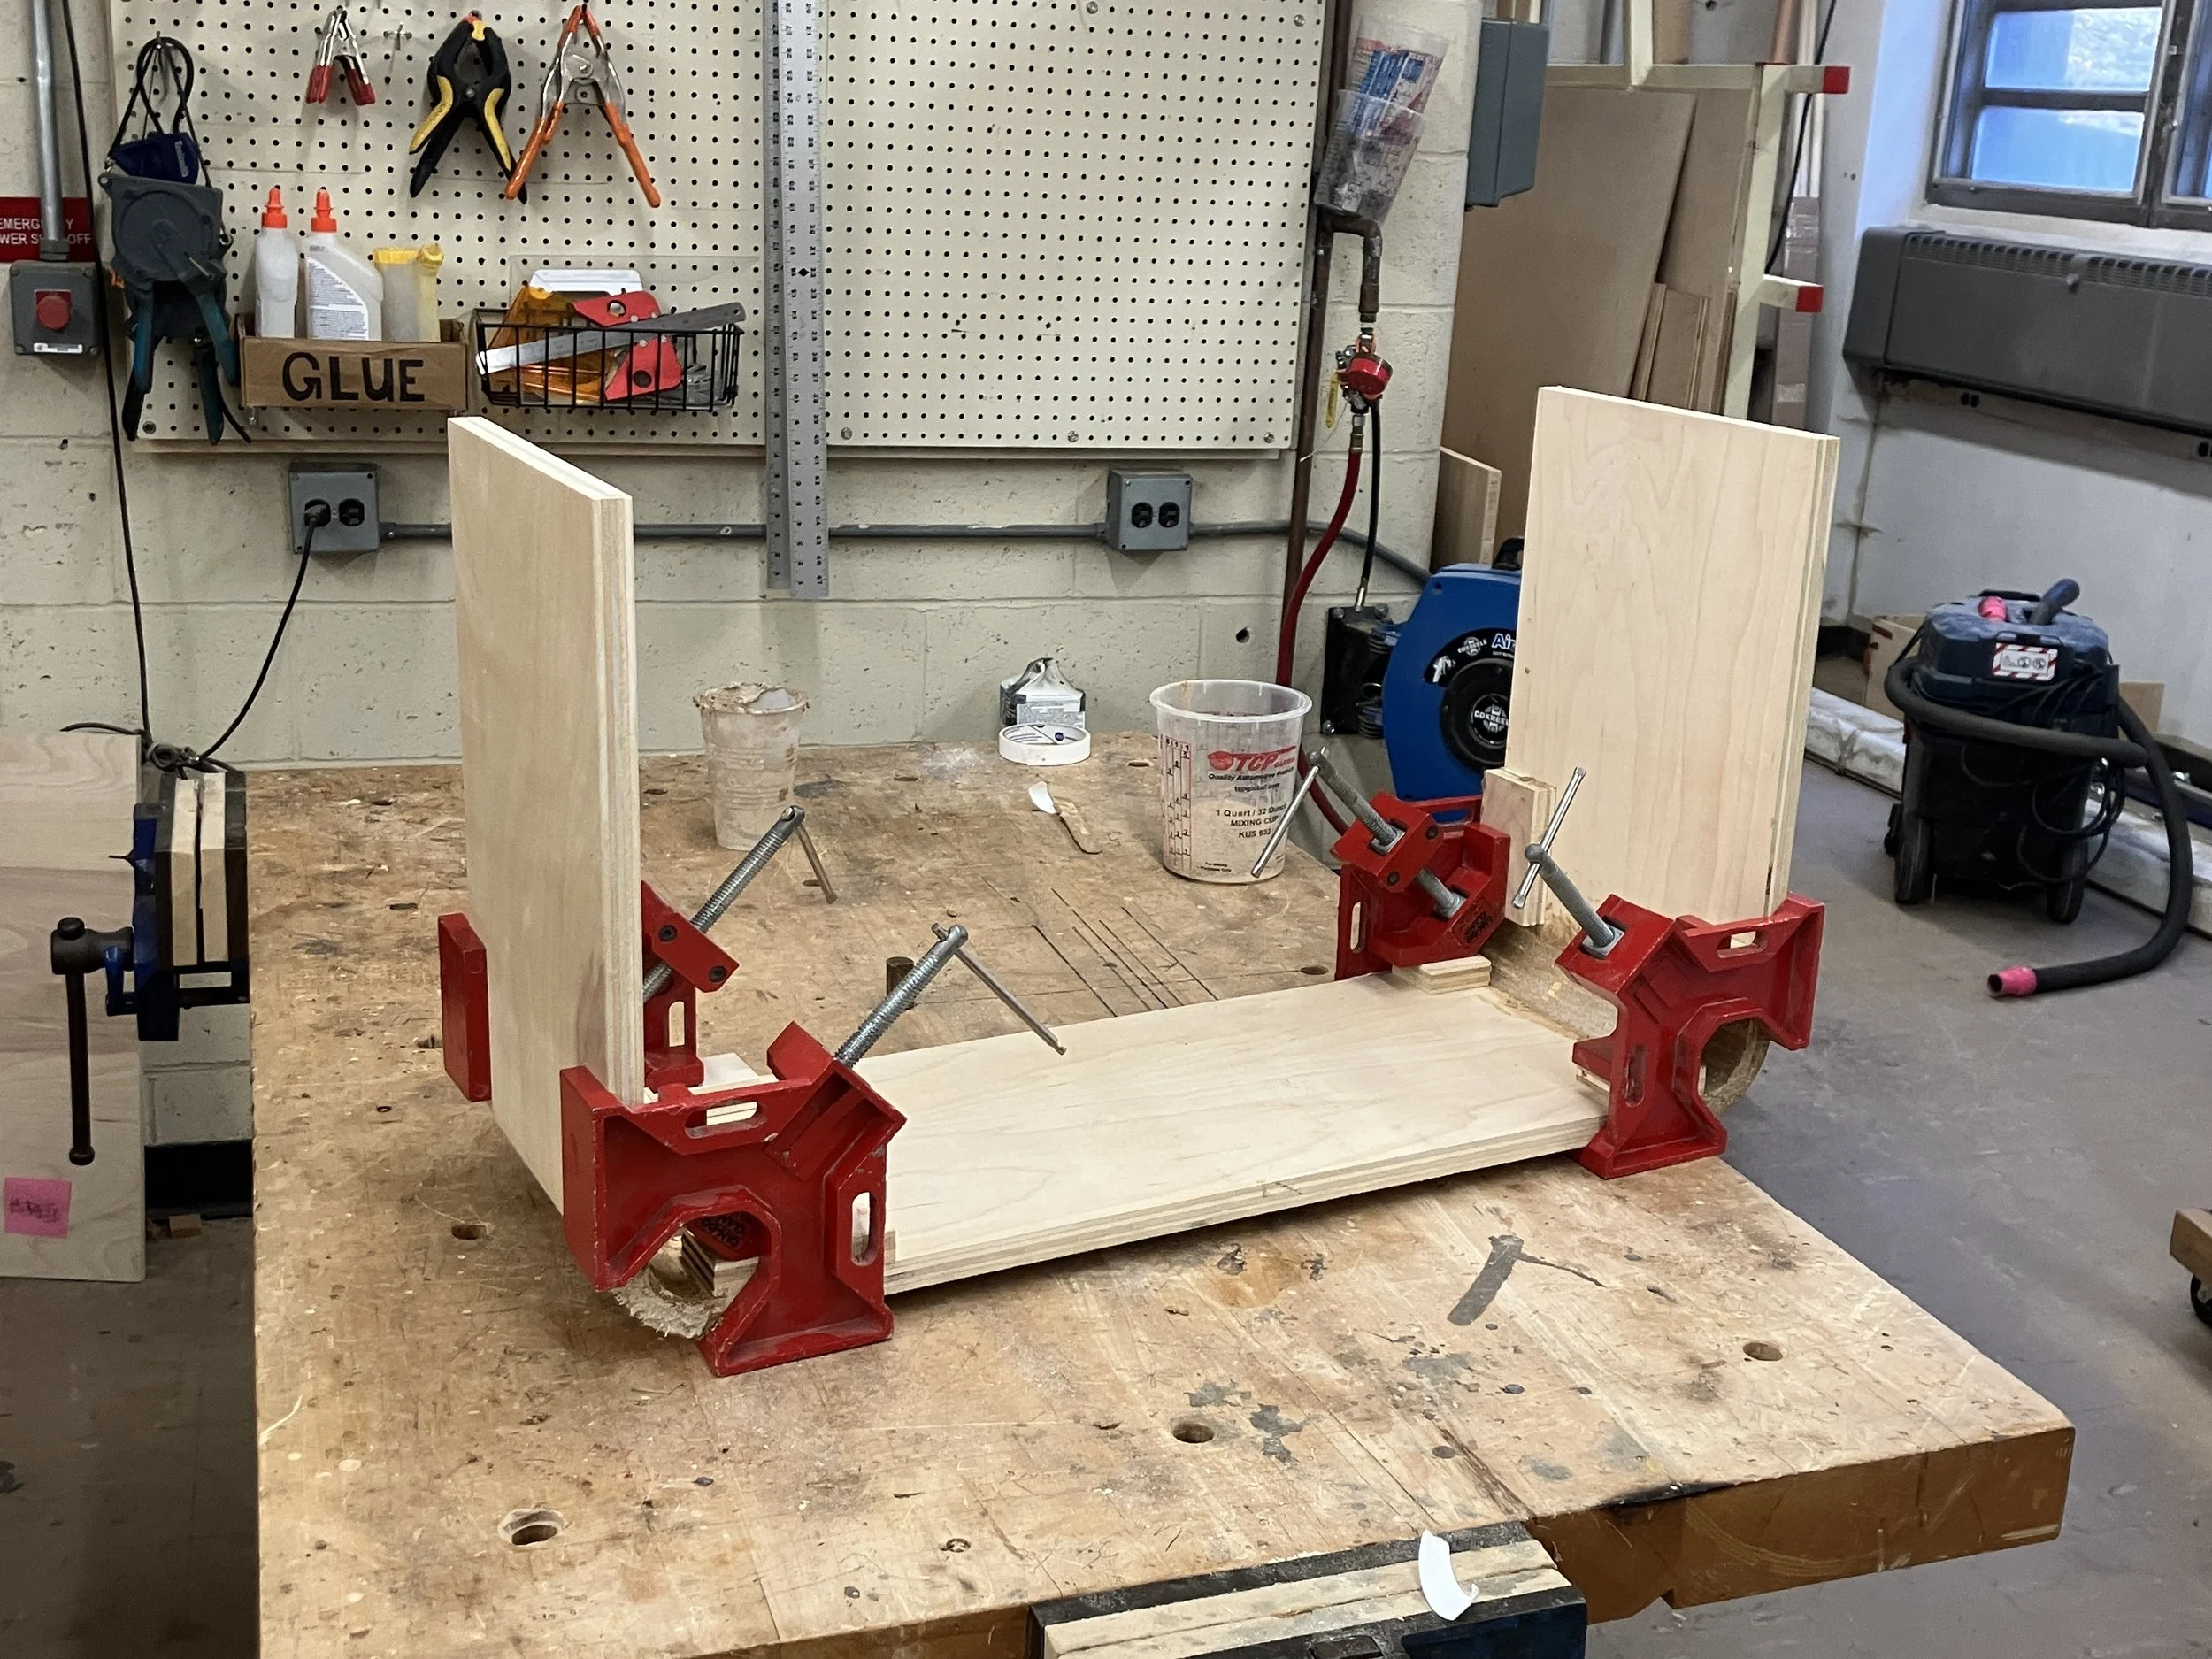
For the final bend I applied the glue and then clamped each joint in a right angle clamp and left it to dry for 2 days to minimize the possibility of warping.
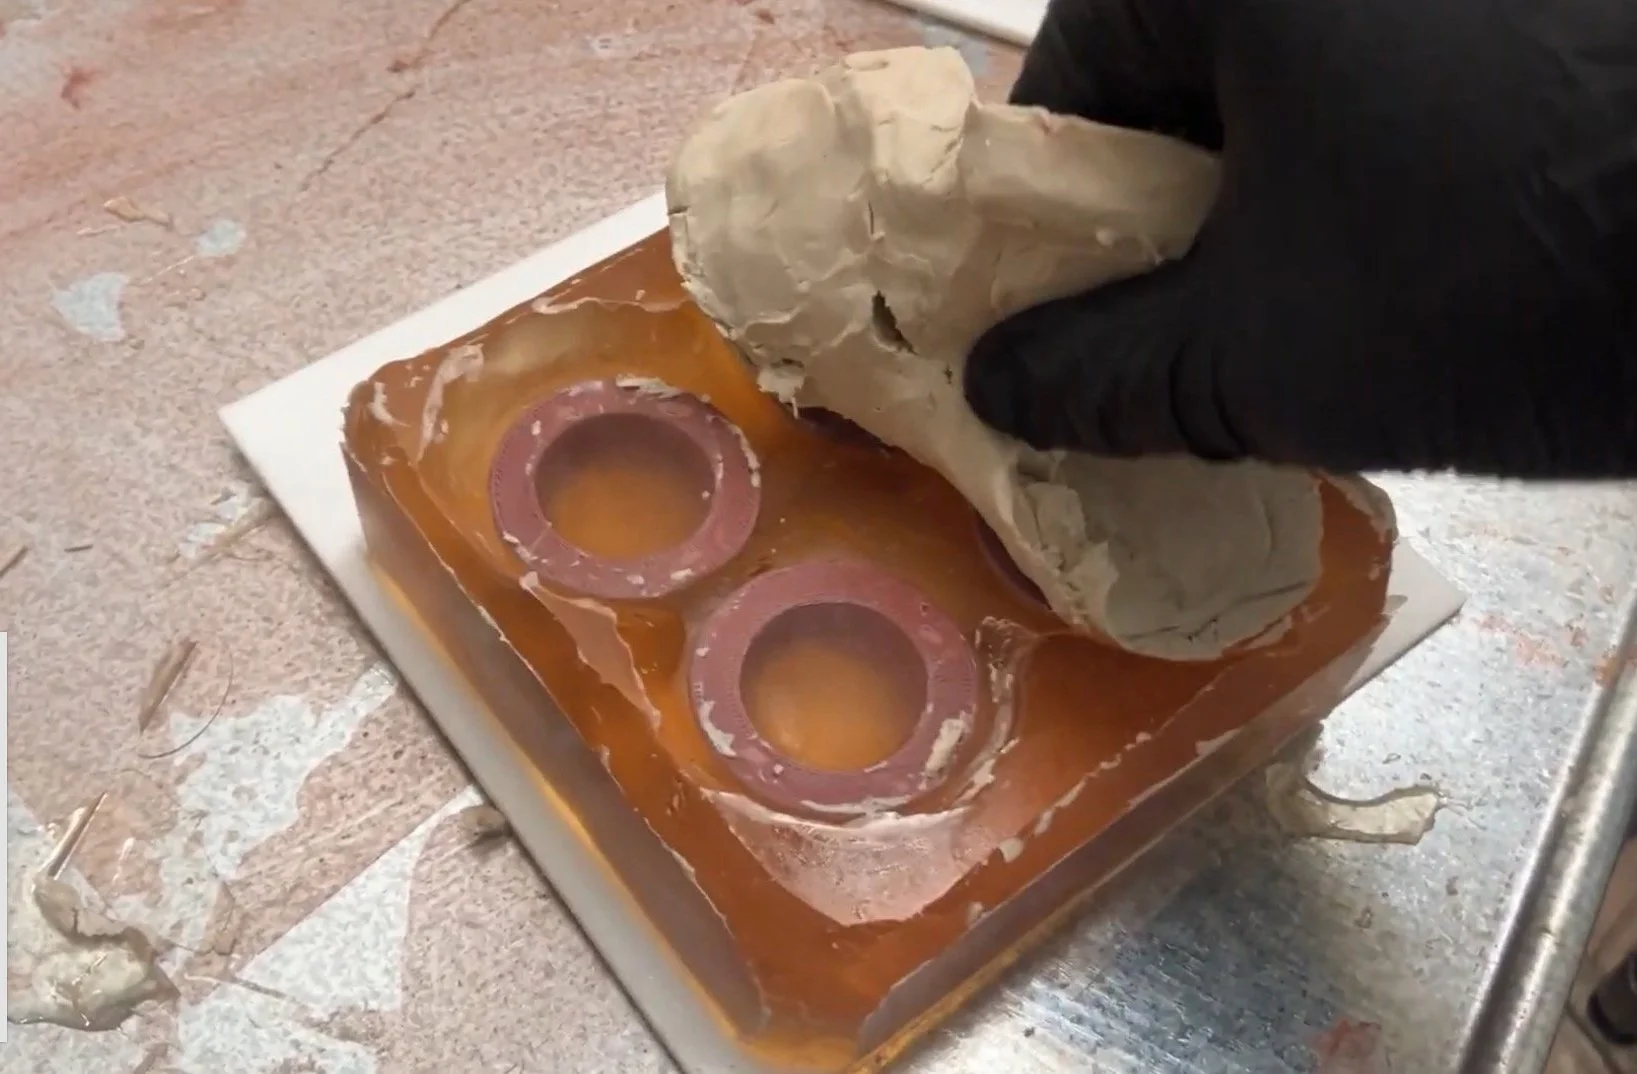

After demolding the first pour, I flipped the molds, removed the clay, and poured the second part of each.
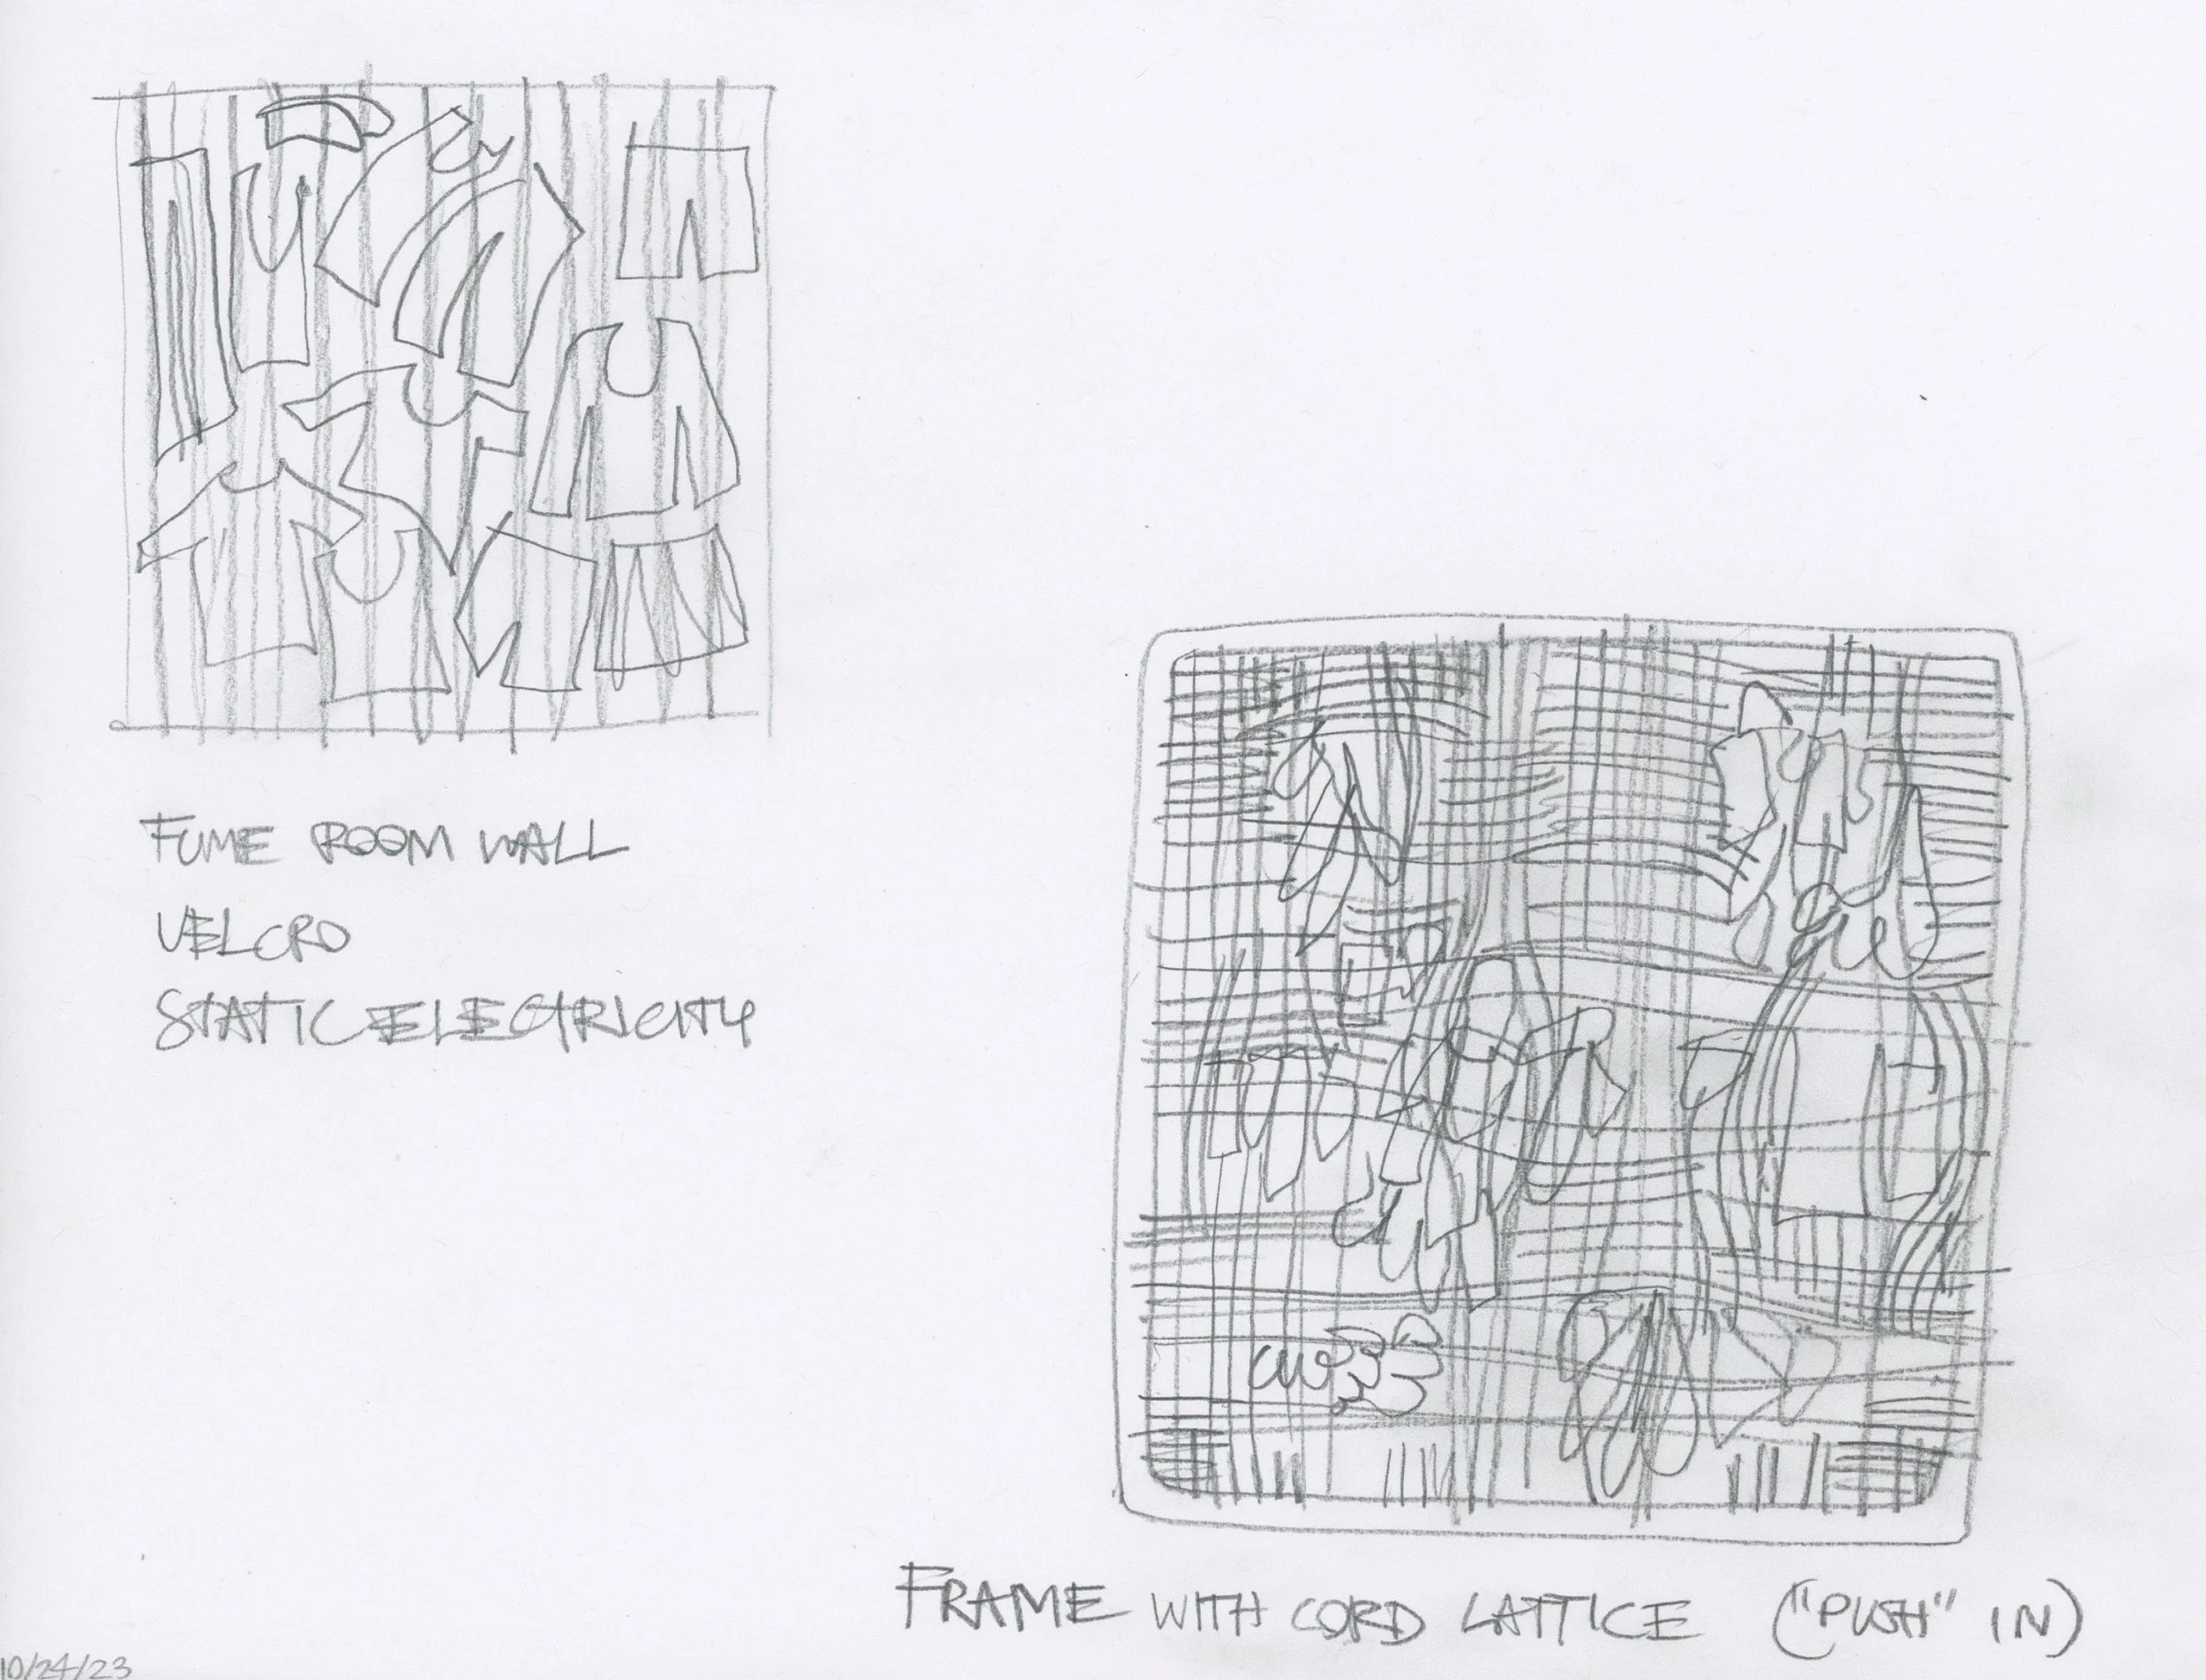
An even more flexible version of the ladder. A surface using suction or velcro to simply stick clothes to the wall. Allows for completely freeform placement.
On the right is a woven bungee lattice which holds clothes with tension.
I thought about how this could exist as a self-contained, freestanding product.
From here I fleshed out the final form of my product, defining every element, material, and interaction that made up the system. At the end of the 10th week I delivered my product proposal deck.
At the time of the product proposal, we had 5 weeks remaining. In my proposal, I specified that I would be making a full working model consisting of at least two frame modules and enough of every other module to properly illustrate my concept (three hammocks, four bungees, etc.) Many of the production methods I would be using were new to me, and many of the components I would be making were not fully designed at the beginning of this stage.

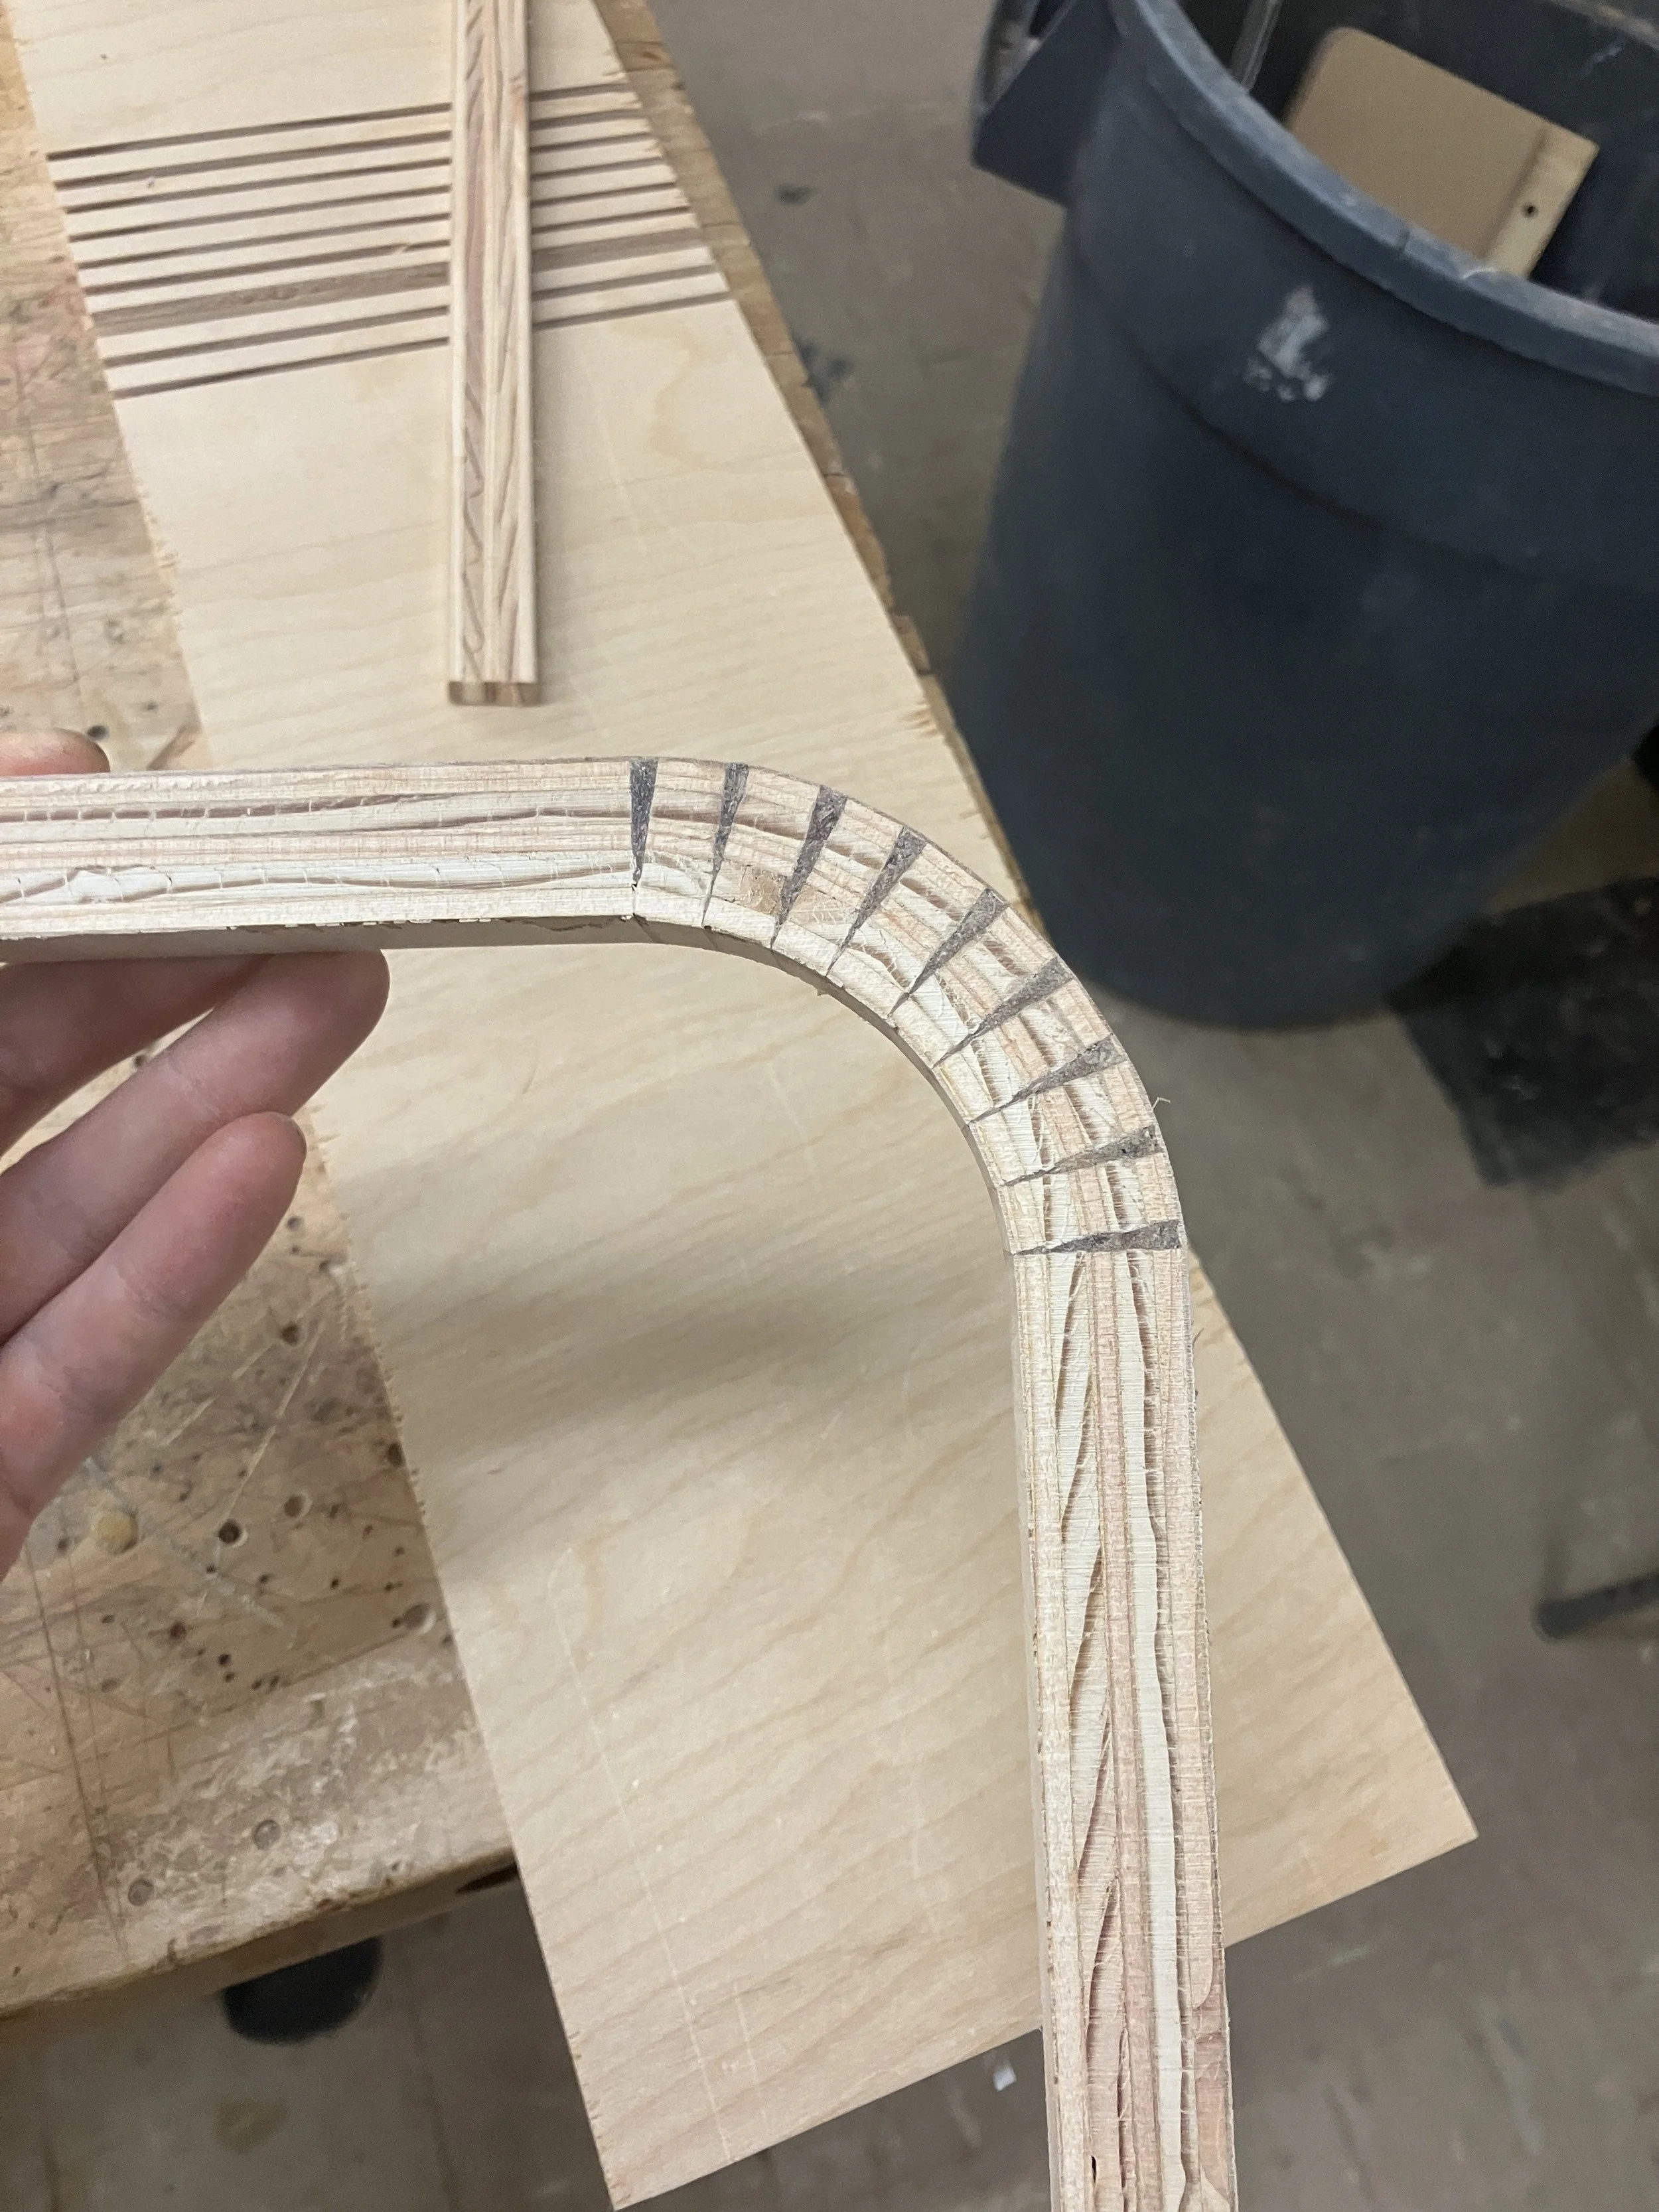
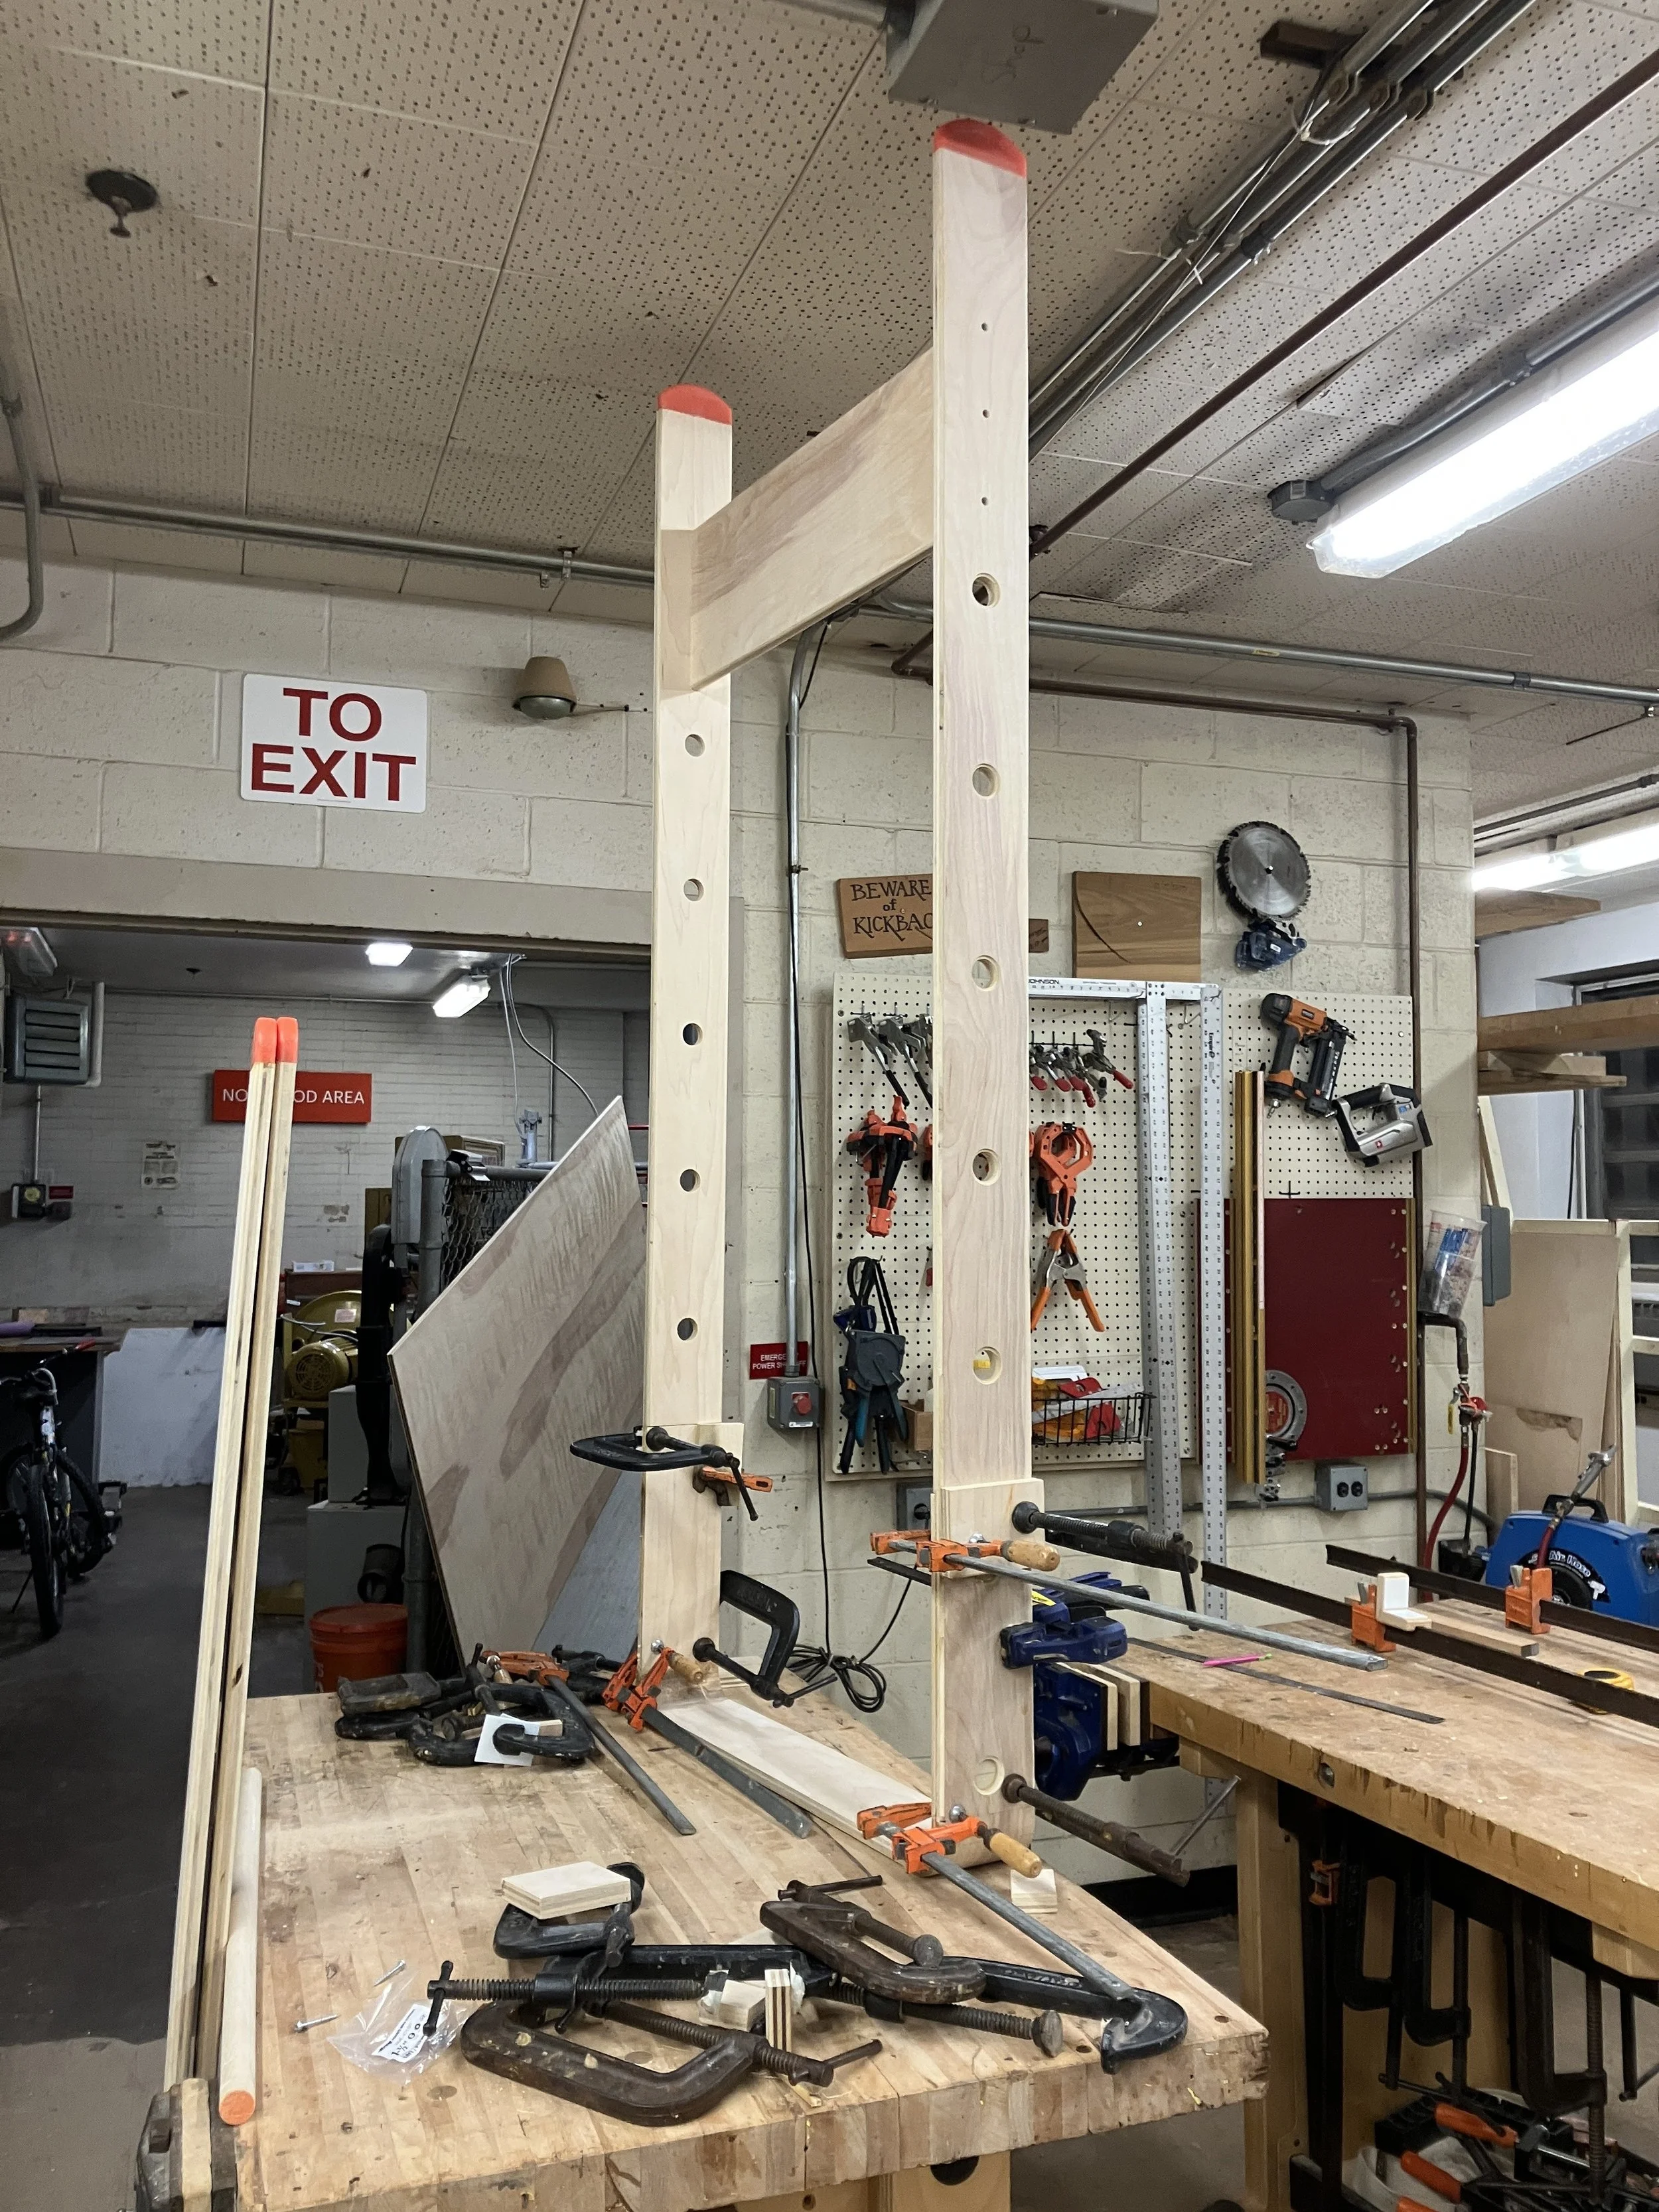
I wanted the frame’s presence to be very minimal. I decided kerf bending was the best way to treat the upper corners of the frame. I set the table saw to cut up to the last layer of plywood and made a jig to standardize the distance between cuts.


Once the molds were ready, I began producing the final parts. These were casted out of Smooth-On Smooth-Cast 325 with a custom mixed pigment.

Back to the frames: I made the dowels holes with the drill press. Each frame has 7 holes.


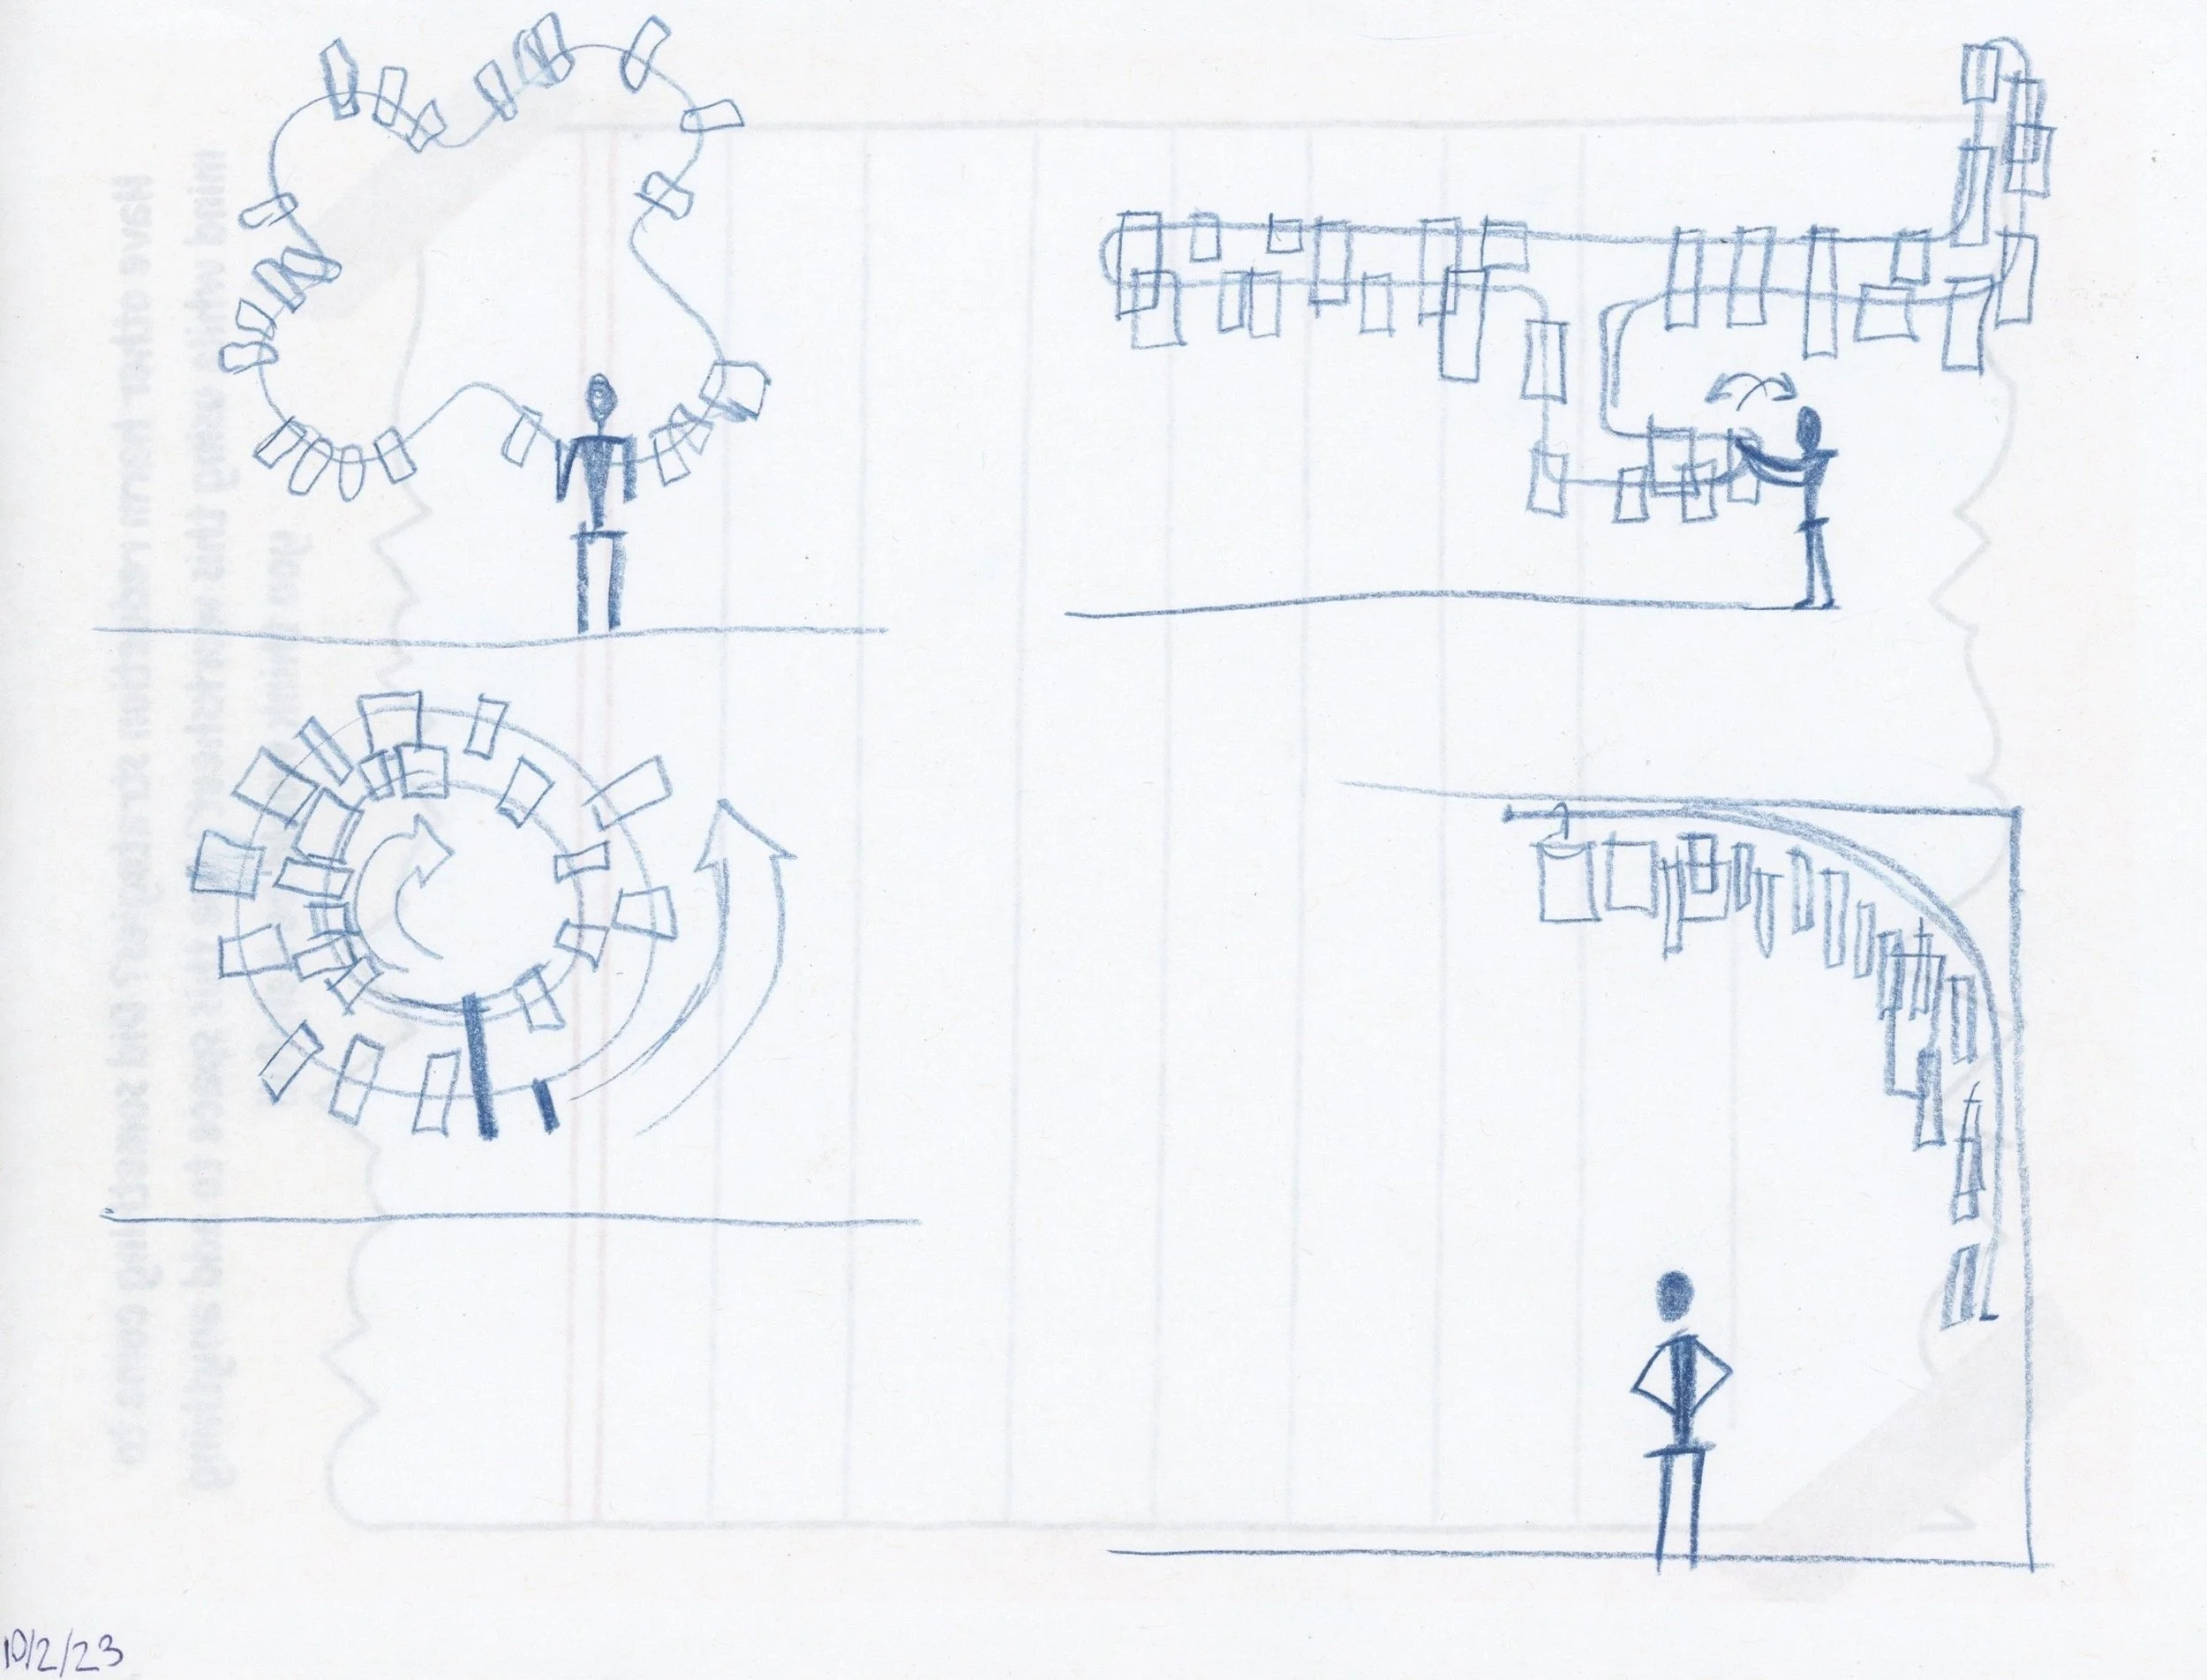
Different shapes that a wall-mounted system could take. How can movement create new compositions?
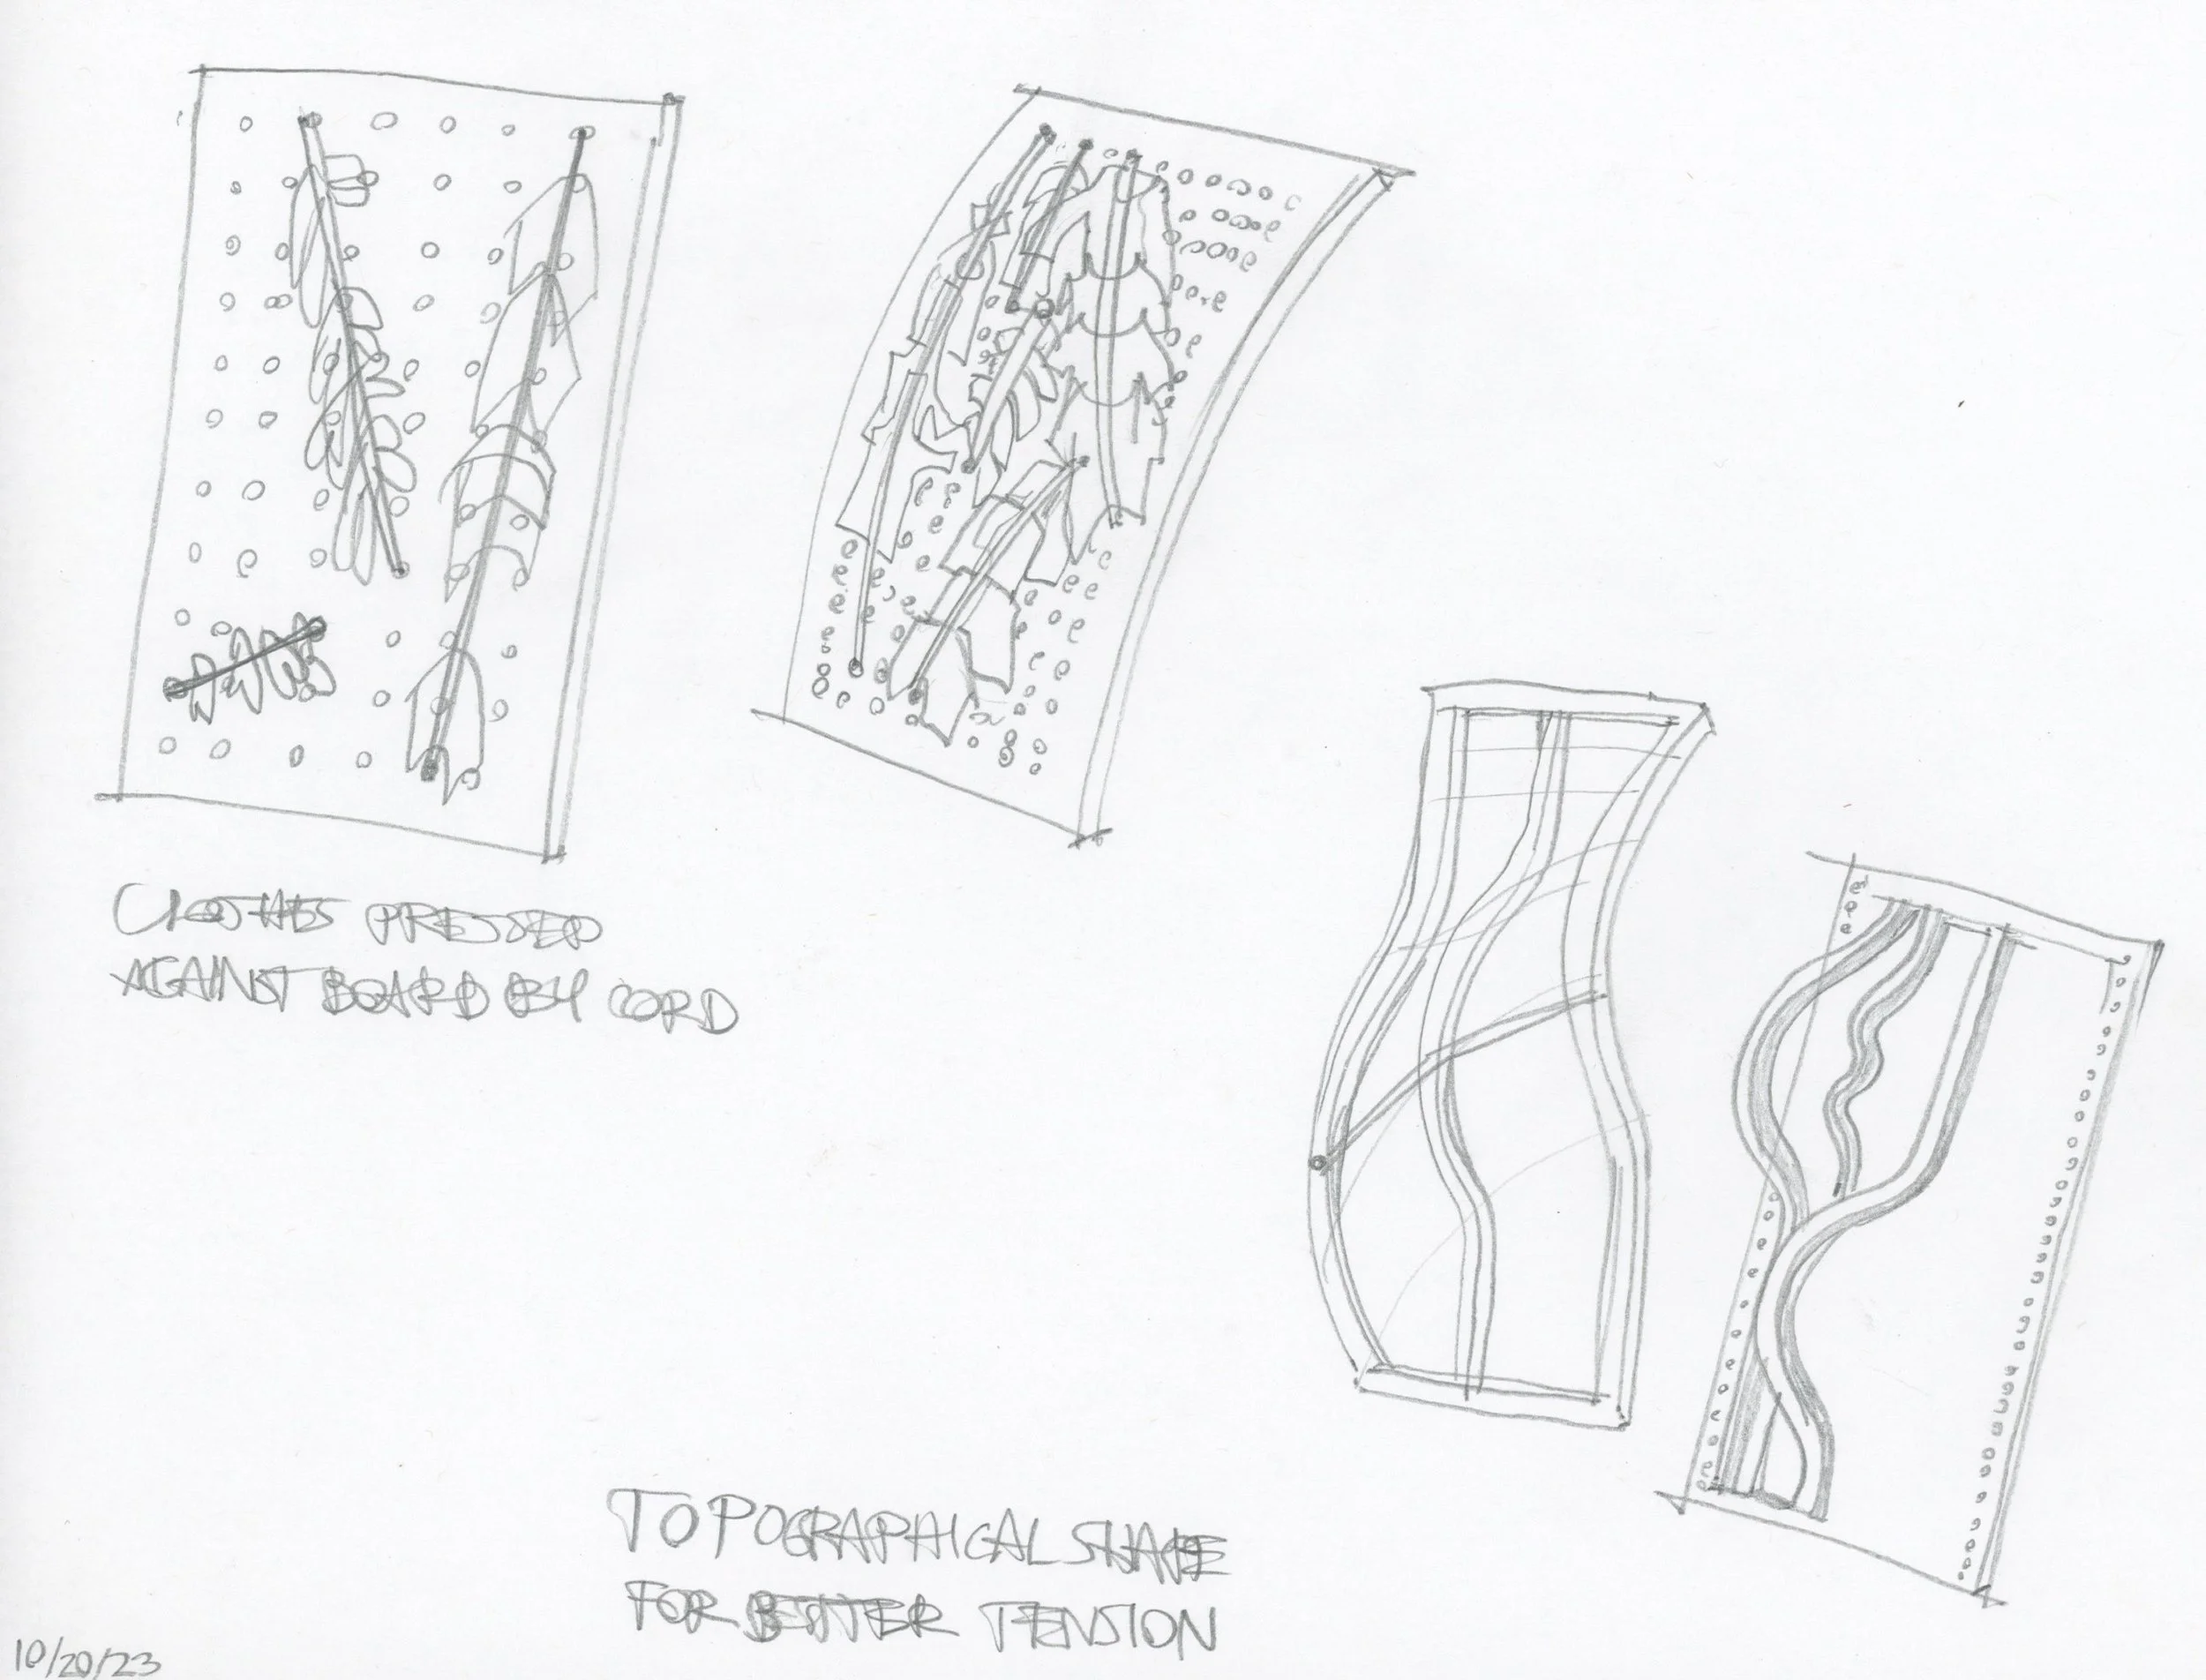
Freeform surface using bungee cords that can be arrange on surface by user.
I considered modularity and customizability. How can the user easily configure the object?
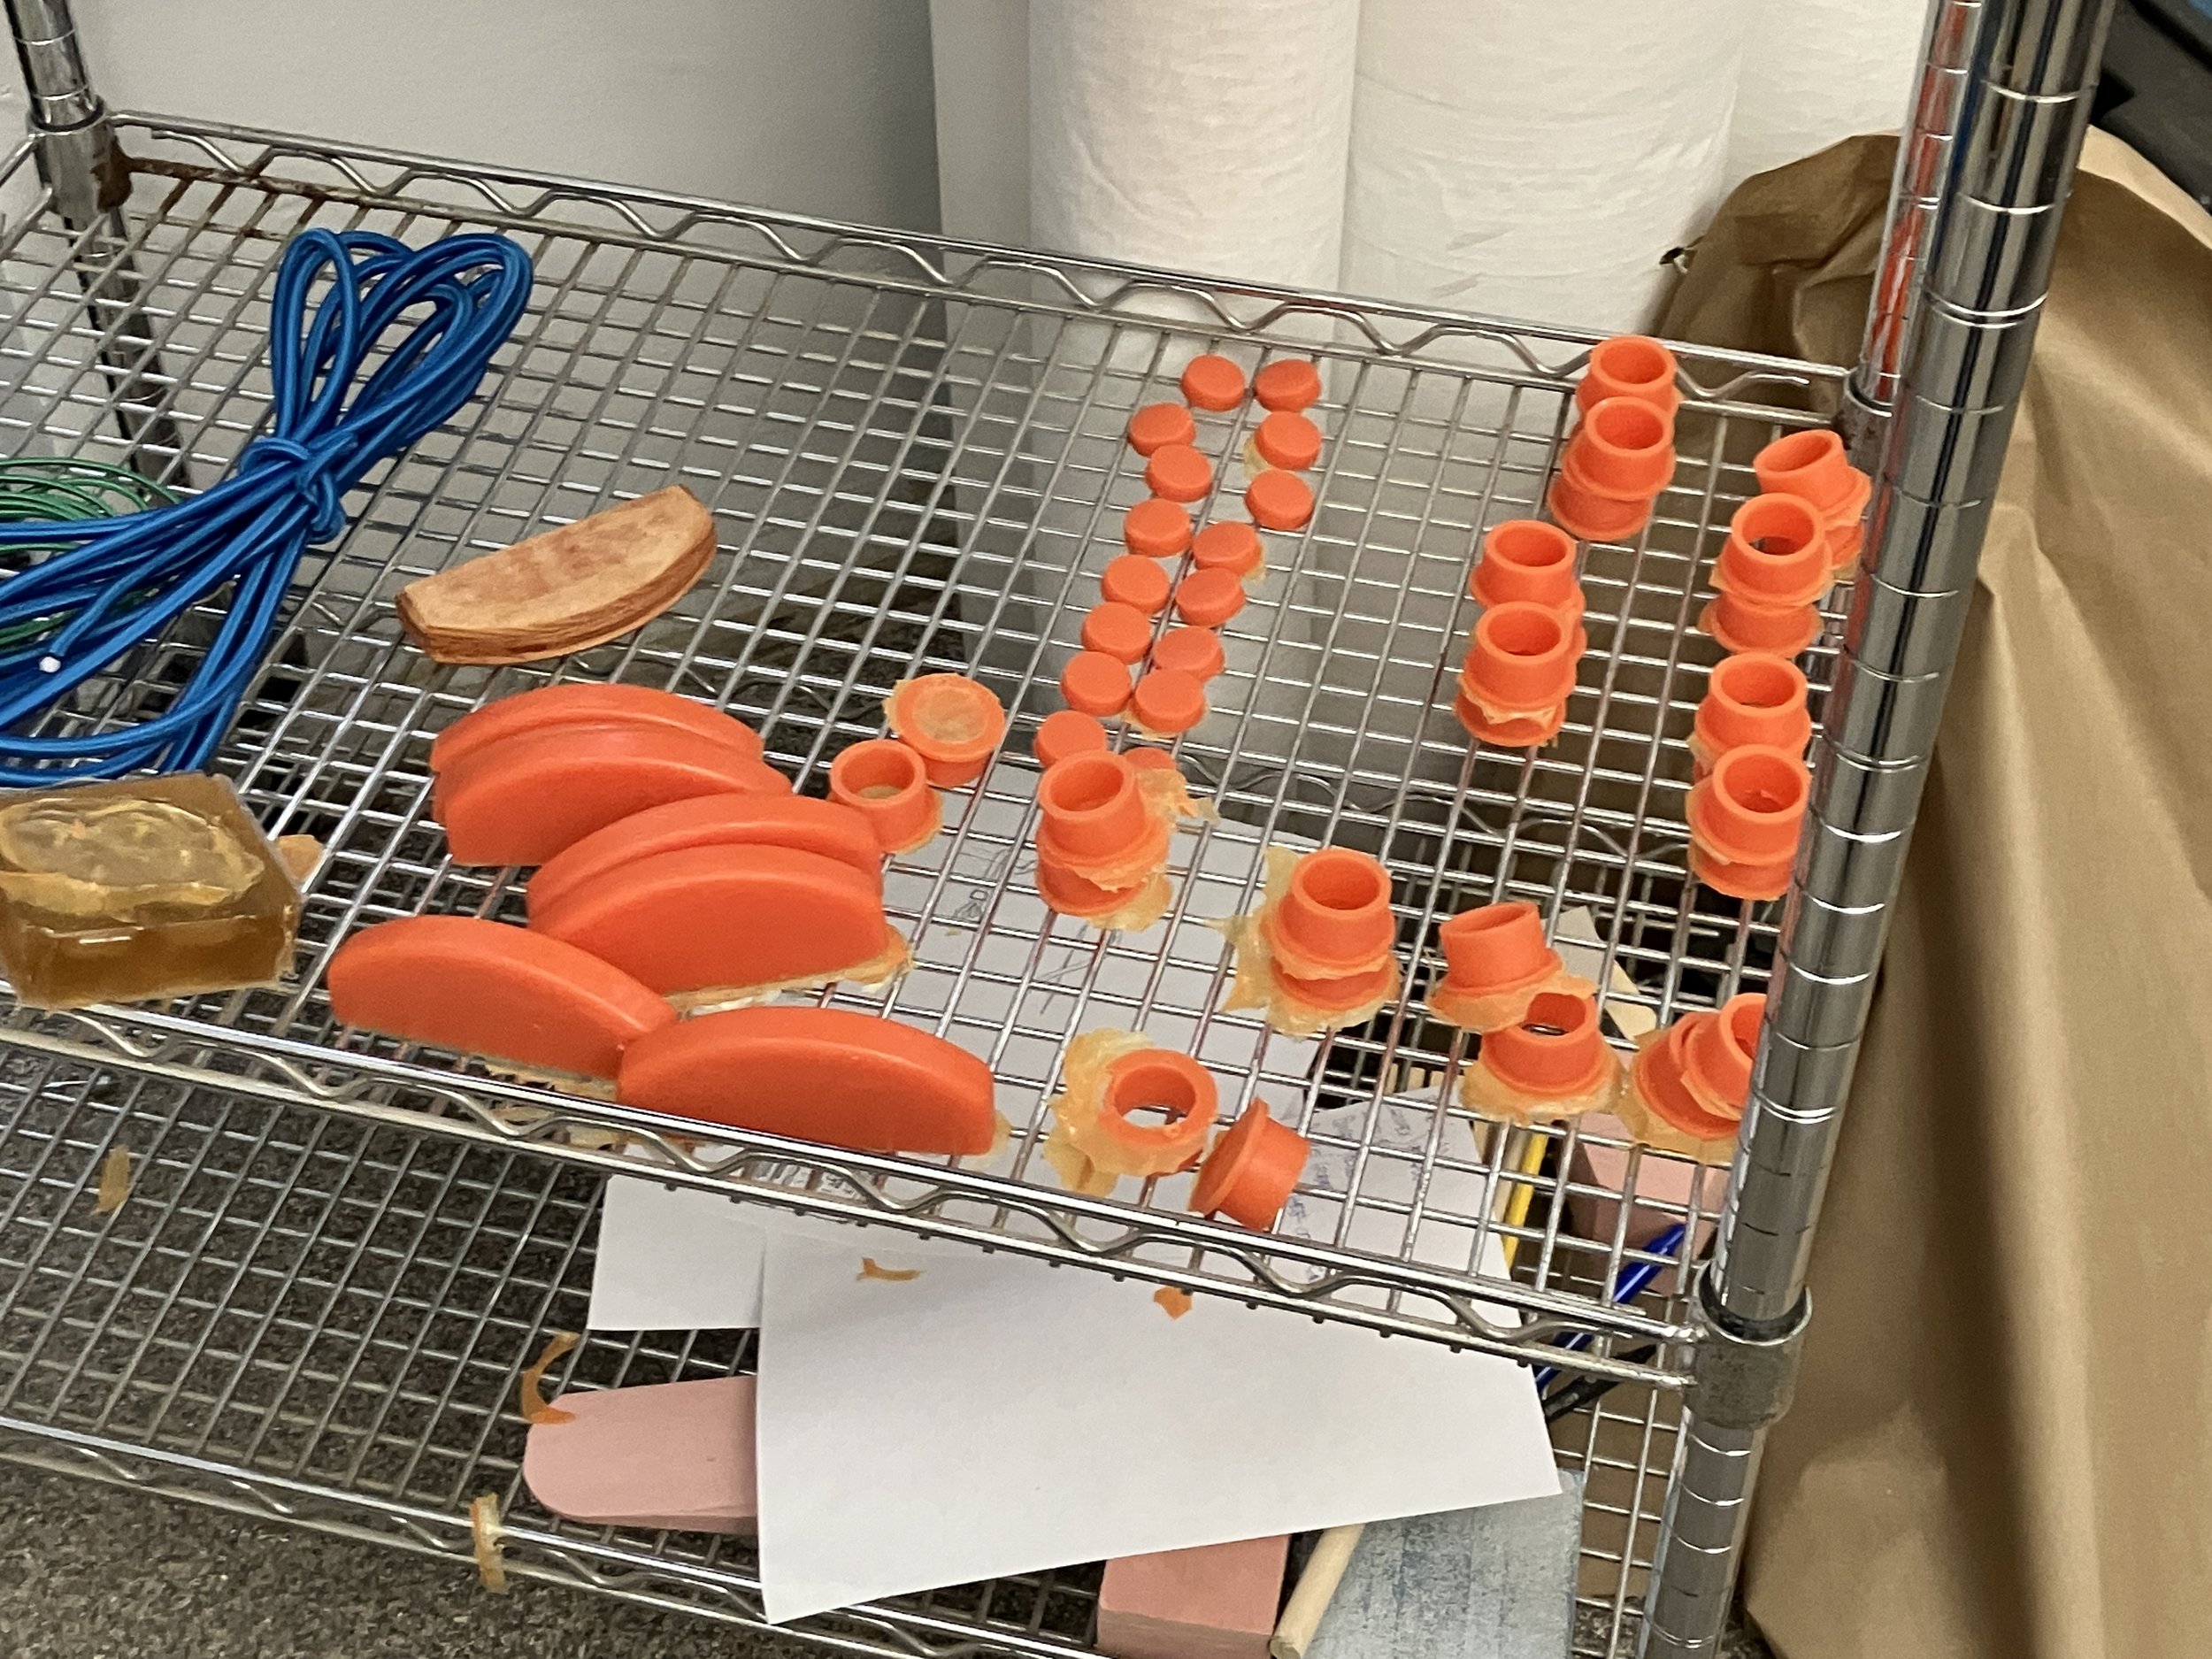
Many pours later^

I assembled the frames with a lap joint connecting the top and sides and a screwed in stretcher to stabilize the frame.