Table & Stool
15 weeks
Fall 2023
Drawing
Hand prototyping
CAD
Woodworking
A semester-long exploration of wood, joinery, and furniture design.
In this course, we learned wood joinery through two projects: making a table and making a chair.
Throughout the semester we learned every process necessary to turn raw lumber into beautiful, functional furniture.
The table:
I wanted to create a bedside table to hold some of my most precious personal items.
My initial sketches attempted to emulate a schoolhouse desk aesthetic, with childlike proportions. I slowly added curves to the geometry to elevate the form.
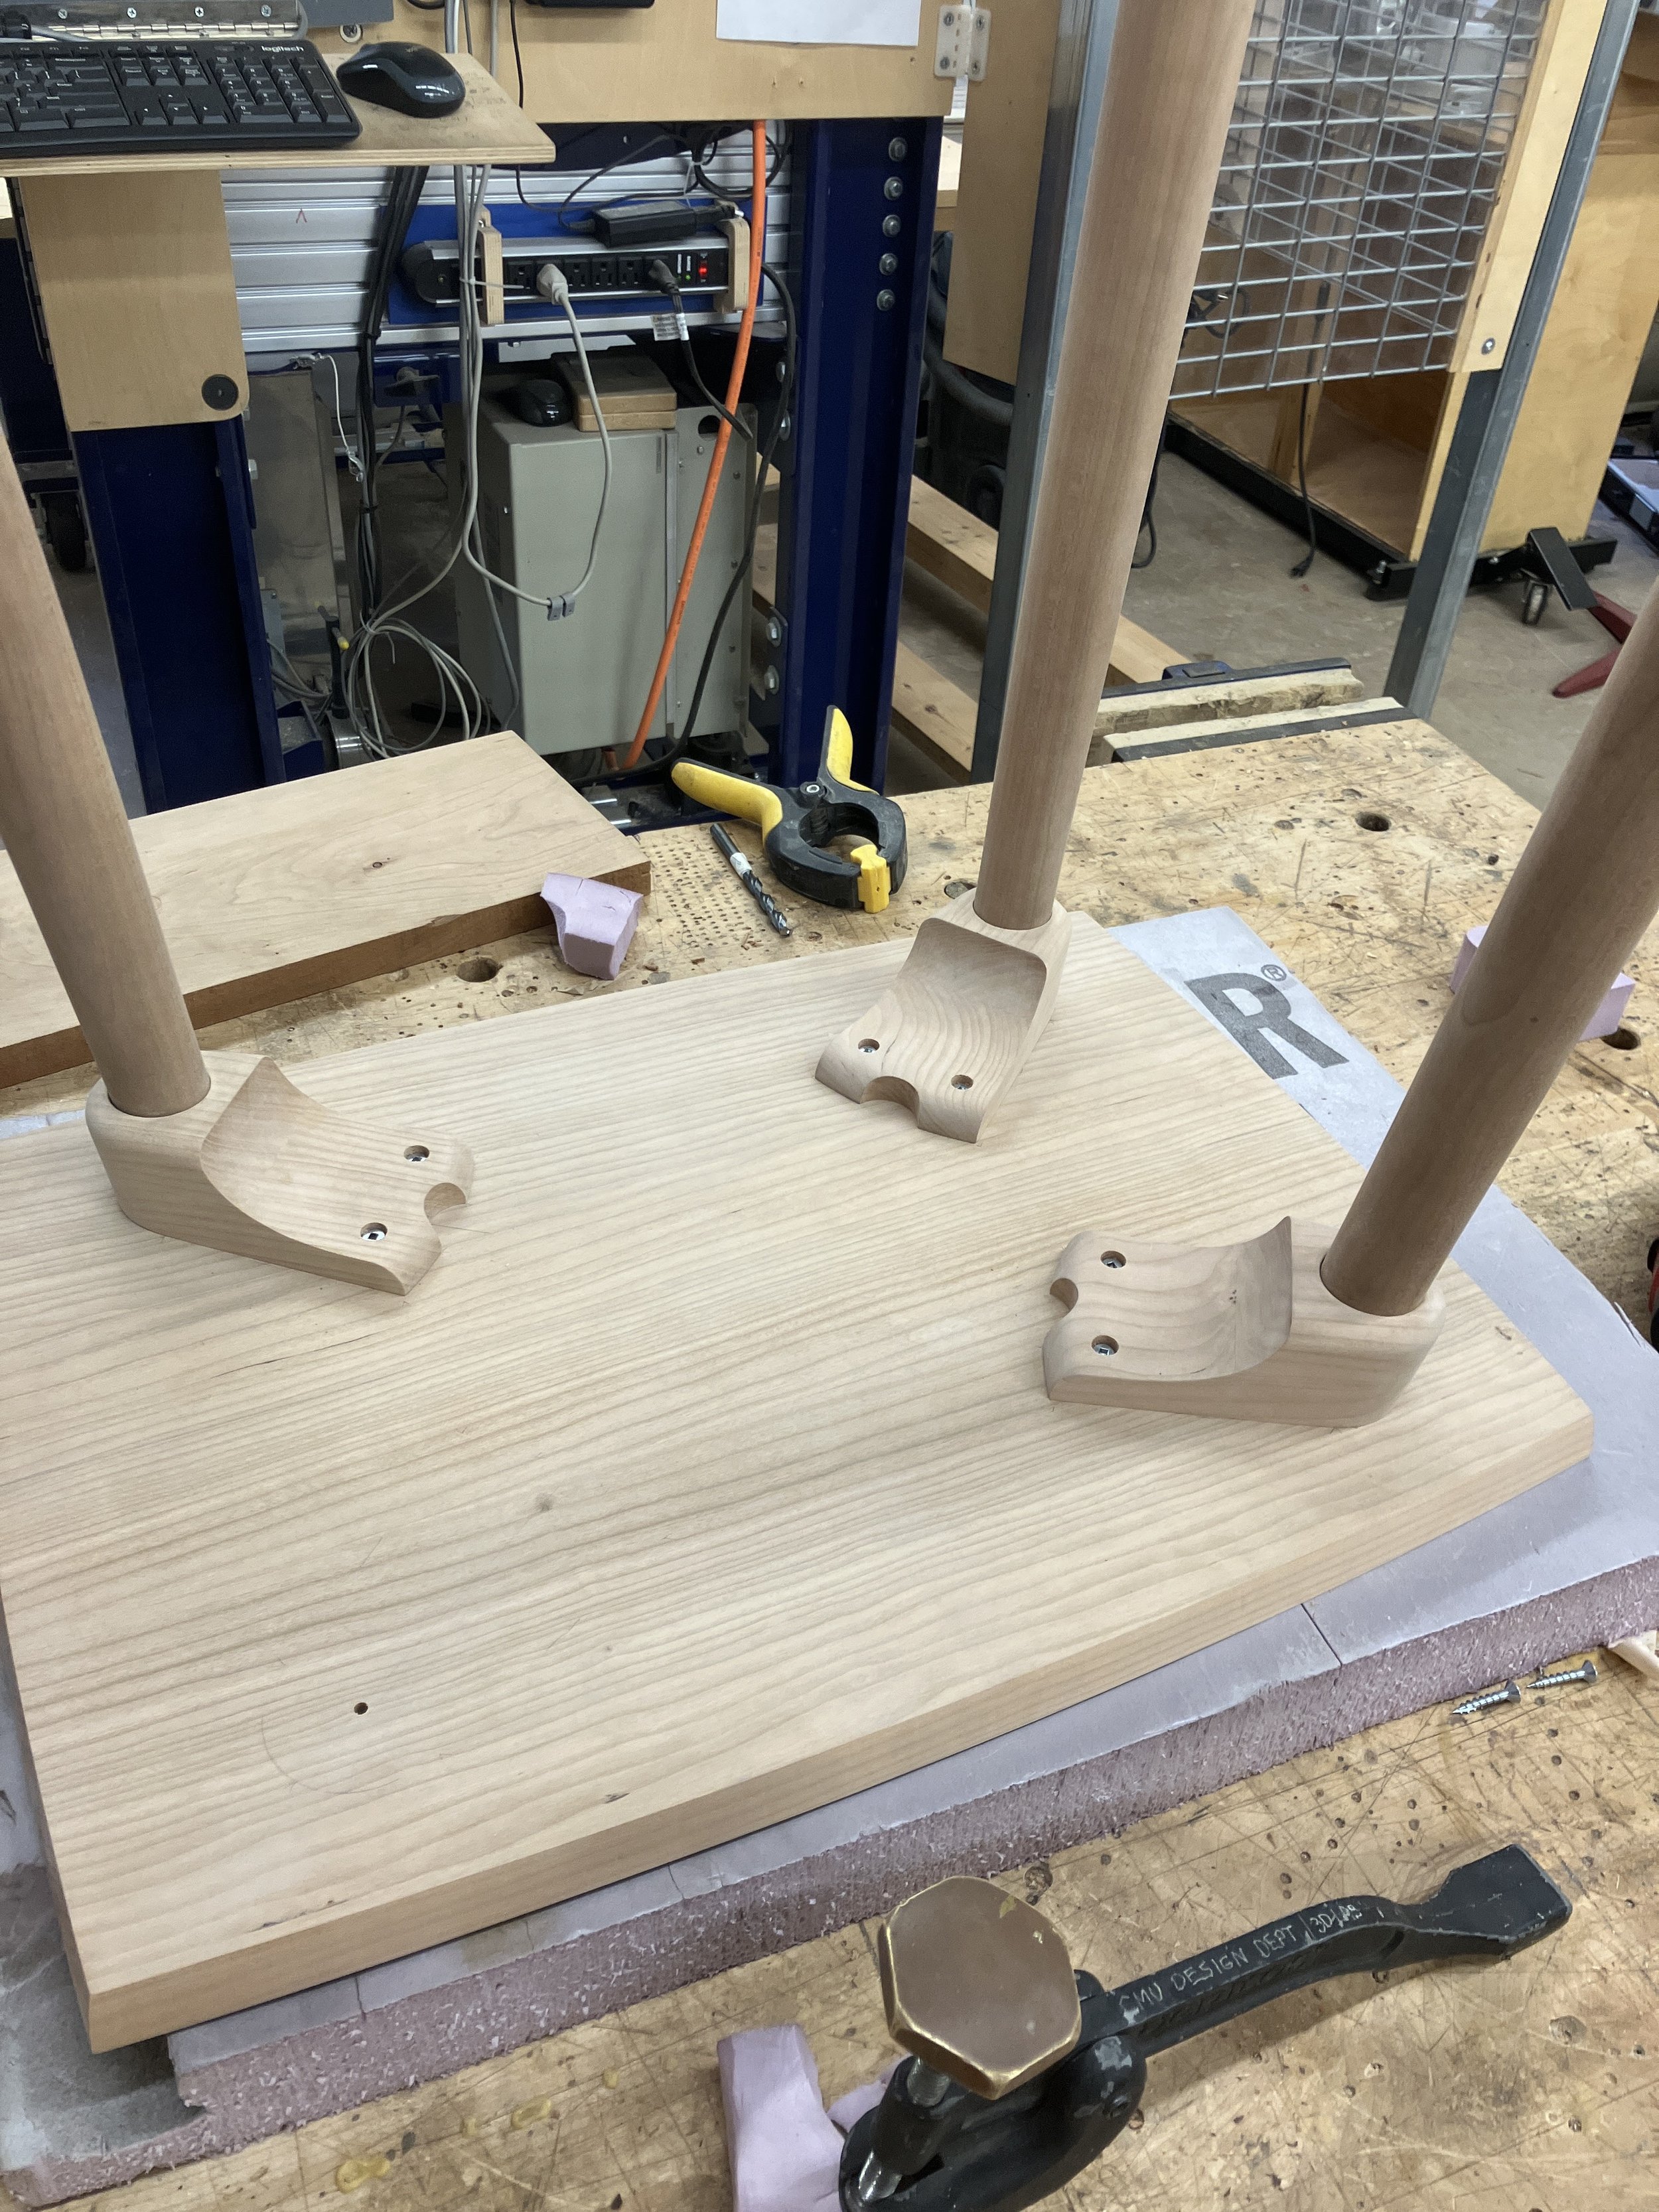
I soon decided I wanted the legs to emerge from the table top at a slight angle. To ensure a repeatable angle, and to strengthen the connection between the leg and top, I decided I would create an intermediate piece to act as a “brace.”

After finalizing dimensions, I made my lumber purchase. I purchased one board for the table top and one thicker piece out of which to turn my legs.

After finalizing dimensions, we made our lumber purchases. I purchased one board for the table top and one thicker piece out of which to turn my legs.
Using another laser cut stencil, I formed the legs one by one on the lathe, frequently holding the stencil up to check the silhouette of the leg. Using this process I was able to ensure all four legs were visually identical.

I screwed the legs into the table from the top and the connectors into the table from the bottom.


At this point I began modeling to figure out proportions. Below is a comparison of two different degrees of angle for the leg. I liked the legs being thicker toward the bottom because I felt it gave the table the playful and juvenile posture that I was looking for.

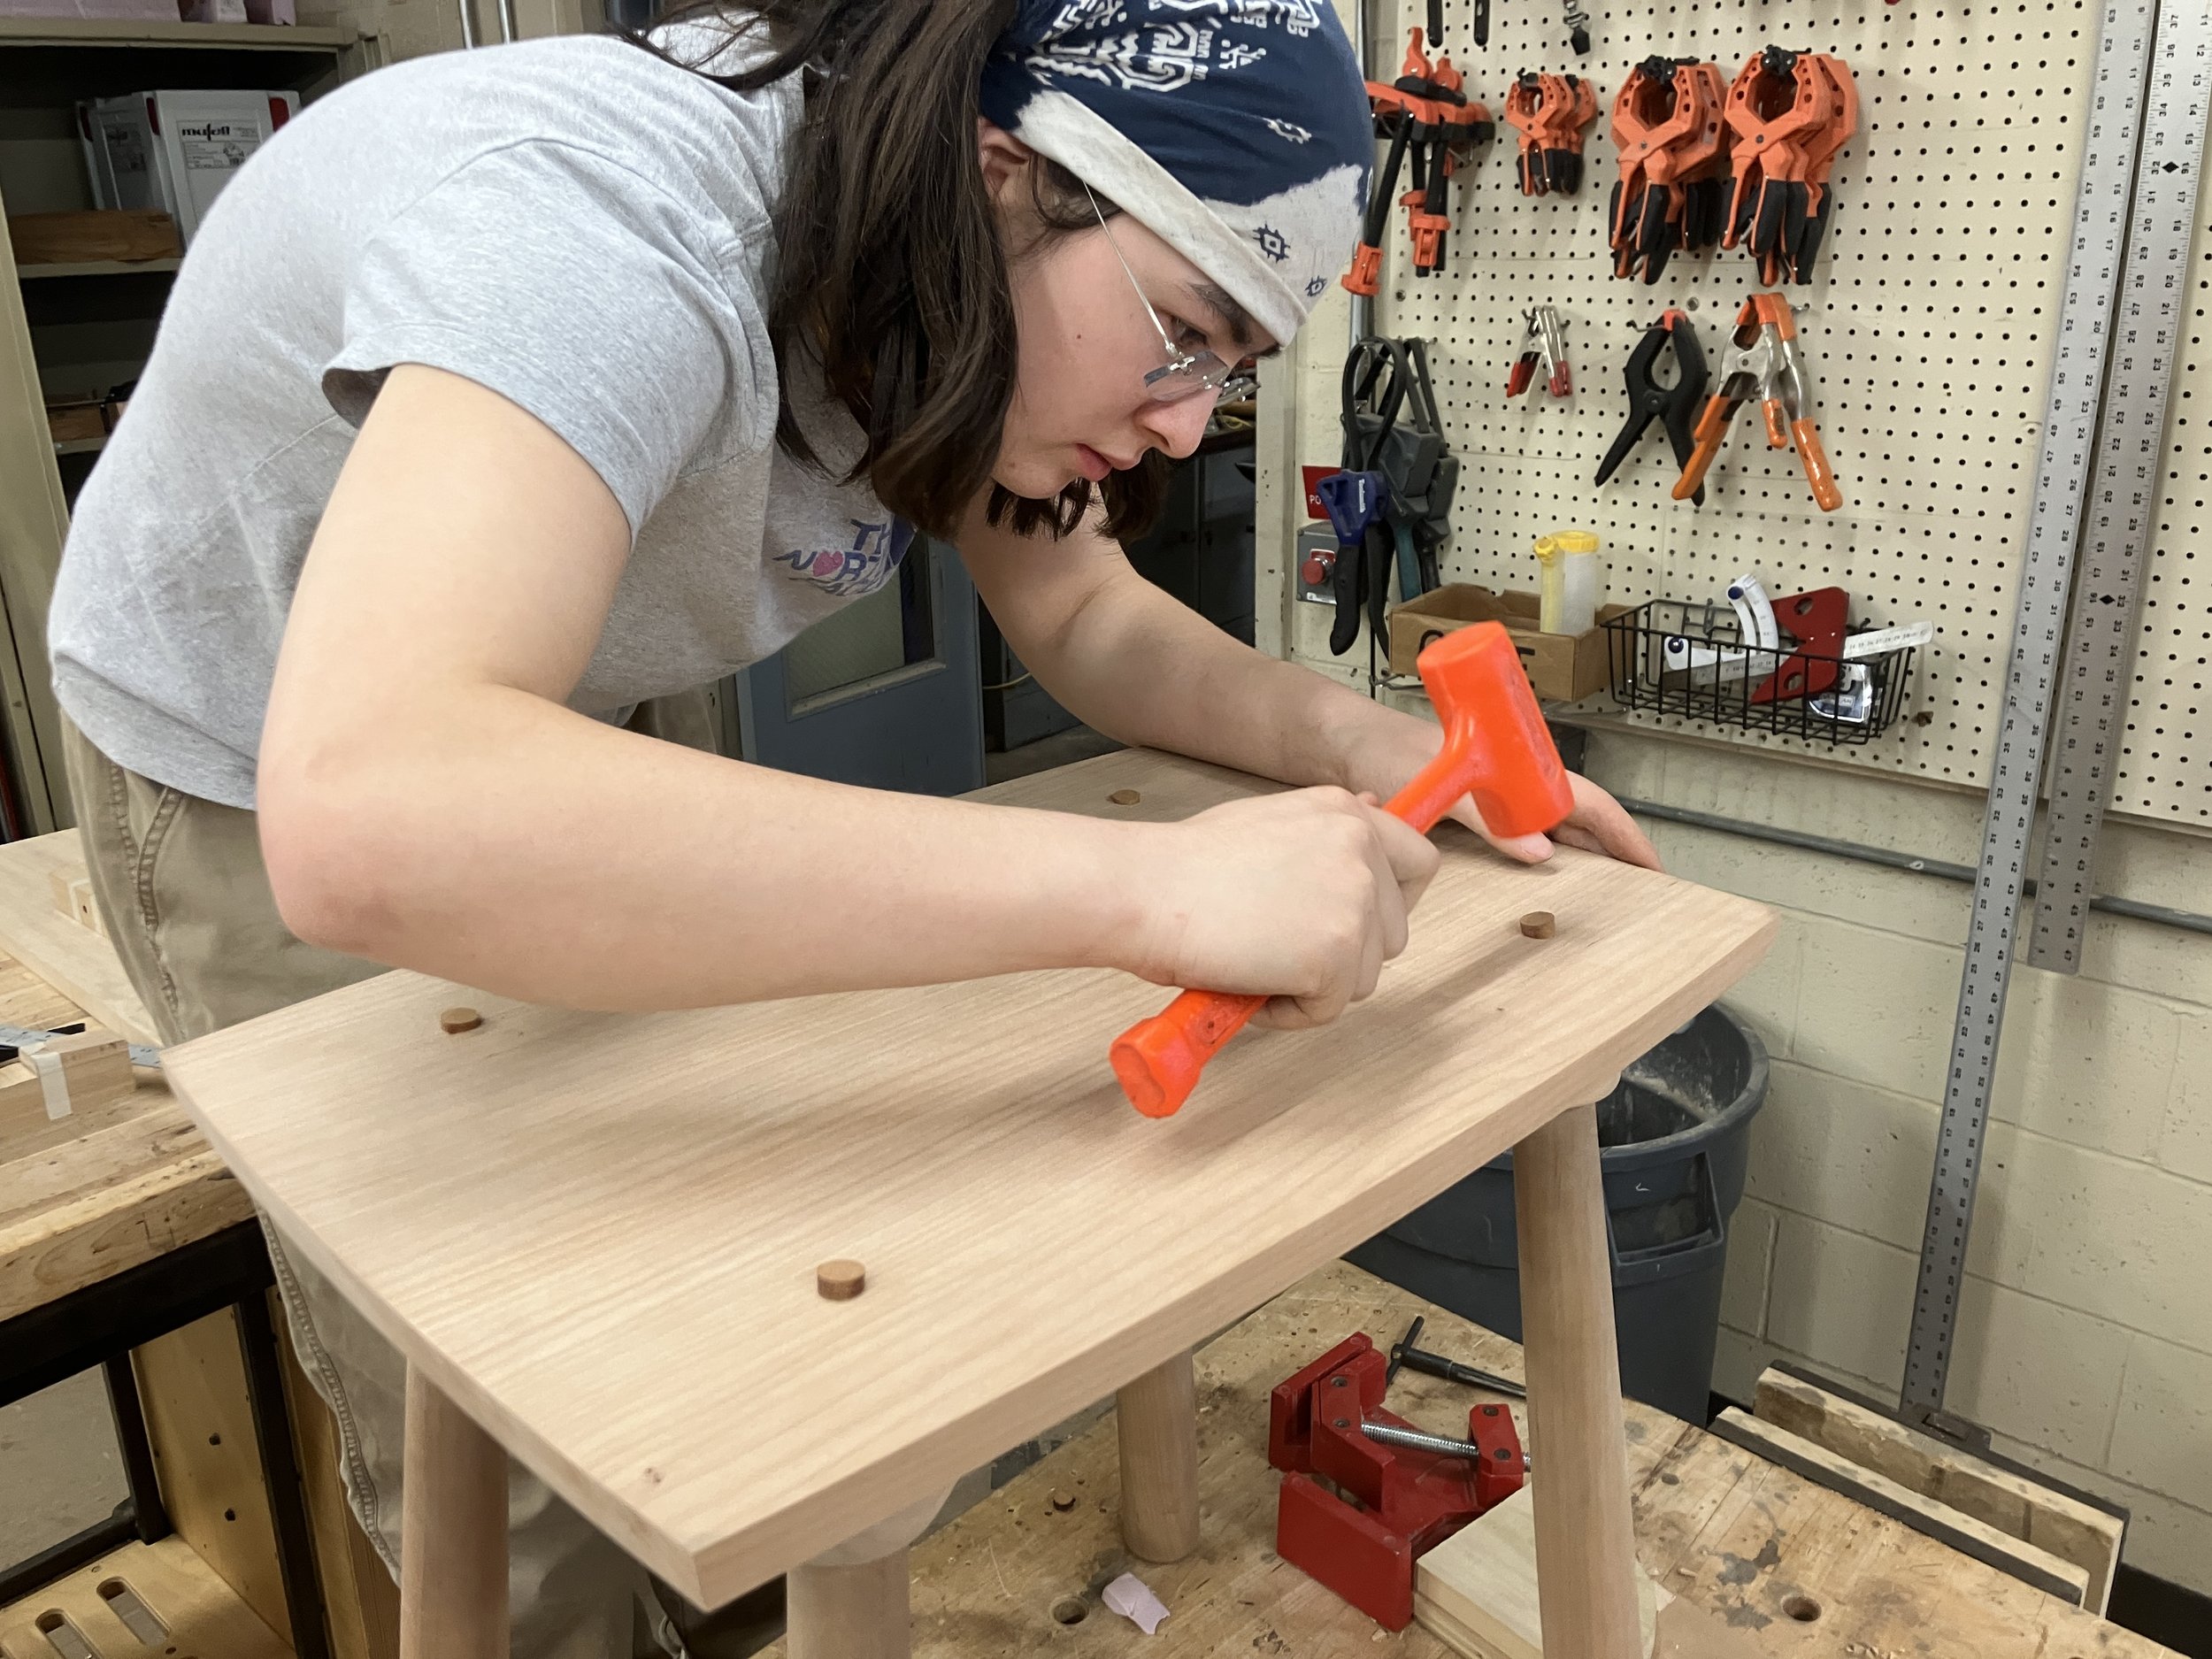
After cutting, joining, planing, and resting my three table top boards, I glued and clamped them, allowing them to dry overnight. Each seam had 3 biscuits to register and strengthen the connection.

For the connector pieces, I used printed guides made in Illustrator to map out cuts. Then I systematically formed each piece using the bandsaw, belt and spindle sander, and table router.
Using the drill press, I made the pilot holes for the leg screws using guides to establish the compound angle at which the legs would be attached.
I then used a large, laser cut acrylic stencil to map and cut the subtle curve of the table top. After an initial pass with the bandsaw, I used another stencil and a tapered router blade to finish the edge.


I wedged the legs into the connectors with brass shim stock and put a pocket screw through the top, into the leg of each.


Finally, I put in the plugs, taken from a darker section of lumber for a subtle contrast.
Final result:


Stool:
Moving from making a table to making a chair meant that I would now have to pay more attention to ergonomics and strength. While my table was a resting place for rarely-used items, my chair would be moved around and sat on every day.


To achieve the seat pan’s tapered mortise I used a metal hole reamer in the mill machine, allowing me to control the angle and depth of the hole.
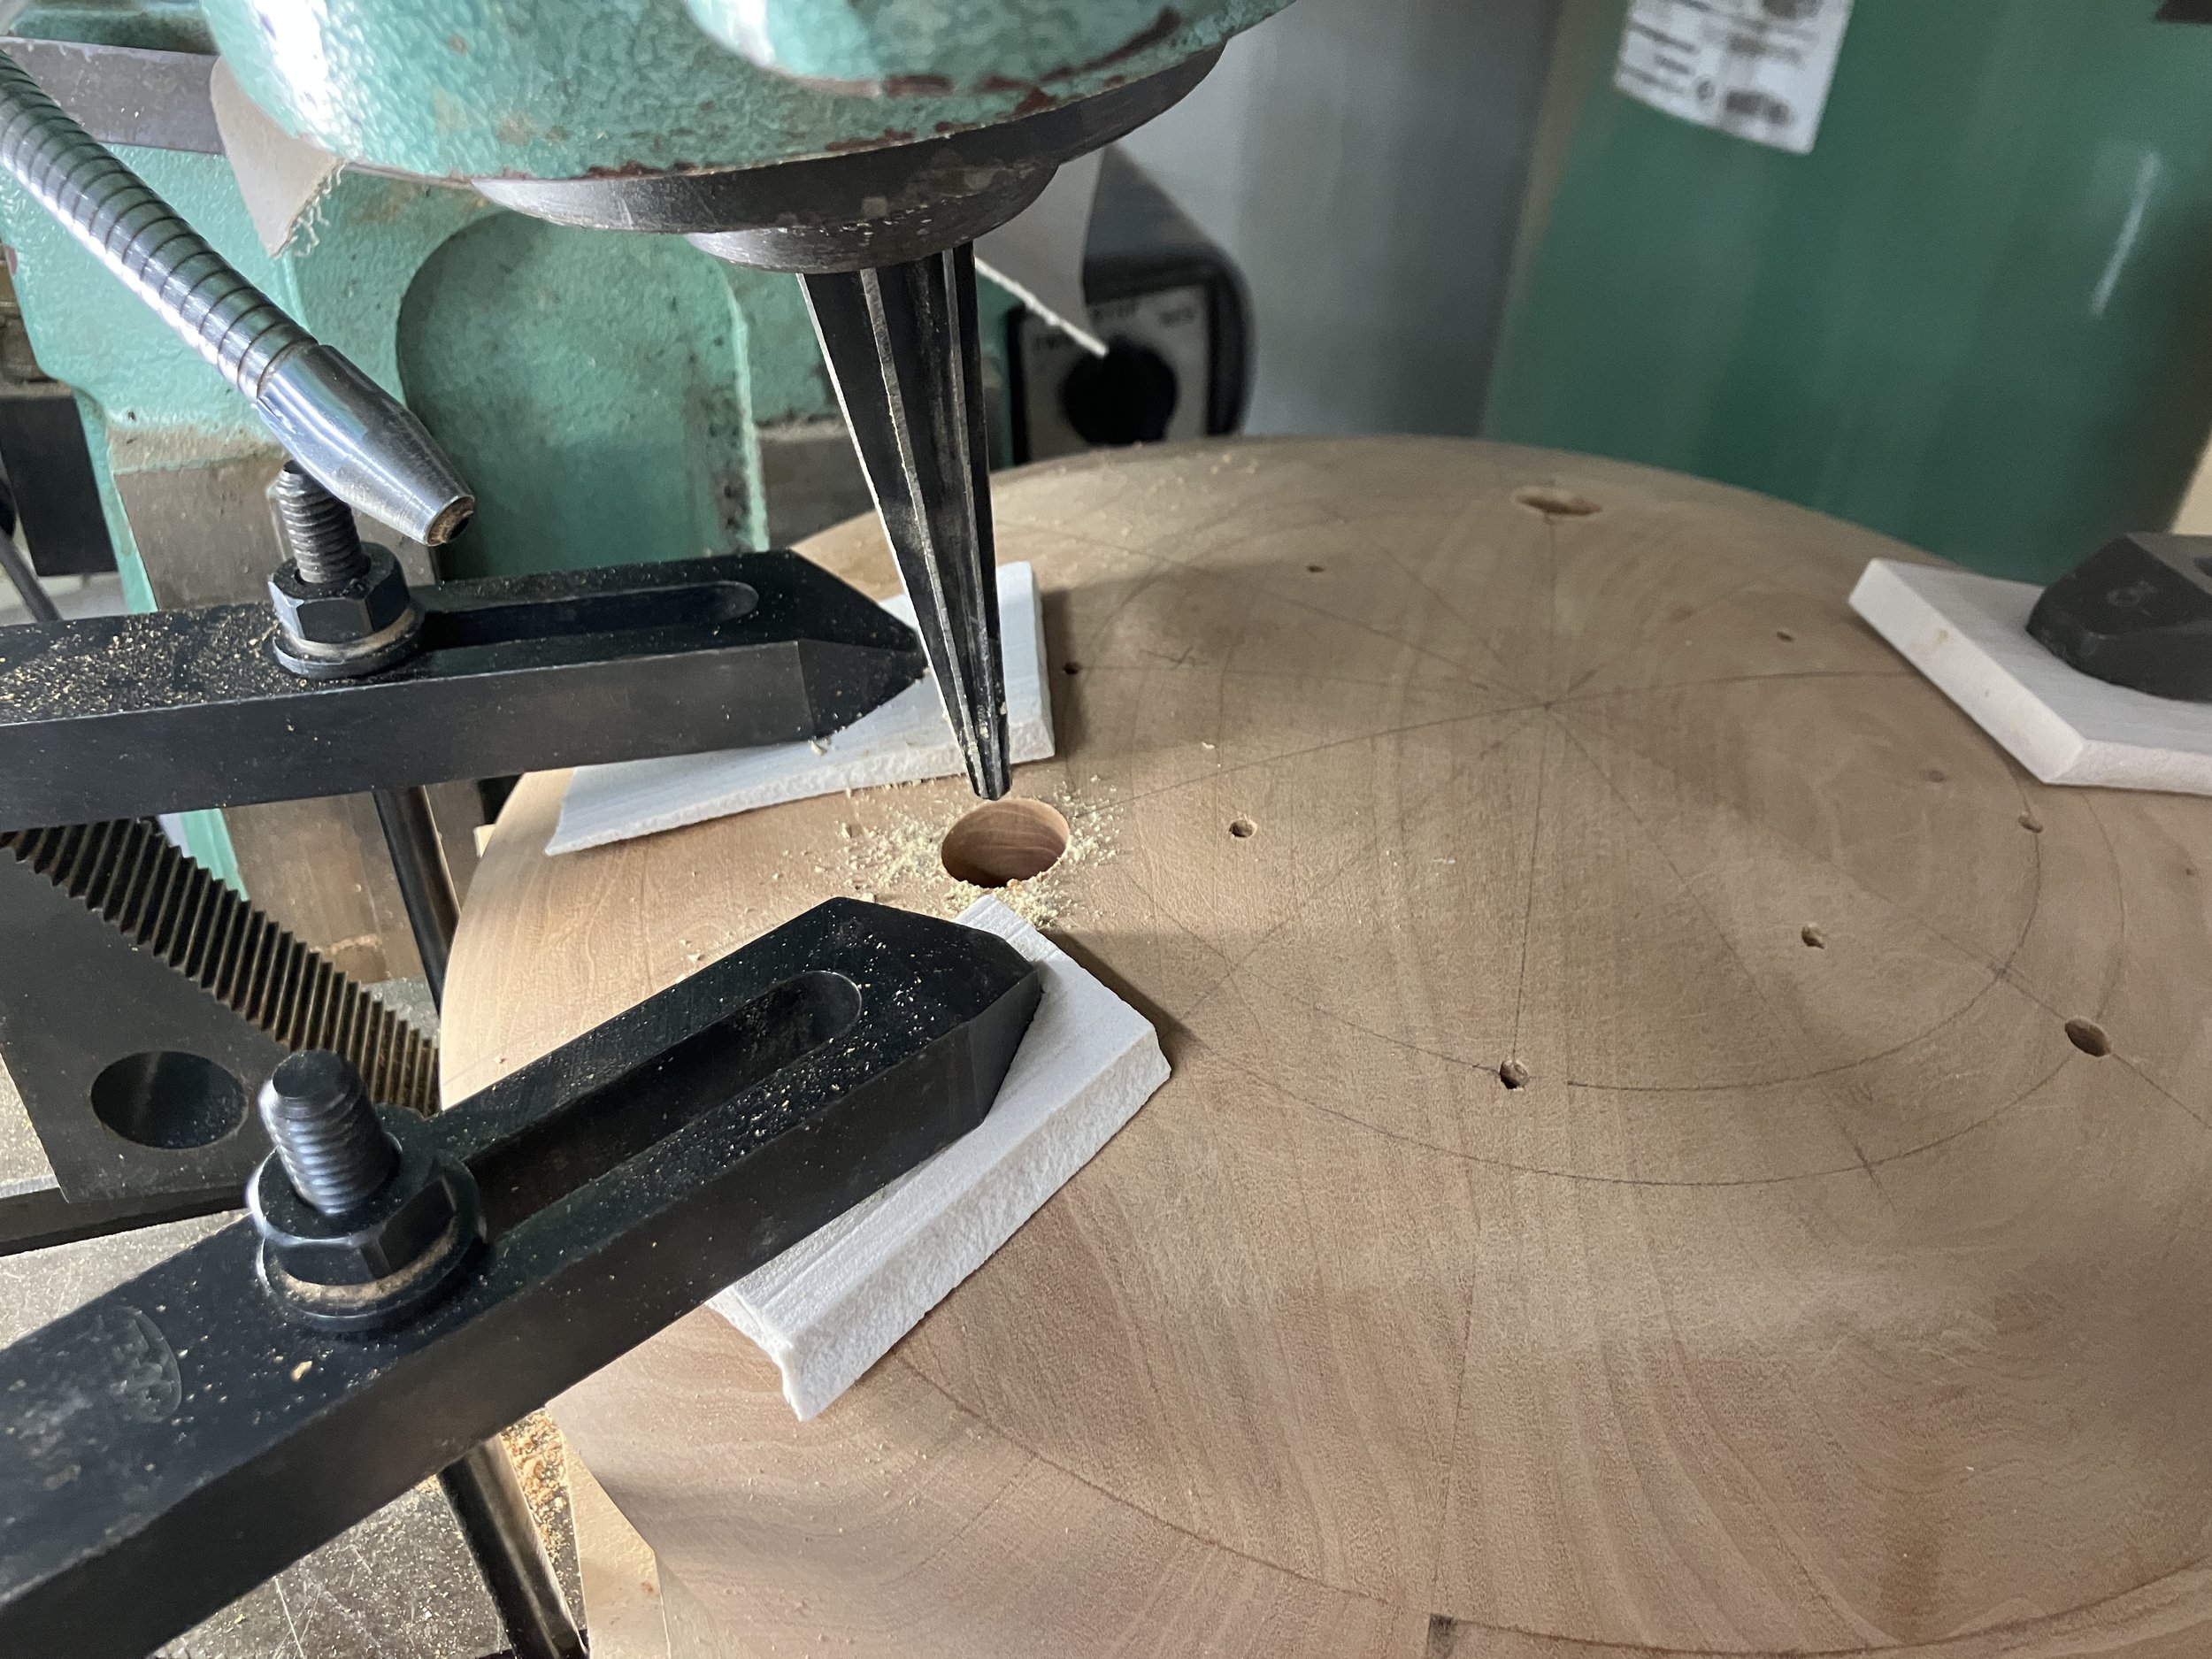
Mapping out a drilling the holes for the stretchers was one of the most arduous parts of the entire process. Because there is a stretcher between each pair of legs, each leg needed two holes at a particular distance and angle from each other. Using tape and levels, measuring and remeasuring, I was able to accurately drill the holes.
Final result:


I wanted to make a high work stool with a delicate, insect-like appearance. My initial sketches feature long lathed legs that are thicker in the middle, and stretchers for support.

Being about 15 inches across, the seat pan needed to be mounted with a baseplate for turning on the lathe.
While I originally envisioned my stool having a back, I soon decided it to remove that element, focusing on perfecting the craft and joinery of the legs and stretchers.

I used a spokeshave to do the final shaping of the seat pan.
I then lathed the legs and stretchers. The legs required multiple stencils in order to achieve identical silhouettes as well as perfectly fitting tapered tenons.

The only way to assemble the stool was to glue everything up at once. after mapping and practicing the glue-up multiple times, I glued and fully assembled everything. The final touch was the wedges through the top of the tapered through-tenons to tighten the connection.


